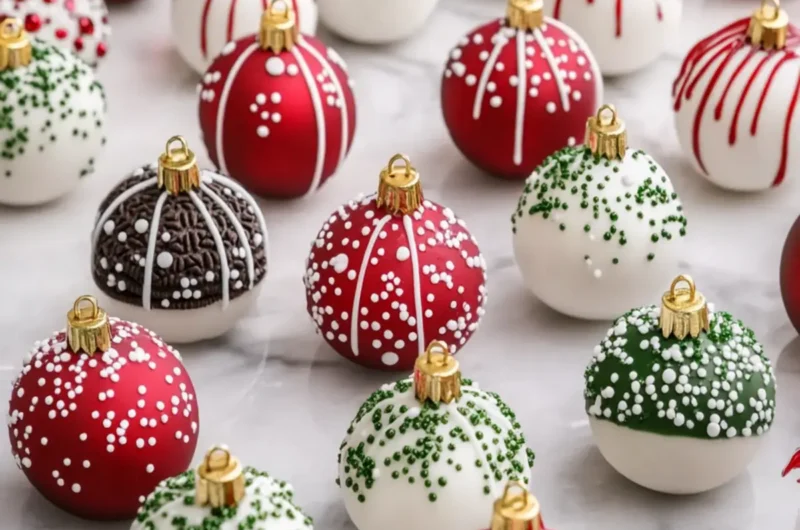
As the holiday season approaches, my kitchen transforms into a wonderland of sights and smells that evoke nostalgia. The moment I catch a whiff of cream cheese mingling with the crunch of Oreo cookies, I’m transported back to festive gatherings filled with laughter and joy. This year, I wanted to create something that not only tastes divine but also looks like a festive centerpiece. Enter my Christmas Ornament Oreo Balls—tiny bites of bliss that will dazzle your family and friends while satisfying every sweet tooth in the room.
Inspired by the charm of handmade decorations, these delightful treats are not only visually stunning but also incredibly simple to make. With just a handful of ingredients and a touch of creativity, you’ll be able to craft these gorgeous edible ornaments that taste as good as they look. Perfect for cookie exchanges, holiday parties, or just a cozy night in, these Oreo balls are bound to become a beloved tradition in your home. Let’s dive into this festive delight that promises to bring smiles and sweet memories to your holiday table!
Why love Christmas Ornament Oreo Balls?
Irresistible flavor: The creamy cheesecake filling mixed with crunchy Oreo crumbs creates a heavenly taste sensation.
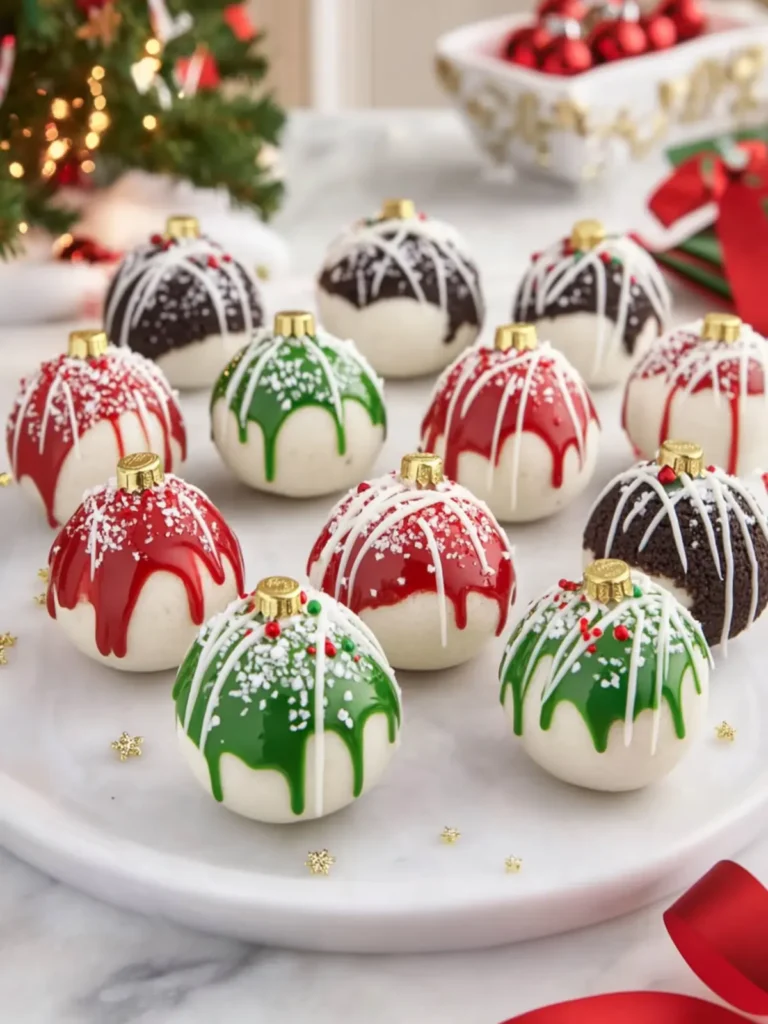
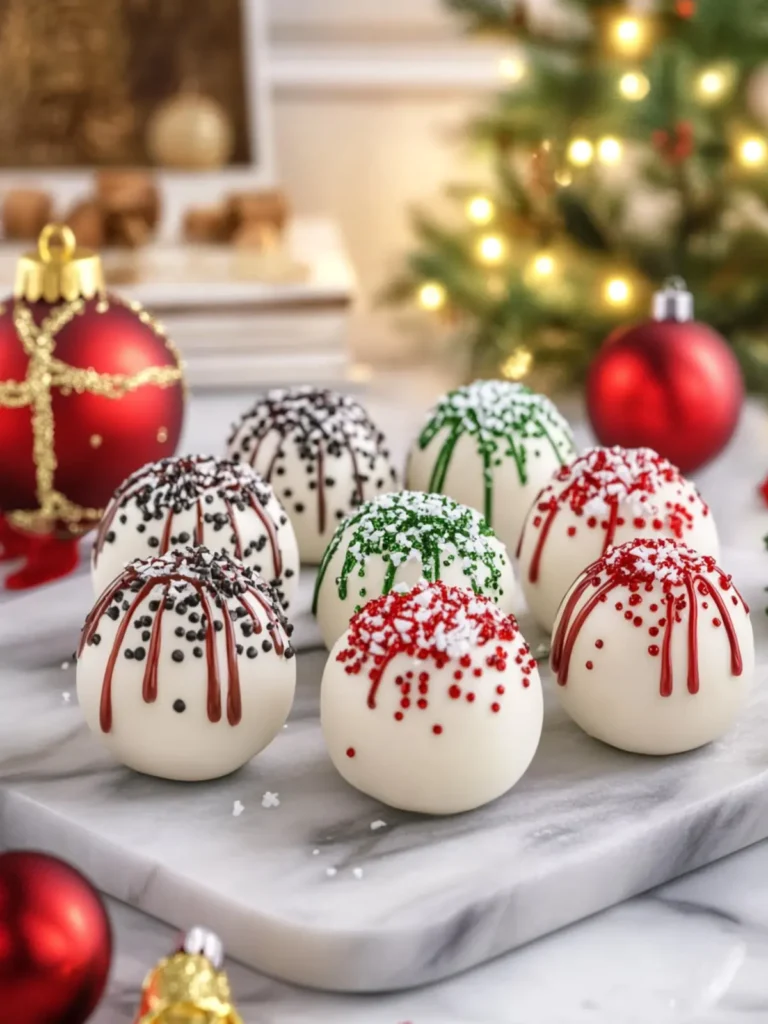
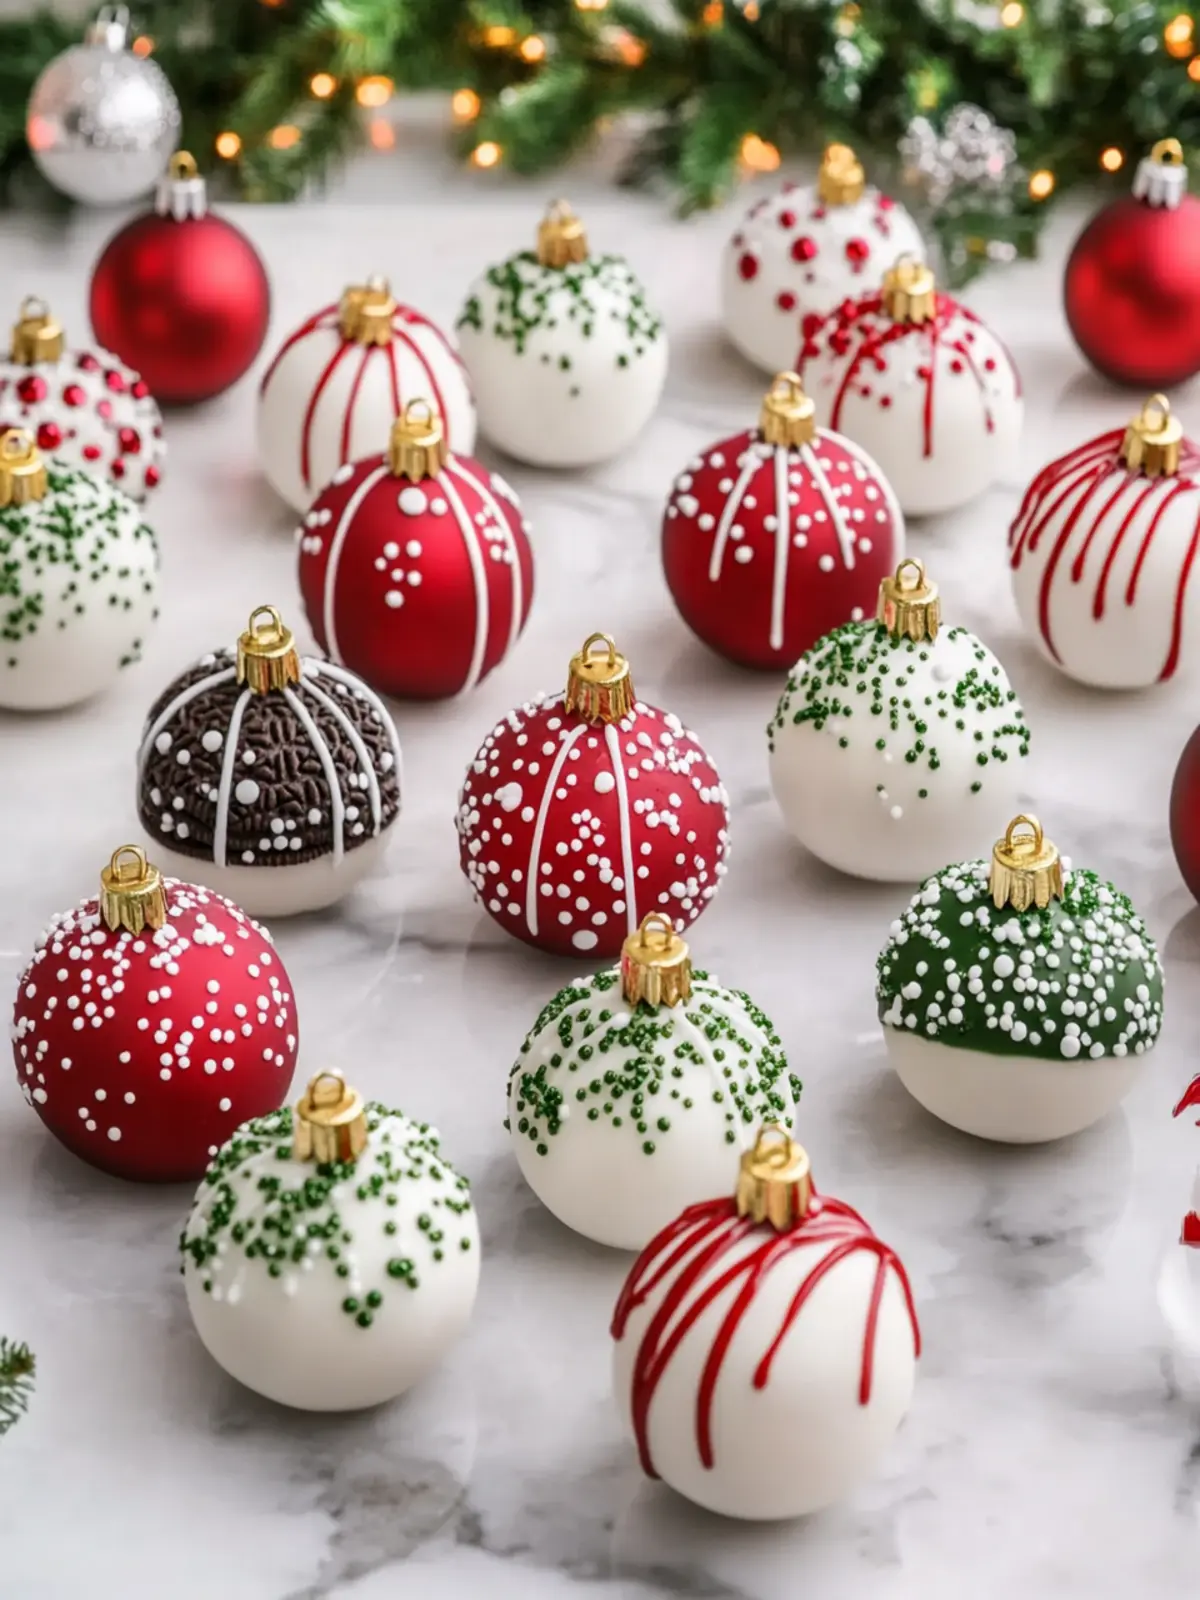
Visually stunning: Shaped like ornaments, these treats are festive and eye-catching for any celebration.
Easy to make: With just a few steps, you’ll whip up these delicious bites in no time—perfect for beginners and seasoned bakers alike.
Customizable: You can personalize the colors and designs for any holiday or occasion, making them a versatile favorite.
Crowd-pleaser: Whether it’s holiday gatherings or cozy nights, these delightful morsels will leave everyone asking for seconds.
Ingredients for Christmas Ornament Oreo Balls
Get ready to create festive magic with these delightful treats!
For the Oreo Filling
• Oreo cookies – 36 cookies provide that beloved creamy crunch alongside the cheesecake.
• Cream cheese – 8 oz softened for a rich and creamy filling that binds it all together.
• Vanilla extract – 1 teaspoon adds a lovely depth of flavor to the Oreo mixture.
For the Coating
• White chocolate melting wafers – 12 oz give a smooth, sweet shell that pairs perfectly with each bite.
• Red candy melts – 6 oz for a splash of festive color and sweetness in your holiday treats.
• Green candy melts – 6 oz to balance out the colors and delight the eyes.
• Coconut oil – 3 teaspoons, divided if needed, to achieve that silky melting texture.
For Drizzling and Decorating
• White candy melts – ¼ cup for drizzling, creating beautiful patterns on your ornaments.
• Red candy melts – 2 tablespoons for a colorful drizzle that adds flair.
• Green candy melts – 2 tablespoons for the finishing touch, ensuring they look festive!
• Christmas sprinkles – 3 tablespoons of red, green, and white to give each ball a magical touch.
• White snowflake sprinkles – 1 tablespoon to sprinkle joy all over your treats.
• Edible gold ornament toppers – 24 small ornaments that transform your Oreo balls into holiday treasures.
Dive into preparing these Christmas Ornament Oreo Balls, and let the festive fun begin!
How to Make Christmas Ornament Oreo Balls
- Crush the Oreos: Place all 36 Oreo cookies, including the cream filling, into a food processor. Blend until fine crumbs form, resembling damp sand—this will be your delightful base!
- Make the filling: Add softened cream cheese and 1 teaspoon of vanilla extract to the crumbs. Mix until a smooth, thick dough forms, creating that luscious cheesecake-like filling.
- Shape the ornaments: Scoop about 1½ tablespoons of the mixture for each ball. Roll them into 24 smooth, round balls and arrange them on a parchment-lined baking sheet, preparing for their festive coating.
- Chill: Refrigerate the balls for 30 minutes or pop them in the freezer for 15–20 minutes until firm. This helps them keep their shape when coated.
- Melt the coatings: Place the white chocolate, red candy melts, and green candy melts in three separate microwave-safe bowls. Microwave each in 20-second intervals, stirring until smooth. Add up to 1 teaspoon coconut oil per bowl if necessary for that silky texture.
- Dip the Oreo balls: Dip 8 balls into the white chocolate, another 8 into the red coating, and the last 8 into the green coating. Allow excess coating to drip off before returning them to the parchment paper.
- Add ornament toppers: While the coating is still slightly soft, attach one edible gold ornament topper to each ball, making each treat a festive delight. Allow the coating to set completely.
- Decorate with chocolate: Melt the remaining white, red, and green candy melts separately. Transfer to small piping bags and drizzle thin lines across the ornaments for that charming touch.
- Add festive sprinkles: Immediately decorate with Christmas sprinkles and small white snowflakes before the drizzle hardens, giving each ornament a joyful sparkle.
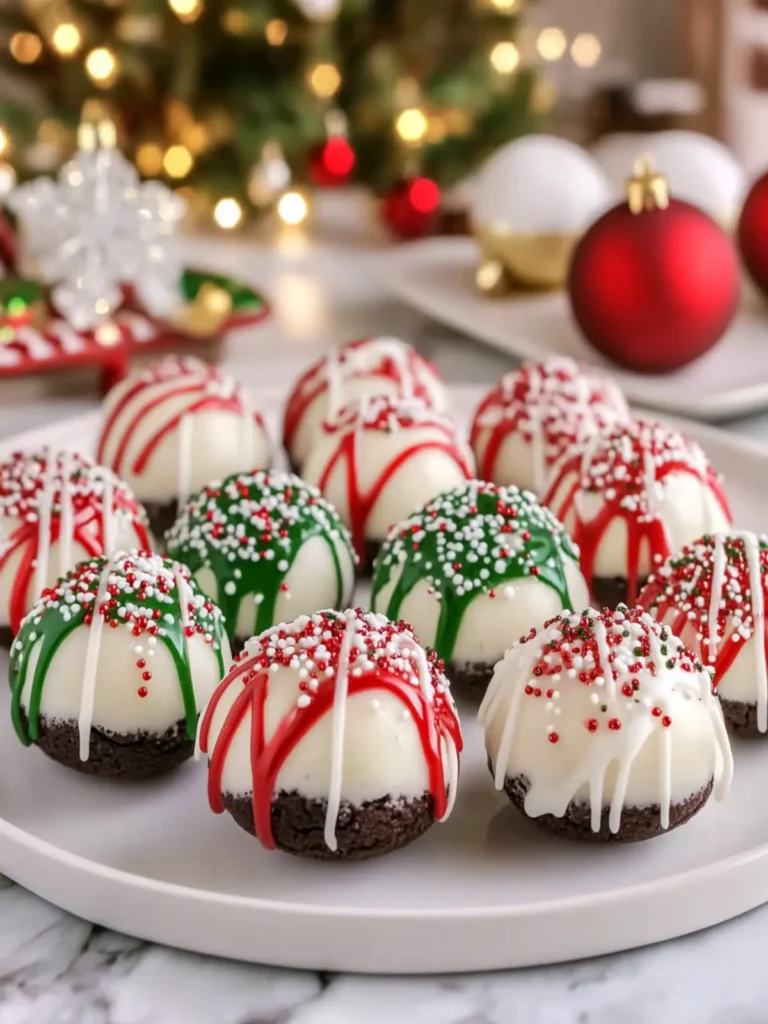
- Chill and serve: Refrigerate for another 20 minutes until firm. Arrange the finished ornaments on a rectangular serving platter, alternating red, green, and white for a stunning presentation.
Optional: Add a sprinkle of edible glitter for extra holiday magic!
Exact quantities are listed in the recipe card below.
Variations & Substitutions for Christmas Ornament Oreo Balls
Feel free to put your own spin on these delightful treats and make them uniquely yours!
- Gluten-Free: Substitute regular Oreos with gluten-free Oreo cookies for a gluten-free version that still delivers on flavor.
- Dairy-Free: Use a vegan cream cheese and dairy-free chocolate coating to make these treats perfect for those avoiding dairy.
- Nutty Flavor: Add ¼ cup of finely chopped nuts like almonds or pecans into the Oreo filling for a delightful crunch and extra depth.
- Mint Chocolate: Swap some Oreos for mint-flavored Oreos or add a drop of mint extract to the filling for a refreshing twist.
- Explosion of Flavor: Mix in mini chocolate chips into the filling for a chocolatey surprise with each bite—always a winning choice!
- Spicy Kick: For an unexpected zing, add a pinch of cinnamon or cayenne pepper to the filling; the warm notes can be a delightful surprise.
- Colorful Coatings: Instead of red and green, use blue and silver candy melts for a winter wonderland theme—perfect for holiday parties!
- Coconut Crunch: Roll the finished Oreo balls in shredded coconut before chilling for an enticing tropical flair that enhances the festive look.
Let your creativity shine as you explore these fun variations or mix and match to discover a combination that speaks to your tastes!
Make Ahead Options
These Christmas Ornament Oreo Balls are perfect for busy home cooks looking to save time during the holiday rush! You can prepare the filling and shape the balls up to 24 hours in advance; simply refrigerate them in an airtight container to maintain their delightful texture. After chilling, you can dip them in your desired coatings and add the festive decorations right before serving. This keeps the balls just as delicious and visually stunning without compromising quality. For even more preparation ease, the finished Oreo balls can be stored in the refrigerator for up to 3 days before your holiday gathering, so you can spend less time in the kitchen and more time enjoying the festivities!
What to Serve with Christmas Ornament Oreo Balls?
The holidays are all about delightful pairings that elevate your festivities, creating a feast for the senses.
- Rich Hot Cocoa: The creamy texture of hot cocoa enhances the sweetness of the Oreo balls, making for a comforting, chocolaty treat.
- Spiced Apple Cider: Warm spiced apple cider offers a perfect blend of sweet and tangy, harmonizing beautifully with these decadent bites.
- Festive Cheese Board: A selection of cheeses and cured meats balances the sweetness, providing a savory contrast that pleases every palate.
- Gingerbread Cookies: The spiced flavor of gingerbread cookies brings a nostalgic feel to your dessert table, blending perfectly with the Oreo delight.
- Peppermint Bark: The refreshing crunch of peppermint bark complements the rich Oreo balls, offering a delightful contrast in flavors and textures.
- Vanilla Ice Cream: A scoop of creamy vanilla ice cream alongside these festive treats provides a cold, luscious balance that’s hard to resist.
- Pineapple Upside-Down Cake: The caramelized sweetness of this classic dessert adds a tropical twist that pairs surprisingly well with the rich Oreo chocolate.
- Sparkling Water with Citrus: A refreshing fizzy drink infused with citrus awakens the palate, cleansing between bites of your rich Christmas Ornament Oreo Balls.
- Chocolate Mint Martini: This elegant cocktail introduces a sophisticated flavor pairing that enhances the festive spirit, perfect for holiday gatherings.
How to Store and Freeze Christmas Ornament Oreo Balls
Fridge: Store your Christmas Ornament Oreo Balls in an airtight container in the refrigerator for up to 3 days to maintain their freshness and flavor.
Freezer: If you’re planning to make these festive treats ahead of time, freeze them in a single layer on a baking sheet. Once firm, transfer to a freezer-safe container for up to 2 months.
Thawing: To enjoy frozen Oreo balls, simply transfer them to the fridge for a few hours or leave them at room temperature for about 30 minutes before serving.
Reheating: There’s no need to reheat these delightful bites, as they are best enjoyed chilled directly from the fridge!
Expert Tips for Christmas Ornament Oreo Balls
• Use fresh ingredients: Ensure your cream cheese is fresh for the creamiest filling, enhancing the flavor of your Christmas Ornament Oreo Balls.
• Chill well: Don’t skip the chilling step! Properly chilled Oreo balls maintain their shape better when you dip them, preventing messy coatings.
• Don’t rush melting: Melt candy melts or chocolate slowly in short bursts. Stir in between, ensuring a silky smooth coating without burning.
• Experiment with sprinkles: Have fun with the festive sprinkles! Mix different colors or use themed sprinkles for various holidays, personalizing your Christmas Ornament Oreo Balls.
• Check coating thickness: If the coating is too thick, add a little coconut oil while melting. This helps achieve a thinner, more elegant finish on your balls.
Christmas Ornament Oreo Balls Recipe FAQs
How do I choose the best Oreos for my Oreo balls?
Absolutely! For the best flavor, select a fresh package of classic Oreos. Look out for any dark spots or a stale smell that might indicate they have gone bad. The texture of the cookies is just as important; they should be crisp and crunchy to make the perfect crumb base for your filling.
How should I store my Christmas Ornament Oreo Balls?
To keep your festive treats fresh, store your Christmas Ornament Oreo Balls in an airtight container in the refrigerator. They’ll stay delicious for up to 3 days. If you find yourself with leftovers, they can also be kept in the freezer for up to 2 months. Just be sure to let them cool completely before storing and layering between parchment paper to prevent sticking.
Can I freeze Christmas Ornament Oreo Balls?
Absolutely! Start by arranging the decorated Oreo balls in a single layer on a baking sheet and freeze them until firm. Then, transfer the frozen balls into a freezer-safe container, separating layers with parchment paper, and store them for up to 2 months. When you’re ready to enjoy, simply thaw them in the fridge for a few hours or let them sit at room temperature for about 30 minutes before serving.
What can I do if my chocolate coating is too thick?
No worries if your coating isn’t perfect! If you find that your melted chocolate or candy melts are too thick, you can add a teaspoon of coconut oil while melting. This will help thin the texture, resulting in a smoother and more elegant finish on your Christmas Ornament Oreo Balls. If you still struggle, try microwaving for a few extra seconds, stirring frequently until you achieve that silky sheen.
Are there any dietary considerations for making these Oreo balls?
Definitely! If you or your guests have dietary restrictions, consider substituting regular Oreos with gluten-free variants, which are widely available. Additionally, for a dairy-free version, try using cream cheese alternatives and non-dairy chocolate melts. Always check labels to ensure they meet your dietary needs. And remember, it’s a good idea to let your guests know what ingredients you’ve used when serving these delights!
Delightful Christmas Ornament Oreo Balls for Festive Fun
Ingredients
Equipment
Method
- Crush the Oreos: Place all 36 Oreo cookies, including the cream filling, into a food processor. Blend until fine crumbs form, resembling damp sand—this will be your delightful base!
- Make the filling: Add softened cream cheese and 1 teaspoon of vanilla extract to the crumbs. Mix until a smooth, thick dough forms, creating that luscious cheesecake-like filling.
- Shape the ornaments: Scoop about 1½ tablespoons of the mixture for each ball. Roll them into 24 smooth, round balls and arrange them on a parchment-lined baking sheet, preparing for their festive coating.
- Chill: Refrigerate the balls for 30 minutes or pop them in the freezer for 15–20 minutes until firm. This helps them keep their shape when coated.
- Melt the coatings: Place the white chocolate, red candy melts, and green candy melts in three separate microwave-safe bowls. Microwave each in 20-second intervals, stirring until smooth. Add up to 1 teaspoon coconut oil per bowl if necessary for that silky texture.
- Dip the Oreo balls: Dip 8 balls into the white chocolate, another 8 into the red coating, and the last 8 into the green coating. Allow excess coating to drip off before returning them to the parchment paper.
- Add ornament toppers: While the coating is still slightly soft, attach one edible gold ornament topper to each ball, making each treat a festive delight. Allow the coating to set completely.
- Decorate with chocolate: Melt the remaining white, red, and green candy melts separately. Transfer to small piping bags and drizzle thin lines across the ornaments for that charming touch.
- Add festive sprinkles: Immediately decorate with Christmas sprinkles and small white snowflakes before the drizzle hardens, giving each ornament a joyful sparkle.
- Chill and serve: Refrigerate for another 20 minutes until firm. Arrange the finished ornaments on a rectangular serving platter, alternating red, green, and white for a stunning presentation.