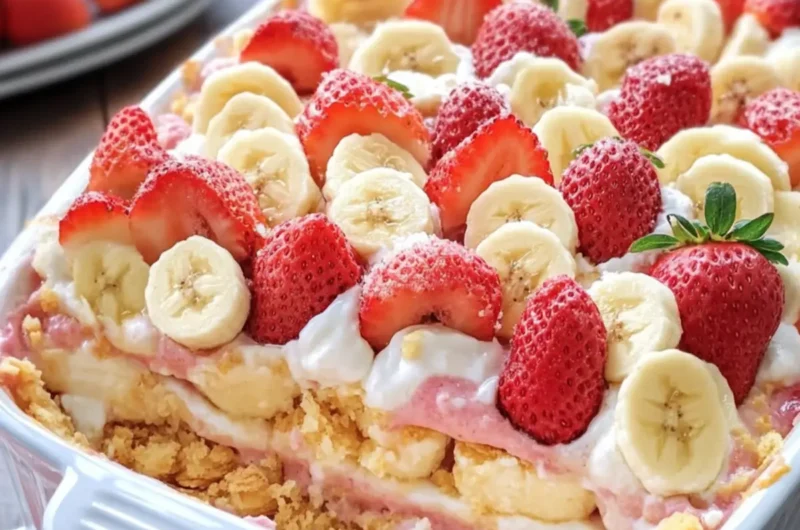
On a warm summer evening, the sight of a chilled dessert on the table is enough to make the heart sing. That’s how I felt when I first layered my Strawberry Banana Pudding Dream Casserole—a towering delight that combines the silky goodness of creamy pudding with the fresh bursts of strawberries and bananas. This dish is not only a feast for the eyes, but it also whispers sweet nostalgia, bringing me back to childhood picnics where dessert was something to be savored.
What makes this casserole special isn’t just how it looks; it’s the clever layering of flavors and textures that turns ordinary ingredients into an extraordinary treat. The smooth vanilla pudding, tangy cream cheese, and the lightness of whipped cream create a luscious blend that will leave everyone at the table asking for seconds. Perfect for potlucks or casual family gatherings, it effortlessly transforms any occasion into a memorable experience.
Ready to dive into a mix of sweet, creamy, and fruity bliss? Let’s get started on creating this dreamy dessert that’s destined to be a crowd-pleaser!
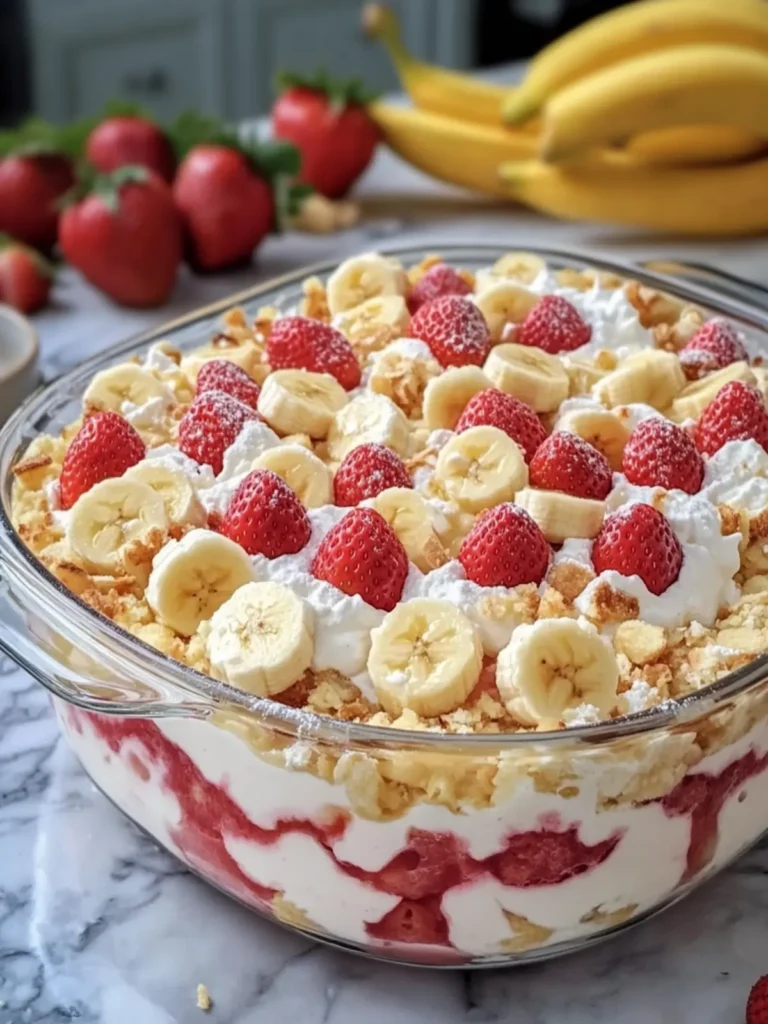
Why love Strawberry Banana Pudding Dream Casserole?
Irresistible layers of flavor: The rich blend of creamy vanilla pudding, sweet strawberries, and bananas makes each bite a delightful experience.
Easy to make: With minimal prep work, you can whip this up in just 30 minutes.
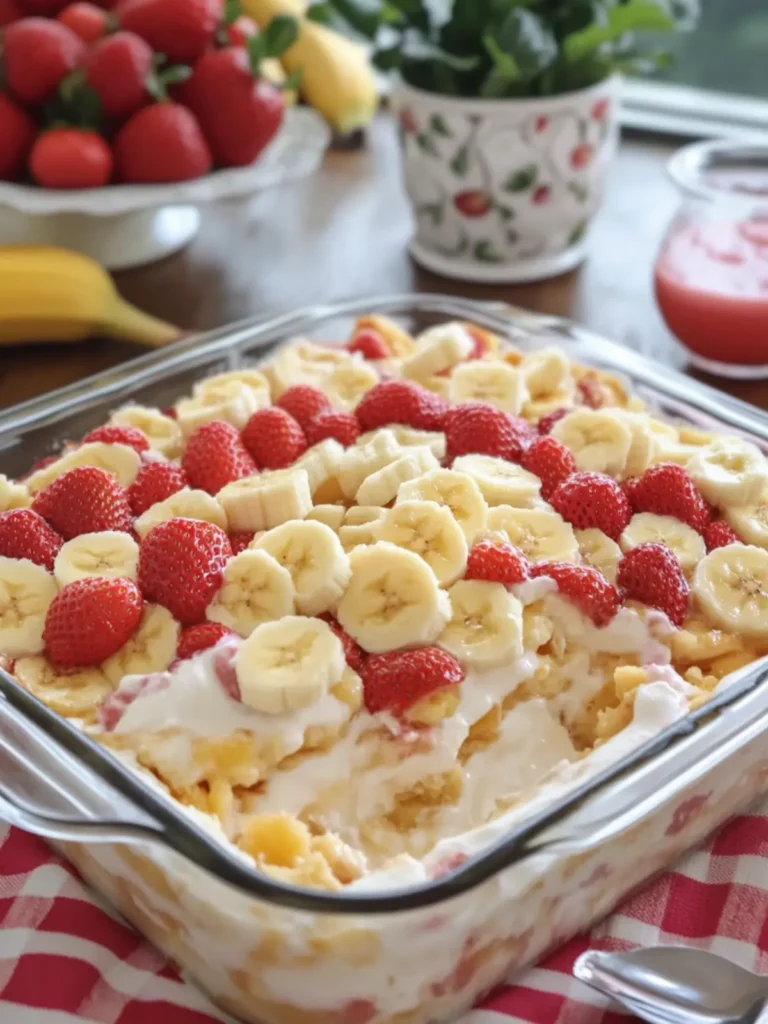
Gorgeous presentation: This dessert looks stunning in a glass dish, perfect for impressing guests.
Crowd favorite: Whether it’s a family dinner or a potluck, everyone will want a slice of this deliciousness.
Versatile: You can easily personalize it with your favorite fruits or add a twist with chocolate!
Don’t miss your chance to impress with this dessert that’s not only a treat but brings back sweet memories; it’s the perfect dish for your next gathering!
Strawberry Banana Pudding Dream Casserole Ingredients
For the Creamy Base
• Instant vanilla pudding mix – adds a rich, creamy texture, making sure you have that signature pudding flavor.
• Cold whole milk – the key to making the pudding perfectly smooth; this is where the magic begins!
• Sweetened condensed milk – brings a luscious sweetness that elevates the overall flavor profile.
• Cream cheese – adds a delightful tanginess and creaminess, taking your casserole to a whole new level.
• Vanilla extract – enhances the vanilla flavor, making it aromatic and delicious.
• Heavy whipping cream – helps create fluffy whipped cream to layer on top, contributing to that dreamy texture.
• Powdered sugar – sweetens your whipped cream without the graininess of granulated sugar.
For the Fruit Layers
• Ripe bananas – provides natural sweetness and creaminess; toss them in lemon juice to keep them fresh!
• Fresh strawberries – infuses vibrant color and juicy flavor to every layer of your Strawberry Banana Pudding Dream Casserole.
For the Cookie Layers
• Vanilla wafer cookies – these provide a lovely crunch and a sweet base for those adorable layers.
For the Toppings
• Fresh strawberry slices – garnish your casserole with these just before serving for that inviting look.
• Banana slices – add these for freshness right at the end for maximum flavor.
• Crushed vanilla wafers – sprinkle on top for added texture and crunch.
• White chocolate shavings – a lovely finishing touch that adds elegance alongside the sweetness of the dessert.
How to Make Strawberry Banana Pudding Dream Casserole
- Whisk together the instant vanilla pudding mixes and 3 cups of cold milk in a large bowl. Mix for about 2 minutes until thickened, then set aside in the fridge for 5 minutes to firm up.
- Beat the softened cream cheese in another bowl until smooth, gradually mixing in the sweetened condensed milk and vanilla extract until everything is creamy and well combined.
- Combine the cooled vanilla pudding with the creamy cream cheese mixture. Beat on low speed until the texture is smooth and homogenous.
- Whip 1½ cups of chilled heavy whipping cream with ¼ cup powdered sugar for about 3–4 minutes until stiff peaks form. This will create a fluffy topping for your casserole!
- Fold the whipped cream gently into the pudding mixture, ensuring it’s airy and light for the perfect bite of goodness.
- Prepare the bananas by slicing them and tossing them gently with lemon juice to keep them from browning. Slice the strawberries and use paper towels to pat away excess moisture.
- Choose your deep 9 × 13-inch rectangular glass baking dish (2½ inches deep is best) for layering.
- Layer vanilla wafer cookies across the bottom of the dish in a single layer, breaking a few if needed to fill any gaps. This will be the crust of your delicious dreams.
- Add half of the banana and half of the strawberry slices over the cookie layer, distributing them evenly for great flavor in every bite!
- Spoon half of the creamy vanilla filling over the fruit and use a spatula to gently smooth it out.
- Repeat the layering by adding another layer of vanilla wafers, followed by the remaining banana and strawberry slices. Top with the remaining pudding filling, smoothing it out nicely.
- Beat the remaining 1½ cups of chilled heavy whipping cream with ¼ cup powdered sugar and ½ teaspoon vanilla until stiff peaks form; this will be your luscious topping.
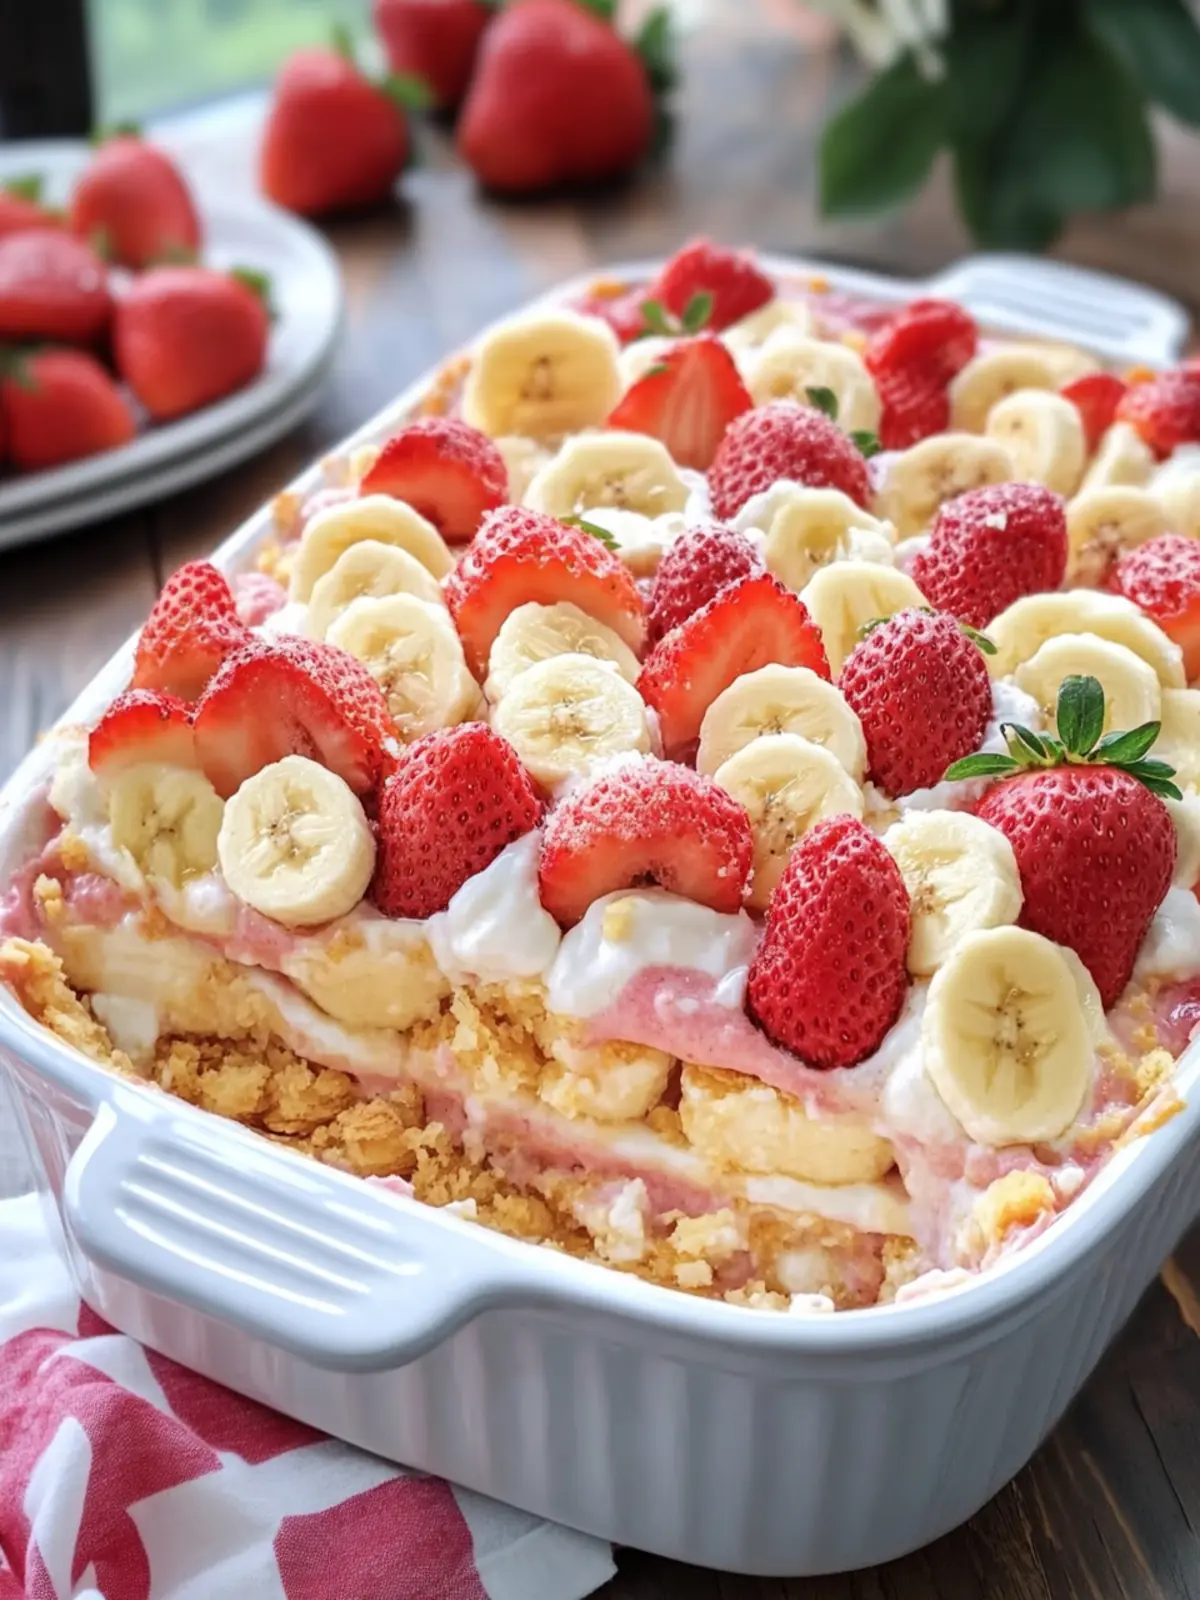
- Spread or pipe the whipped cream over the pudding layer, then sprinkle with crushed vanilla wafers and white chocolate shavings for an elegant finish.
- Cover and refrigerate the casserole for at least 6 hours, preferably overnight, to allow the flavors to meld and the wafers to soften into delightful layers.
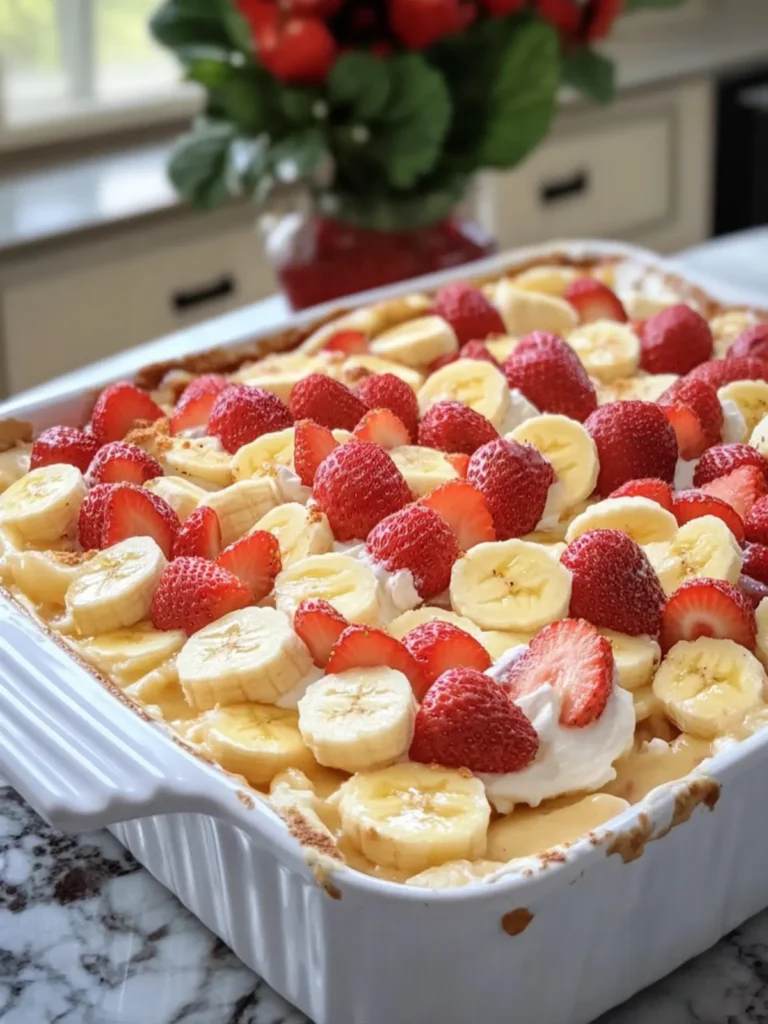
- Top with reserved fresh strawberry and banana slices just before serving, keeping the casserole whole for an eye-catching presentation. Spoon portions directly from the dish for a casual yet chic experience!
Optional: Dust with additional crushed vanilla wafers for extra crunch.
Exact quantities are listed in the recipe card below.
What to Serve with Strawberry Banana Pudding Dream Casserole?
Nothing complements this dreamy dessert quite like a beautiful selection of sides that balance out its sweetness and bring forth fresh, lively flavors.
-
Light Garden Salad: A crisp salad with citrus vinaigrette brightens the palate after every sweet bite, refreshing the senses.
-
Grilled Chicken: Juicy, seasoned grilled chicken offers a savory contrast, elevating this dessert to a full meal experience.
-
Lemon Sorbet: An icy scoop of lemon sorbet enhances the fruity flavors, providing a zesty, refreshing finish to your gathering.
-
Chocolate-Covered Strawberries: Sweet and rich, these treats harmonize with the pudding’s fruity layers, creating a delightful chocolate experience.
-
Mini Cheesecakes: Individual cheesecakes provide a creamy counterpart that guests can enjoy alongside their dessert, making it a decadent duo.
-
Sparkling Water: Serve chilled sparkling water with lemon or mint to cleanse the palate and keep the mood light and festive.
For a delightful meal that invites laughter and conversation, these pairings will enhance your Strawberry Banana Pudding Dream Casserole beautifully, making every bite a joyous occasion!
Strawberry Banana Pudding Dream Casserole Variations
Feel free to explore the delightful world of customization with this delicious dish!
- Dairy-Free: Use almond or oat milk and non-dairy cream cheese to make this creamy delight suitable for dairy-free diets.
- Chocolate Twist: Incorporate layers of chocolate pudding in between the vanilla layers for a rich, decadent flavor contrast.
- Nutty Crunch: Add chopped nuts such as walnuts or pecans between the layers for an irresistible crunch.
- Berry Medley: Swap out strawberries for a mix of blueberries and raspberries for a vibrant berry medley explosion.
- Coconut Cream: Replace half the heavy whipping cream with coconut cream for a tropical twist that pairs beautifully with bananas.
- Spicy Kick: Mix a dash of cinnamon or a pinch of nutmeg into the cream cheese filling for a subtly spiced flavor enhancement.
- Granola Crunch: Layer in some granola for a healthful crunch, adding another texture dimension to your pudding masterpiece.
- Caramel Drizzle: Top with a generous drizzle of caramel sauce just before serving for a sweet, luxurious finish that elevates every bite.
Embrace these fun variations and let your creativity shine while making this nostalgic dessert!
Expert Tips for Strawberry Banana Pudding Dream Casserole
- Choose Ripe Fruit: Use perfectly ripe bananas and strawberries for the best flavor; avoid overly soft or bruised fruit to maintain texture.
- Avoid Watery Layers: Pat the diced strawberries dry with paper towels before layering to prevent excess moisture from making the dessert soggy.
- Chill Thoroughly: Allow the casserole to chill overnight for optimal flavor melding; this makes a world of difference in the final taste of your Strawberry Banana Pudding Dream Casserole.
- Layer Wisely: Ensure even distribution of fruit between layers for balanced sweetness in every bite; don’t skip the cookie layer, as it adds necessary crunch!
- Fold Gently: When incorporating whipped cream into the pudding mixture, fold gently to keep it airy; a heavy hand can lead to a denser pudding.
- Presentation Matters: Keep the casserole whole until serving to showcase its beautiful layers; add fresh fruit on top just before serving for a vibrant finish.
Make Ahead Options
These Strawberry Banana Pudding Dream Casserole layers are perfect for meal prep and can save you valuable time on busy weeknights! You can prepare the creamy base (vanilla pudding, cream cheese mixture, and whipped cream) up to 24 hours in advance and store it in the refrigerator. Additionally, you can slice the bananas and strawberries ahead of time, but it’s best to toss the bananas with lemon juice to prevent browning. When you’re ready to serve, simply layer the cookies, fruit, and prepared creamy filling, then refrigerate for at least 6 hours to allow the flavors to develop. This makes your dessert just as delicious with minimal last-minute effort!
How to Store and Freeze Strawberry Banana Pudding Dream Casserole
Fridge: Store leftovers in an airtight container for up to 3 days. Keep it covered to maintain freshness and prevent absorption of other odors.
Freezer: Ideally, do not freeze the casserole, as the fruits and cream can change texture. If necessary, freeze individual servings for up to 1 month; thaw in the fridge before serving.
Reheating: Strawberry Banana Pudding Dream Casserole is best served cold as a refreshing dessert, so no reheating needed. Simply enjoy straight from the fridge!
Strawberry Banana Pudding Dream Casserole Recipe FAQs
What kind of bananas should I use for the best flavor?
Absolutely! Opt for medium-sized, ripe but still firm bananas for your casserole. Look for bananas with a bright yellow skin, and avoid overly soft ones or those with dark spots covering the surface, as they can quickly turn mushy and affect the texture of your dessert.
How do I store leftover Strawberry Banana Pudding Dream Casserole?
You can keep any leftovers in an airtight container in the fridge for up to 3 days. Be sure to cover it well to maintain freshness and prevent it from absorbing other odors in your refrigerator. Enjoying it chilled is the way to go!
Can I freeze Strawberry Banana Pudding Dream Casserole?
While it’s best not to freeze the entire casserole due to potential texture changes in the fruits and cream, you can freeze individual servings. To do this, portion out the casserole into freezer-safe containers and store for up to 1 month. Thaw in the fridge overnight before serving!
What should I do if my layers become soggy?
Very! To avoid sogginess, make sure to dry your strawberries thoroughly with paper towels before layering them. Additionally, it’s crucial to let the casserole set in the fridge for at least 6 hours. This gives the vanilla wafers time to soften without turning into mush.
Are there any dietary considerations I should keep in mind?
Certainly! If you or your guests have allergies, be mindful of the cream cheese and heavy whipping cream, which contain dairy. For a dairy-free option, consider using coconut cream and a dairy-free cream cheese substitute. If there are pet considerations, it’s best to keep this dessert out of reach as some ingredients like chocolate should be avoided by pets.
How long should I let the pudding layers chill before serving?
For the best results, let your Strawberry Banana Pudding Dream Casserole chill in the refrigerator for at least 6 hours and preferably overnight. This is crucial as it allows the flavors to meld beautifully and the vanilla wafers to soften into lush cake-like layers, creating that dreamy dessert experience!
Strawberry Banana Pudding Dream Casserole You'll Crave Daily
Ingredients
Equipment
Method
- Whisk together the instant vanilla pudding mixes and 3 cups of cold milk in a large bowl. Mix for about 2 minutes until thickened, then set aside in the fridge for 5 minutes to firm up.
- Beat the softened cream cheese in another bowl until smooth, gradually mixing in the sweetened condensed milk and vanilla extract until everything is creamy and well combined.
- Combine the cooled vanilla pudding with the creamy cream cheese mixture. Beat on low speed until the texture is smooth and homogenous.
- Whip 1½ cups of chilled heavy whipping cream with ¼ cup powdered sugar for about 3–4 minutes until stiff peaks form.
- Fold the whipped cream gently into the pudding mixture.
- Prepare the bananas by slicing them and tossing them gently with lemon juice. Slice the strawberries and pat away excess moisture.
- Choose your deep 9 × 13-inch rectangular glass baking dish for layering.
- Layer vanilla wafer cookies across the bottom of the dish in a single layer.
- Add half of the banana and half of the strawberry slices over the cookie layer.
- Spoon half of the creamy vanilla filling over the fruit and smooth it out.
- Repeat the layering by adding another layer of vanilla wafers, followed by the remaining banana and strawberry slices.
- Top with the remaining pudding filling.
- Beat the remaining 1½ cups of chilled heavy whipping cream with ¼ cup powdered sugar and ½ teaspoon vanilla until stiff peaks form.
- Spread or pipe the whipped cream over the pudding layer, then sprinkle with crushed vanilla wafers and white chocolate shavings.
- Cover and refrigerate the casserole for at least 6 hours, preferably overnight.
- Top with reserved fresh strawberry and banana slices just before serving.