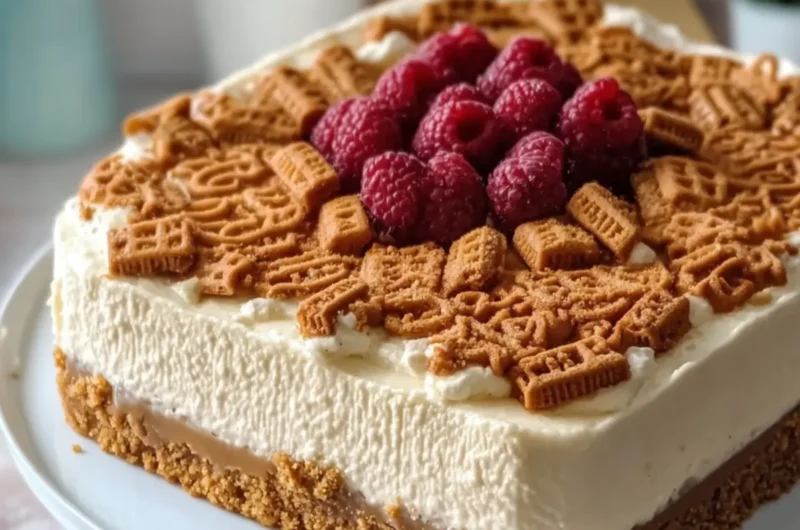
There’s a certain joy that comes from whipping up a dessert that seems like a grand endeavor but is incredibly simple to create. Enter my No-Bake Lotus Biscoff Cheesecake, a delightful treat that has swept through my kitchen like a sweet whirlwind. The moment I first tasted this creamy, decadent cheesecake, I felt like I had stumbled upon a hidden treasure in the world of desserts.
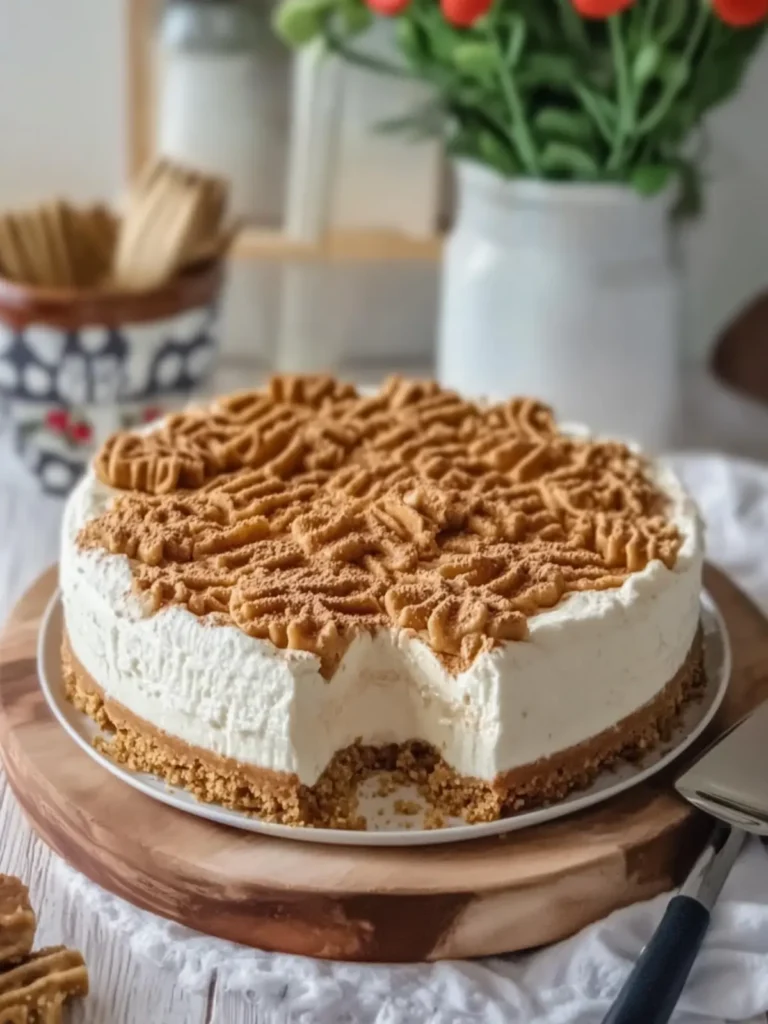
Have you ever had one of those days where all you want is a slice of something indulgent but effortless? Picture this: a buttery, crunchy Biscoff crust layered with a rich cream cheese filling, topped with warm, gooey Biscoff spread and a sprinkle of crushed cookies for that perfect textural contrast. This recipe is not just a crowd-pleaser; it’s a personal delight that beckons you to return for seconds (and maybe thirds).
As you indulge in this luscious cheesecake, you may just find yourself asking, “When can I make this again?” So, let’s skip the oven and dive right into this easy, no-bake phenomenon that’s bound to become a beloved staple in your dessert repertoire!
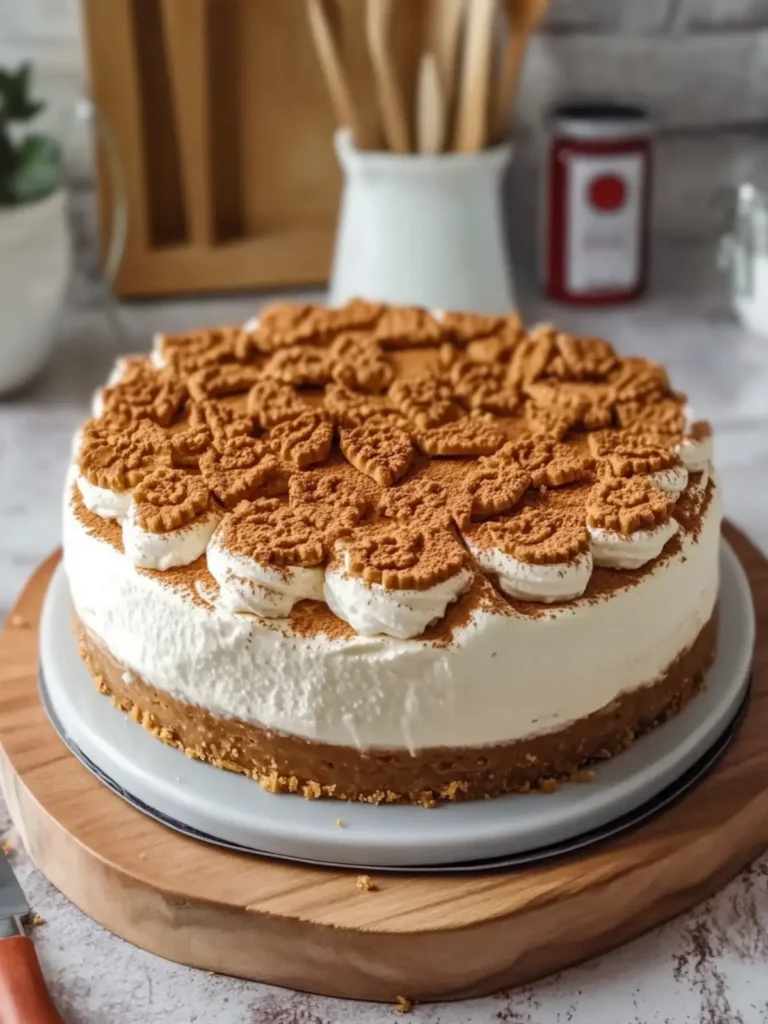
Why is No-Bake Lotus Biscoff Cheesecake a Must-Try?
Unique Indulgence: The combination of creamy cheesecake and crunchy Biscoff creates a divine dessert experience.
No Baking Required: Enjoy the ease of a no-bake recipe that saves you time and hassle.
Crowd Favorite: Perfect for gatherings, this cheesecake will impress friends and family with its rich flavors.
Simple Ingredients: With just a handful of pantry staples, you can create something extraordinary.
Versatile Enjoyment: Customize it with toppings or enjoy it plain—everyone will love it!
So, if you’re looking for a sweet escape from the ordinary, give this delightful cheesecake a try!
Ingredients for No-Bake Lotus Biscoff Cheesecake
Get ready to gather these simple yet essential ingredients to create your heavenly cheesecake!
For the Crust
• Crushed Lotus Biscoff biscuits – 2 cups (250 g); these provide that irresistible flavor and texture.
• Unsalted butter – ½ cup (115 g), melted; it helps bind the crust while adding richness.
For the Filling
• Cream cheese – 500 g, softened; the star of the cheesecake, ensuring a creamy, smooth consistency.
• Cold heavy whipping cream – 1 cup (250 ml); for whipping up into fluffy peaks that lighten the filling.
• Lotus Biscoff spread – ¾ cup (180 g) + additional for topping; this adds a delicious, caramelized flavor that complements the cheesecake beautifully.
• Powdered sugar – ½ cup (60 g); it sweetens the filling without making it grainy.
• Vanilla extract – 1 teaspoon; enhances the overall flavor profile for a comforting taste.
For Garnish
• Whole Lotus Biscoff biscuits – 8–10; they add a lovely presentation and a delightful crunch on top.
• Crushed Biscoff biscuits – ½ cup; sprinkle for extra texture and sweetness all around!
Now that you’ve got all the ingredients lined up, it’s time to create your exquisite No-Bake Lotus Biscoff Cheesecake!
How to Make No-Bake Lotus Biscoff Cheesecake
-
Mix the crust: Combine the crushed Lotus Biscoff biscuits with melted butter in a bowl. Press the mixture firmly into the bottom of a 9 × 13-inch red casserole dish. Refrigerate for 20 minutes to set the crust.
-
Beat the filling: In a large bowl, use a hand mixer to beat the softened cream cheese, powdered sugar, and vanilla extract until the mixture is smooth and creamy, resembling a soft cloud of deliciousness.
-
Add the Biscoff spread: Fold in ¾ cup of the Lotus Biscoff spread into the cream cheese mixture, blending well until fully combined. This step intensifies the decadent flavor!
-
Whip the cream: In a separate bowl, whip the cold heavy cream until stiff peaks form. Gently fold this whipped cream into the cream cheese mixture, being careful to maintain the airiness of the blend.
-
Spread the filling: Evenly distribute the cheesecake filling over your chilled biscuit crust. Smooth the top with a spatula for a beautiful, even finish.
-
Add the topping: Warm the remaining Lotus Biscoff spread in the microwave for 15–20 seconds until it’s pourable. Drizzle it over the cheesecake filling, spreading gently to create a luscious layer.
-
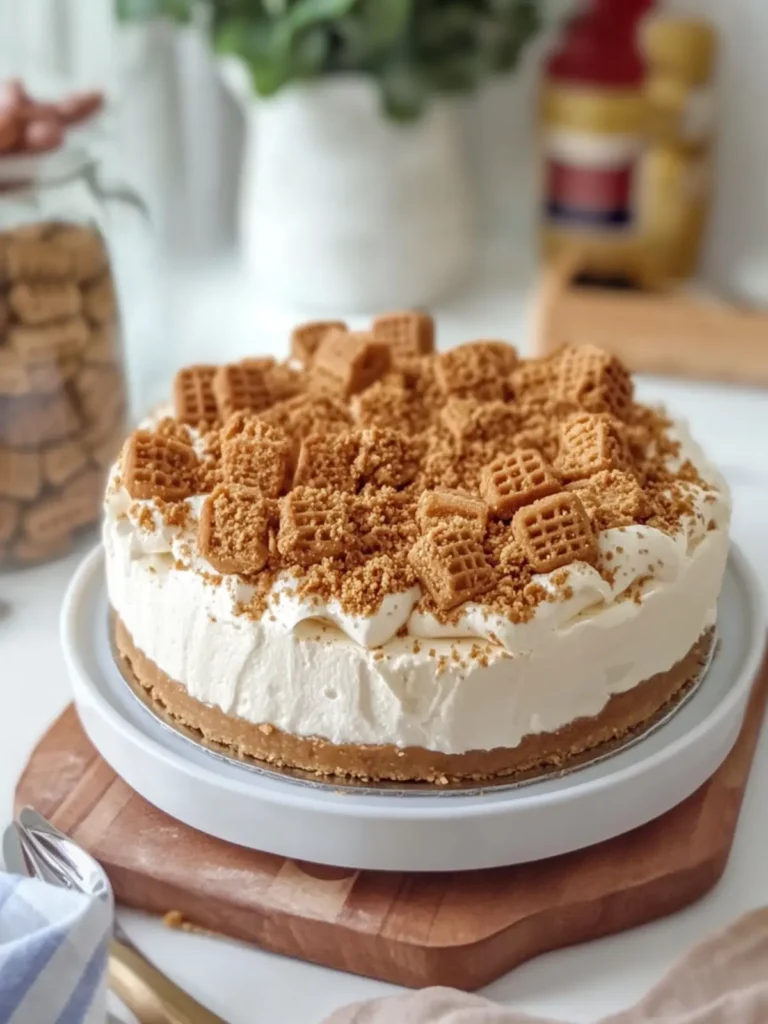
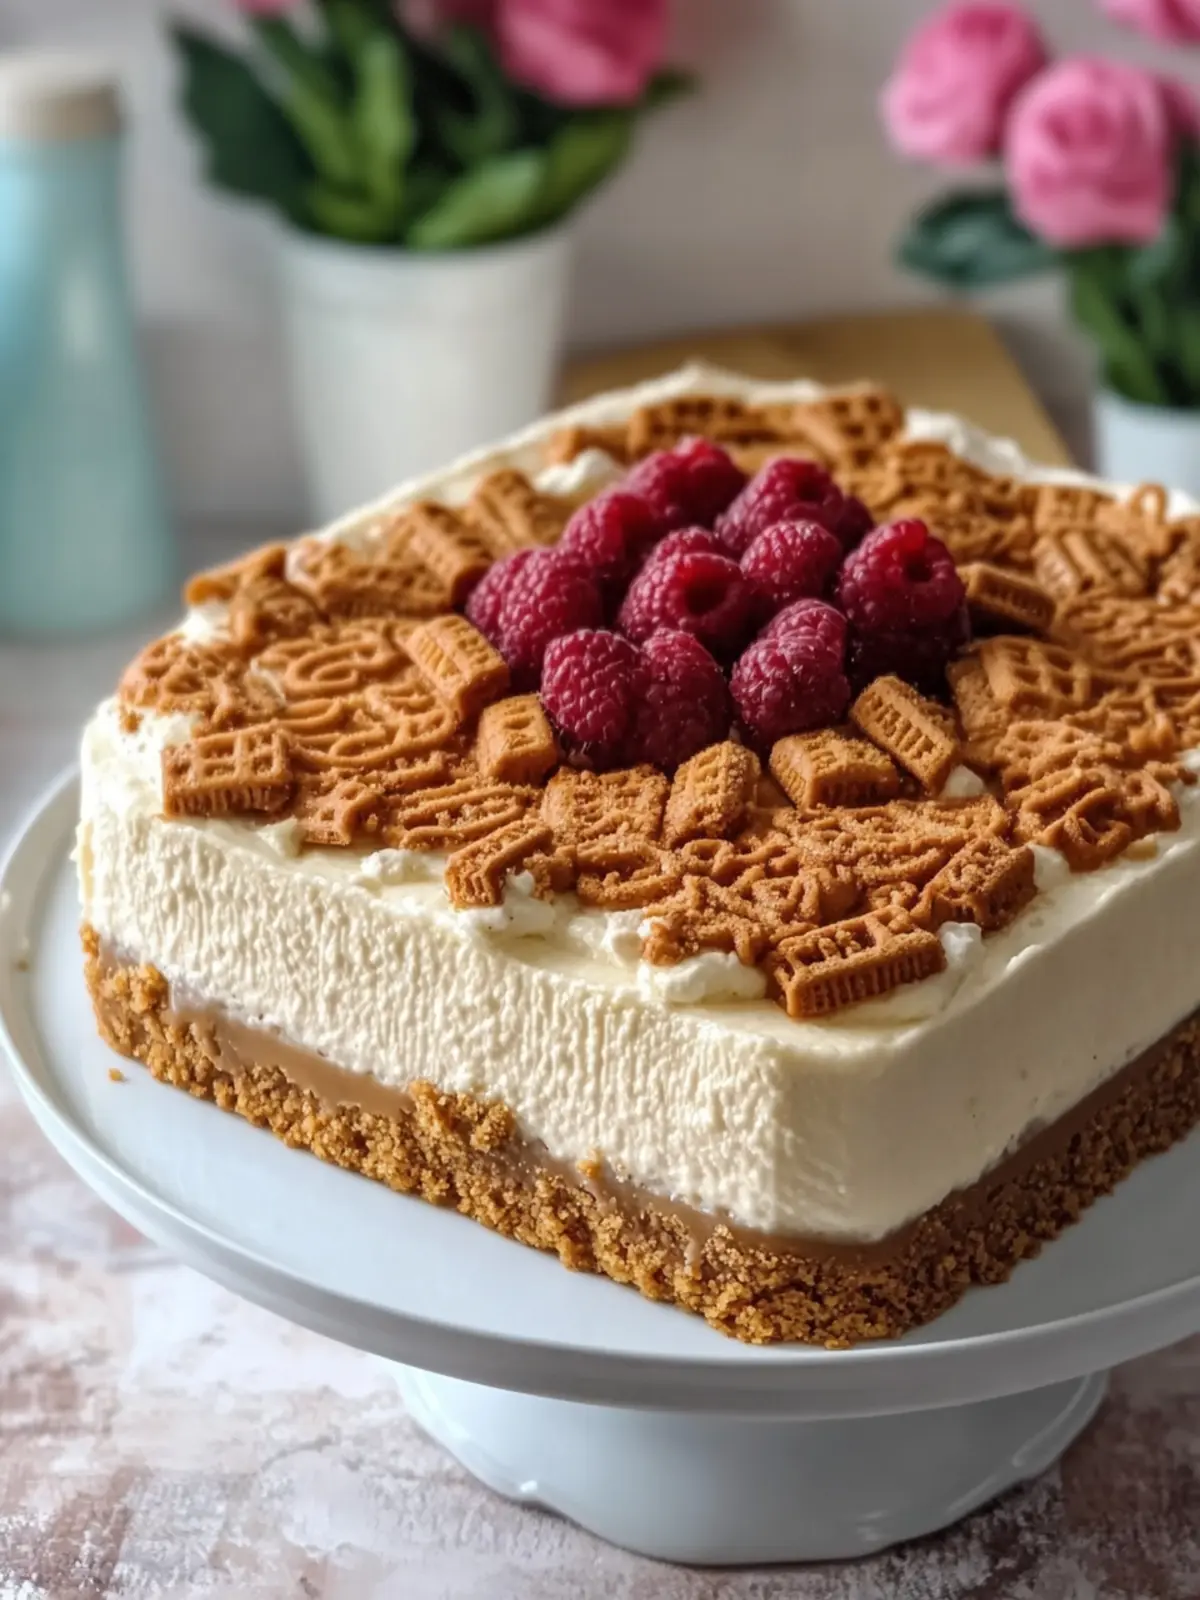
Garnish: Arrange the whole Lotus Biscoff biscuits on top of the cheesecake. Finish by sprinkling the crushed biscuits over everything for that delightful crunch.
-
Chill the cheesecake: Cover the dish and refrigerate for at least 6 hours, but preferably overnight. This waiting time allows the cheesecake to firm up, making it easier to slice.
Optional: For an extra touch of flavor, serve with a dollop of whipped cream on the side.
Exact quantities are listed in the recipe card below.
What to Serve with No-Bake Lotus Biscoff Cheesecake?
Elevate your dessert experience by exploring delightful pairings that beautifully complement this indulgent treat.
-
Fresh Berries: Their natural tartness balances the rich cheesecake flavor, adding a pop of bright color and freshness. Strawberries or raspberries are particularly delightful!
-
Chocolate Drizzle: A warm, silky chocolate sauce creates a luxurious contrast. Its bittersweet notes harmonize beautifully with the sweetness of the Biscoff.
-
Coffee or Espresso: A cup of robust coffee pairs seamlessly. The bitterness of the coffee enhances the flavors in the cheesecake, making each bite even more satisfying.
-
Whipped Cream: A generous dollop of freshly whipped cream adds lightness and airiness. It beautifully complements the creamy texture of the cheesecake while providing a classic touch.
-
Caramel Sauce: Drizzling a bit of caramel over your cheesecake introduces a sweet, buttery flavor that enhances the dessert’s richness. It’s a decadent twist that feels indulgent!
-
Mint Leaves: Garnishing with fresh mint adds a refreshing element and a vibrant pop of color. It brightens up the rich flavors and leaves a refreshing aftertaste!
-
Vanilla Ice Cream: A scoop of vanilla ice cream adds a creamy, cold contrast, making every bite of your cheesecake feel like an extravagant treat.
-
Spiced Chai: For a warm drink option, a spiced chai latte offers a perfect fusion of spices that ties in deliciously with the caramel notes of the cheesecake.
-
Nutty Biscotti: Pairing with crispy biscotti complements the Biscoff theme and adds an appealing crunch that plays well with the creamy texture.
-
Dark Chocolate Shavings: A sprinkle of dark chocolate shavings lends a touch of bitterness and adds visual sophistication to your dessert plate.
Expert Tips for No-Bake Lotus Biscoff Cheesecake
-
Crust Precision: Ensure you press the crust mixture firmly into the dish. A well-packed crust will hold its shape when sliced.
-
Room Temperature Cream Cheese: Make sure your cream cheese is softened to room temperature for a smooth filling. Cold cream cheese can lead to lumps.
-
Whip Carefully: When folding the whipped cream into the filling, be gentle to maintain lightness. Aggressive mixing can deflate the airy texture essential for the no-bake Lotus Biscoff cheesecake.
-
Chill Time Matters: Allow the cheesecake to chill for at least 6 hours. Patience is key, as this helps achieve the perfect firmness for slicing.
-
Try Variations: Feel free to explore different toppings like chocolate shavings or fresh fruit for a fun twist on the classic flavor!
Variations & Substitutions for No-Bake Lotus Biscoff Cheesecake
Ready to make your cheesecake even more exciting? Let’s explore delightful twists and swaps that will make this dessert truly your own!
-
Gluten-Free: Use gluten-free biscuit alternatives for the crust to make this dessert accessible for everyone.
-
Chocolate Lovers: Add melted chocolate to the cream cheese mixture for a rich, chocolatey flavor that enhances the Biscoff.
-
Nutty Crunch: Mix in finely chopped nuts like almonds or pecans with the crust for an added crunch that contrasts beautifully with the creamy filling.
-
Sweetener Swap: Substitute the powdered sugar with maple syrup or honey to cater to dietary preferences while adding a unique flavor.
-
Spice It Up: Add a dash of cinnamon or nutmeg to the cream cheese filling for a warm, cozy flavor profile that feels like a hug in dessert form.
-
Different Biscuits: Experiment with different cookie types, like ginger snaps or Oreos, for the crust to create a new taste experience with each bake.
-
Fruity Twist: Top with fresh berries or a fruit compote to add a pop of color and a fresh, tart contrast to the creamy sweetness.
-
Vegan Version: Use a vegan cream cheese alternative and non-dairy whipping cream to make this cheesecake plant-based without sacrificing flavor.
These variations invite you to get creative and personalize your No-Bake Lotus Biscoff Cheesecake for any occasion!
How to Store and Freeze No-Bake Lotus Biscoff Cheesecake
Fridge: Keep the cheesecake covered in an airtight container and store it in the fridge for up to 3 days. This helps to maintain its creamy texture and flavor.
Freezer: For longer storage, slice the cheesecake and wrap each piece in plastic wrap, then place it in a freezer-safe container. It can be frozen for up to 2 months.
Thawing: To enjoy a slice from the freezer, transfer it to the fridge to thaw overnight. This slow thaw keeps the cheesecake’s texture intact.
Serving Suggestions: When ready to serve, consider adding a drizzle of warm Biscoff spread or a dollop of whipped cream for an indulgent touch!
Make Ahead Options
These No-Bake Lotus Biscoff Cheesecake delights are perfect for busy weeknights or when you want to impress guests with minimal effort! You can prepare the crust by mixing the crushed biscuits and melted butter and chilling it up to 24 hours in advance to ensure a clean, crisp base. The filling can also be made 3 days ahead; just store it in an airtight container in the fridge to keep it fresh and avoid excess moisture. When you’re ready to serve, simply layer the filling over the crust, drizzle with warmed Biscoff spread, and let it set for at least 6 hours or preferably overnight. This make-ahead tip ensures that your cheesecake is just as delicious and allows for stress-free entertaining!
No-Bake Lotus Biscoff Cheesecake Recipe FAQs
How do I choose the right Lotus Biscoff biscuits?
Absolutely! When selecting Lotus Biscoff biscuits, look for ones that are crisp and free from dark spots. Fresh biscuits would have a nice, even color and a delightful aroma. If your biscuits are stale, they’ll crumble unevenly and won’t create that perfect crust.
How should I store leftover cheesecake?
Very important! Keep your No-Bake Lotus Biscoff Cheesecake covered in an airtight container in the fridge for up to 3 days. This ensures it stays fresh and maintains its creamy texture. If you want to save it for longer, I recommend freezing individual slices for up to 2 months.
Can I freeze No-Bake Lotus Biscoff Cheesecake? If so, how?
Absolutely! To freeze, first slice the cheesecake into individual servings. Wrap each piece tightly in plastic wrap, then place all the wrapped slices into a freezer-safe container. Make sure it’s sealed properly to prevent freezer burn. When you’re ready to enjoy, you can thaw them overnight in the fridge for the best texture.
What if my cheesecake isn’t setting properly?
No worries! If your cheesecake isn’t firming up, it may be due to insufficient chilling time or if the heavy cream wasn’t whipped properly. Ensure the cheesecake is refrigerated for at least 6 hours, or preferably overnight. If you suspect the cream wasn’t whipped to stiff peaks, next time make sure to whip it until the cream holds its shape well before folding it into the cream cheese mixture.
Are there any allergenic ingredients in this recipe?
Great question! The No-Bake Lotus Biscoff Cheesecake contains cream cheese and heavy cream, which may pose issues for those with dairy allergies. Additionally, Lotus Biscoff products may contain gluten, so it’s essential to check labels for anyone with gluten sensitivities. If you have a pet, be cautious about sharing this treat as chocolate can be toxic to them, though this recipe does not contain chocolate.
Can I adjust the sweetness in the cheesecake?
Certainly! If you prefer a less sweet cheesecake, feel free to reduce the powdered sugar in the filling. Start with 1/3 cup and taste, adding more sugar if desired. You can also experiment with using less Biscoff spread on top, depending on your sweetness preference!
Decadent No-Bake Lotus Biscoff Cheesecake for Sweet Cravings
Ingredients
Equipment
Method
- Combine the crushed Lotus Biscoff biscuits with melted butter in a bowl. Press the mixture firmly into the bottom of a 9 × 13-inch casserole dish. Refrigerate for 20 minutes to set the crust.
- In a large bowl, use a hand mixer to beat the softened cream cheese, powdered sugar, and vanilla extract until the mixture is smooth and creamy.
- Fold in ¾ cup of the Lotus Biscoff spread into the cream cheese mixture, blending well until fully combined.
- Whip the cold heavy cream in a separate bowl until stiff peaks form. Gently fold this whipped cream into the cream cheese mixture.
- Evenly distribute the cheesecake filling over your chilled biscuit crust and smooth the top with a spatula.
- Warm the remaining Lotus Biscoff spread in the microwave for 15–20 seconds. Drizzle it over the cheesecake filling.
- Arrange the whole Lotus Biscoff biscuits on top of the cheesecake, then sprinkle the crushed biscuits over everything.
- Cover the dish and refrigerate for at least 6 hours or preferably overnight.