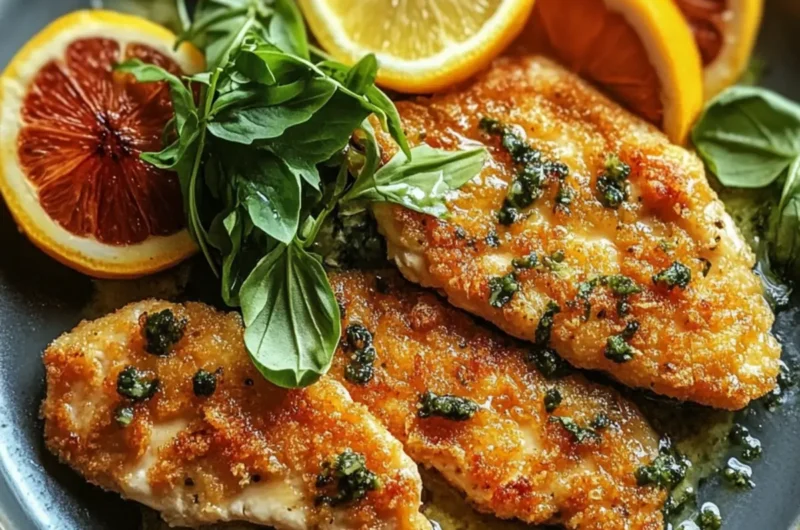
There’s something truly special about the vibrant sizzle of chicken hitting the hot oil—it’s like a siren’s call beckoning you to the dinner table. Today, I’m excited to share my Crispy Chicken Milanese recipe, a delightful venture into Italian cuisine that transforms simple ingredients into an extraordinary meal in under 30 minutes. As the golden-brown crust forms, your home will fill with an aroma that guarantees to whet the appetite of anyone nearby.
Imagine plates adorned with juicy, tender chicken accompanied by a fresh salad of peppery arugula and sweet cherry tomatoes. This dish isn’t just quick and easy; it’s versatile too! You can switch up the breadcrumbs for a gluten-free option, infuse herbaceous notes, or even add a zesty twist. Whether you’re hosting friends or just craving a comforting homemade meal, this Milanese is sure to impress. So grab your apron and prepare to learn how to master this Italian classic today!

Why Love This Crispy Chicken Milanese Recipe?
Flavors that Dazzle: Each bite bursts with savory goodness thanks to the perfectly seasoned panko coating.
Quick & Easy: Whip it up in under 30 minutes—perfect for busy weeknights!
Versatility at Its Best: Enjoy gluten-free options or add herbs for a personalized twist.
Impressive Presentation: Serve with a vibrant salad for a dish that looks as good as it tastes.
Crowd-Pleasing Delight: Whether for family dinners or gatherings, it’s bound to impress everyone at the table!
Delve into a world of flavors with this delightful dish; you may also want to explore serving suggestions to elevate your meal!
Crispy Chicken Milanese Ingredients
For the Chicken
- Boneless, Skinless Chicken Breasts – Choose quality chicken for the best flavor and tenderness.
- Flour – Ideal for dredging; use all-purpose or gluten-free flour as preferred.
- Eggs – Beat until pale yellow; this ensures a cohesive coating.
- Panko Breadcrumbs – Offers a lighter, crunchier texture; swap with gluten-free panko if needed.
For the Salad
- Fresh Arugula – Provides a peppery bite that complements the rich chicken.
- Cherry Tomatoes – Sweet pops of flavor; slice them in half for a lovely presentation.
- Olive Oil – Drizzle for freshness in the salad; enhances overall flavors.
- Balsamic Vinegar – Balances the earthy notes; substitute with lemon juice for brightness.
For Seasoning
- Salt – Essential for enhancing the dish’s overall taste.
- Pepper – Adds depth and rounds out the seasoning blend.
Prepare to enjoy this Crispy Chicken Milanese recipe that brings the flavors of Italy right to your table!
How to Make Crispy Chicken Milanese
-
Prepare Chicken: Butterfly the boneless, skinless chicken breasts and gently pound them between plastic wrap until they reach about 1/2 inch thickness for even cooking throughout.
-
Set Up Breading Station: Grab three shallow bowls and fill the first with flour, the second with beaten eggs (beaten until pale yellow), and the third with panko breadcrumbs to create a simple assembly line.
-
Bread Chicken: Dredge each chicken breast in flour first, then dip into the eggs, making sure to coat evenly. Finally, coat the chicken generously with panko breadcrumbs, pressing lightly to ensure they stick well.
-
Heat Oil: In a large heavy skillet, pour enough olive oil to cover the bottom and heat it over medium heat until shimmering. You want it hot enough that a breadcrumb sizzles upon contact.
-
Cook Chicken: Fry each breaded chicken breast for about 3-4 minutes per side, or until they are a beautiful golden brown. Drain them on paper towels afterwards to remove any excess oil for a crisp finish.
-
Prepare Salad: In a large bowl, toss together fresh arugula and halved cherry tomatoes with a drizzle of olive oil, balsamic vinegar, and a sprinkle of salt and pepper. This bright salad will complement the crispy chicken beautifully.
-
Serve: Plate your crispy Chicken Milanese alongside the fresh salad for a gorgeous presentation. For an extra touch, garnish with fresh herbs or a sprinkle of parmesan cheese if desired.
Optional: For a zesty kick, drizzle a bit of fresh lemon juice over the chicken before serving.
Exact quantities are listed in the recipe card below.

Make Ahead Options
These Crispy Chicken Milanese are perfect for meal prep enthusiasts! You can bread the chicken up to 24 hours in advance. Simply prepare the chicken as instructed, coating them in flour, eggs, and panko, then place the breaded chicken on a parchment-lined baking sheet and refrigerate until ready to cook. This step not only saves you time but also allows the coating to adhere better, resulting in an even crispier finish. When you’re ready to serve, heat the oil and fry the chicken as usual—just be sure to check the oil temperature to maintain that delicious crunch. Enjoy a homemade meal with minimal effort on busy weeknights!
What to Serve with Crispy Chicken Milanese?
Transform your meal into an Italian feast with delightful pairings that harmonize beautifully with this crunchy delight.
-
Creamy Risotto: The rich, creamy texture of risotto complements the crispy chicken perfectly—it’s a match made in heaven!
-
Garlic Bread: Crunchy and buttery, garlic bread makes a delightful side that enhances the Italian theme while providing satisfying texture.
-
Sauteed Seasonal Vegetables: Lightly sautéed veggies add freshness to your plate, offering a beautiful contrast to the crispy chicken.
-
Pasta Primavera: Tossed with fresh vegetables, this light pasta dish is the ideal companion, bringing an extra layer of vibrant flavors to the meal.
-
Freshly Grated Parmesan: A sprinkle of aged cheese on top of your Chicken Milanese elevates its taste, enhancing every bite with a nutty richness.
-
Zesty Lemonade: A glass of refreshing lemonade brightens the dining experience, balancing the savory notes and adding a citrusy zing to every sip.
-
Chocolate Mousse: Wrap up the meal with a luscious chocolate mousse; the silky dessert is the perfect sweet finale after a scrumptious main course.
All these options not only create a visually appealing spread but also balance flavors and textures, making your homemade Crispy Chicken Milanese shine!
Storage Tips for Crispy Chicken Milanese
Fridge: Refrigerate leftovers in an airtight container for up to 3 days to maintain freshness and flavor.
Freezer: Wrap the chicken tightly in plastic wrap and then in aluminum foil to prevent freezer burn; it will last for up to 2 months.
Reheating: For best results, reheat in the oven at 375°F for about 10-15 minutes to restore crispiness without drying it out.
Salad Storage: Store salad components separately; dress them just before serving for optimal freshness and flavor.
Expert Tips for Crispy Chicken Milanese
-
Chicken Thickness: Ensure chicken is pounded evenly to 1/2 inch; uneven thickness may lead to overcooking or undercooking.
-
Breading Technique: Press panko firmly onto the chicken for better adhesion; this prevents the coating from falling off during frying.
-
Oil Monitoring: Use a thermometer to maintain the oil temperature around 350°F; too hot will burn the crust, while too cool will make the chicken greasy.
-
Resting Time: Let the coated chicken rest for 10-15 minutes before frying; this helps the breading set and improves crispiness.
-
Salad Enhancement: For a color boost, add sliced cucumbers or bell peppers to the salad; it not only elevates flavors but also makes the dish visually appealing.
-
Storage Tips: For the best results, refrigerate leftovers in an airtight container and consume within 3 days to retain the crispy texture of your Crispy Chicken Milanese recipe.
Variations & Substitutions for Crispy Chicken Milanese
Customize your meal with these variations that bring exciting new flavors and textures to your table!
- Gluten-Free: Swap out regular panko breadcrumbs for gluten-free panko or almond flour for a delicious, no-gluten option.
- Herb-Infused: Blend dried herbs such as oregano, basil, or parsley into the breadcrumbs for a burst of earthy flavor. The aroma alone will delight your senses!
- Cheesy Delight: Stir grated Parmesan into the panko mixture before coating the chicken. This adds a savory richness that complements the dish beautifully.
- Zesty Lemon Addition: Squeeze fresh lemon juice over the cooked chicken just before serving. It brightens the whole dish and adds a wonderful tang!
- Spicy Variation: Mix red pepper flakes into the breadcrumb coating for a pleasing kick. If you love a bit of heat, this will quickly become your favorite.
- Mushroom Milanese: Top your crispy chicken with sautéed mushrooms for an earthy flavor contrast. This simple addition can elevate the entire dish to gourmet status.
- Caprese Style: Top with fresh mozzarella and basil for a classic Italian Caprese twist. Melt the cheese slightly for a gooey, comforting finish.
- Sweet & Savory: Add thinly sliced figs or a fig jam glaze on top for a delightful sweet contrast that plays beautifully against the savory chicken.
Feel free to mix and match these ideas, and watch as your Crispy Chicken Milanese evolves into new favorite dishes!

Crispy Chicken Milanese Recipe FAQs
What type of chicken should I use for the best results?
Absolutely! For the best flavor and tenderness, I recommend choosing high-quality boneless, skinless chicken breasts. Look for chicken that is firm and has a pinkish hue without dark spots. Organic or free-range options often provide enhanced taste.
How long can I store leftovers?
Very! Refrigerate any leftovers in an airtight container, and they will stay fresh for up to 3 days. Just make sure to cool the chicken completely before sealing, which helps retain its crunchy texture.
Can I freeze Crispy Chicken Milanese? If so, how?
Yes, indeed! To freeze, wrap the chicken tightly in plastic wrap followed by aluminum foil to prevent freezer burn. You can store it in the freezer for up to 2 months. When you’re ready to enjoy it again, just reheat in the oven at 375°F for about 10-15 minutes to get that crispy texture back.
What should I do if my breading falls off while frying?
Ah, troubleshooting is part of cooking! If your breading falls off, it may be due to insufficient pressing during the breading step. Make sure to firmly press the panko breadcrumbs onto the chicken. Additionally, ensuring that your oil is hot enough (around 350°F) before adding the chicken helps the breading adhere better.
Can I make this recipe gluten-free?
Absolutely! You can substitute regular panko breadcrumbs with gluten-free panko or almond flour for a delightful crunch. Additionally, use gluten-free flour when dredging the chicken to make this a completely gluten-free meal.
What can I do with leftovers to keep them interesting?
Definitely! To keep leftovers exciting, try slicing the chicken and tossing it into a fresh pasta salad or using it as a topping for sandwiches. Pair it with different sauces like marinara or pesto, or even mix it into a hearty soup for a flavorful meal transformation!
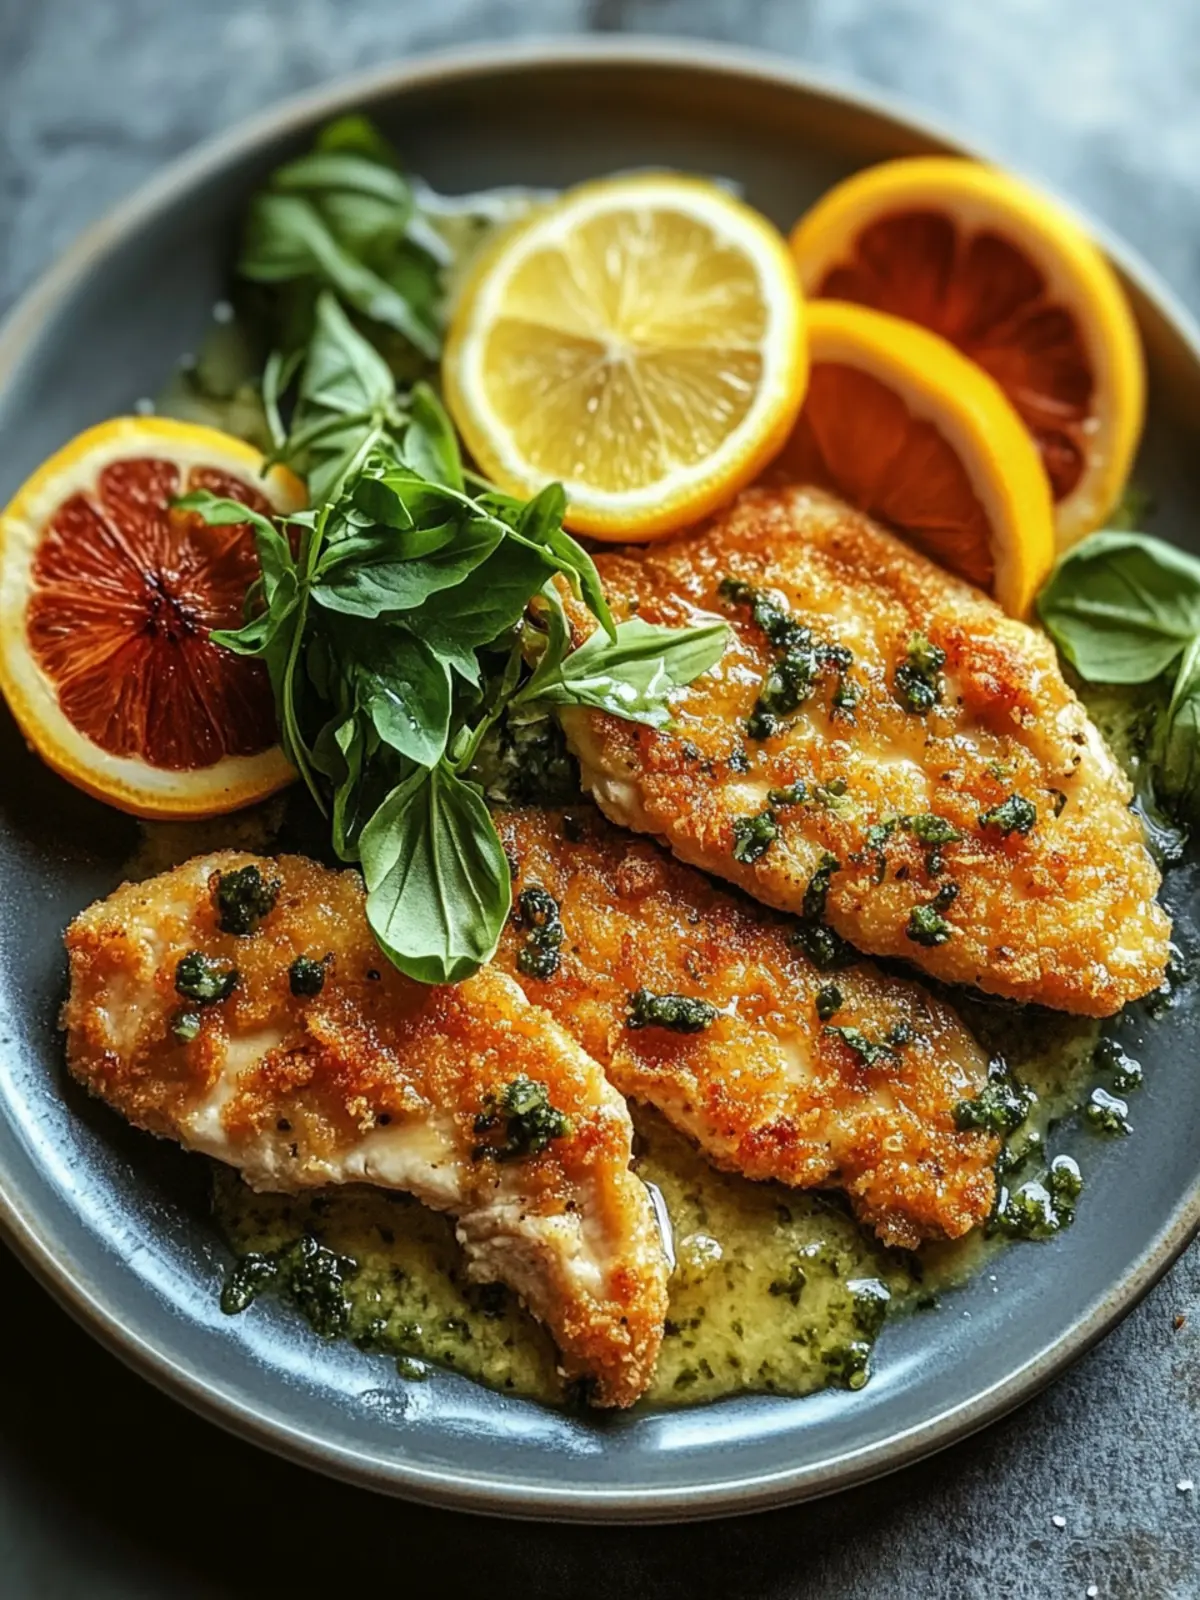
Crispy Chicken Milanese Recipe: Your Easy Italian Classic Magic
Ingredients
Equipment
Method
- Butterfly the chicken breasts and gently pound them between plastic wrap to 1/2 inch thickness.
- Set up a breading station with flour, beaten eggs, and panko breadcrumbs.
- Dredge each chicken breast in flour, dip in the eggs, then coat with panko breadcrumbs.
- In a skillet, heat olive oil until shimmering.
- Fry each chicken breast for about 3-4 minutes per side until golden brown.
- Drain on paper towels to remove excess oil.
- In a bowl, toss arugula and cherry tomatoes with olive oil, balsamic vinegar, salt, and pepper.
- Plate the chicken alongside the fresh salad.
- Optional: Garnish with fresh herbs or a sprinkle of parmesan.