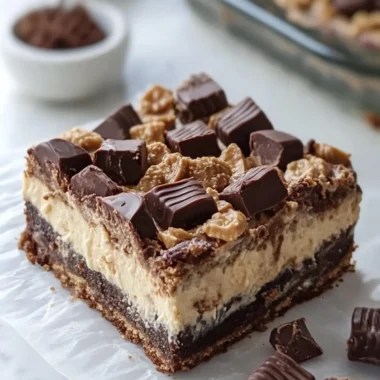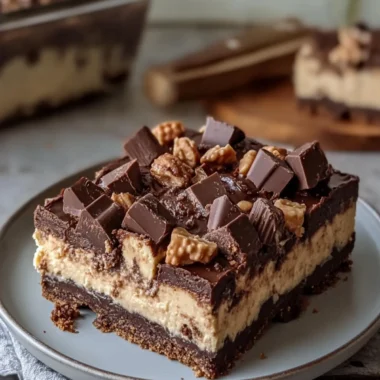
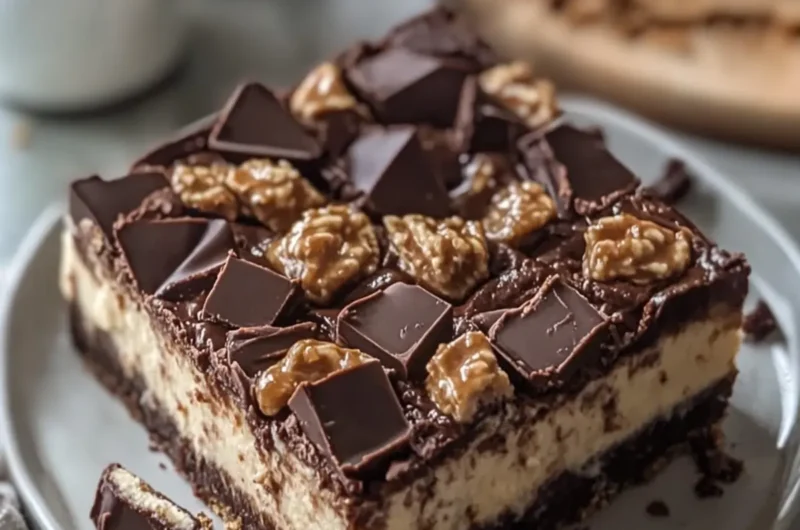
There’s something genuinely indulgent about sinking your teeth into a rich, fudgy brownie layered with creamy peanut butter cheesecake. Picture this: the satisfying crunch of chocolate peanut butter cups, the luscious swirl of velvety cheesecake, and the irresistible aroma wafting through your kitchen as they bake. I discovered this delightful combination on a cozy afternoon, where the longing for a truly decadent treat led me to whip up these Peanut Butter Cup Brownie Cheesecake Bars.
Whether you’re looking to impress guests at your next gathering or simply wanting to elevate your dessert game after a long day, this recipe delivers on both flavor and ease. Not only are these bars a feast for the senses, but they’re also surprisingly straightforward to make, transforming your boredom with takeout into a joyful baking adventure. Ready to savor a moment of pure bliss in every bite? Let’s dive into this delicious treat that’s bound to become a favorite with family and friends!
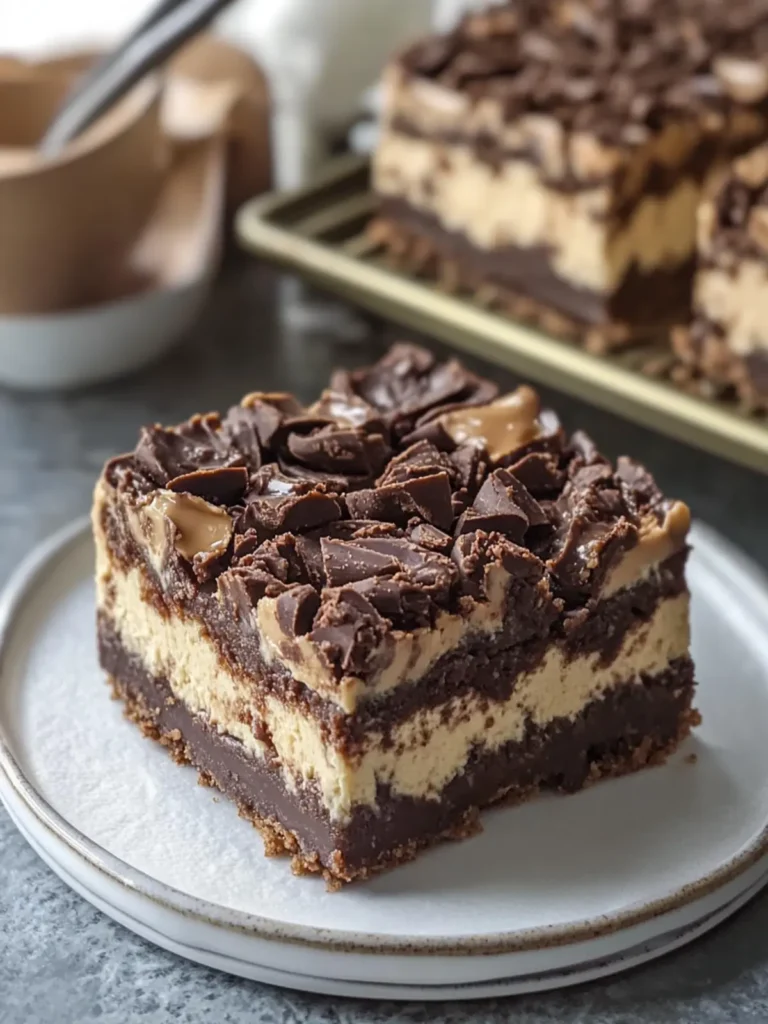
Why are Peanut Butter Cup Brownie Cheesecake Bars irresistible?
Decadent flavor: These bars blend rich brownie goodness with creamy peanut butter cheesecake for an indulgent treat that’ll leave you craving more.
Crowd favorite: Perfect for parties or cozy family nights, they’re sure to impress guests and loved ones alike.
Simple preparation: With just a few common ingredients, you can whip these up with ease, making them an approachable dessert for any home cook.
Eye-catching presentation: Drizzled with melted chocolate and topped with crunchy peanut butter cups, they’re as stunning as they are delicious.
Versatile treats: Enjoy them chilled or at room temperature – either way, they’ll be a delightful addition to any gathering. Don’t forget to explore our tips for perfecting your baking skills for even more fun in the kitchen!
Peanut Butter Cup Brownie Cheesecake Bars Ingredients
Get ready to make a dessert that will wow everyone at your table!
For the Brownie Base
• Unsalted butter – 1/2 cup (115 g), melted for a rich base.
• Granulated sugar – 1 cup (200 g) adds sweetness to balance the cocoa.
• Large eggs – 2 eggs help bind the ingredients and create a fudgy texture.
• Vanilla extract – 1 teaspoon enhances the overall flavor profile.
• Unsweetened cocoa powder – 1/3 cup (35 g) delivers that deep chocolate richness.
• All-purpose flour – 1/2 cup (65 g) provides structure to the brownies.
• Salt – 1/4 teaspoon enhances the sweetness and flavor.
• Baking powder – 1/4 teaspoon gives a slight lift to the brownies.
For the Cheesecake Filling
• Cream cheese – 8 oz (225 g), softened for a creamy and smooth filling.
• Creamy peanut butter – 1/2 cup (125 g) brings that signature nutty flavor.
• Granulated sugar – 1/3 cup (65 g) sweetens the cheesecake layer.
• Large egg – 1 egg helps bind and enrich the filling.
• Vanilla extract – 1 teaspoon adds a delightful depth to the cheesecake.
For the Toppings
• Chopped chocolate peanut butter cups – 1 cup gives a fun and crunchy surprise.
• Semi-sweet chocolate chips – 1/3 cup melts perfectly for drizzling.
• Heavy cream – 2 tablespoons creates a silky chocolate drizzle.
• Creamy peanut butter – 2 tablespoons, melted for extra peanut butter goodness on top.
Dive into this delightful treat and explore the layers of flavor in your Peanut Butter Cup Brownie Cheesecake Bars!
How to Make Peanut Butter Cup Brownie Cheesecake Bars
-
Preheat the oven: Begin by preheating your oven to 350°F (175°C). Line an 8 × 8-inch baking pan with parchment paper, allowing some overhang for easy lifting later.
-
Prepare the brownie batter: In a mixing bowl, whisk together the melted butter, granulated sugar, eggs, and vanilla extract until smooth and creamy. Then, add in the cocoa powder, all-purpose flour, salt, and baking powder. Stir gently until just combined—avoid overmixing for that perfect texture!
-
Make the brownie base: Spread the rich brownie batter evenly into the prepared baking pan, creating a luscious base for your cheesecake layer.
-
Prepare the cheesecake filling: In a separate bowl, beat the softened cream cheese, creamy peanut butter, and sugar until you have a smooth and creamy mixture. Add in the egg and vanilla extract, mixing until everything is beautifully blended together.
-
Layer the cheesecake: Carefully pour the peanut butter cheesecake mixture over the brownie batter, smoothing it out gently so that it covers the surface evenly.
-
Bake: Place the pan in the preheated oven and bake for 35–42 minutes. Look for the edges of the cheesecake to be set, while the center still has a slight jiggle—this ensures a creamy consistency.
-
Cool completely: Once baked, let your bars cool at room temperature for about 1 hour. Then refrigerate for at least 3 hours until they are firm and ready to slice.
-
Add the toppings: After chilling, sprinkle the chopped chocolate peanut butter cups over the top of the cheesecake. Melt the semi-sweet chocolate chips with heavy cream until smooth, and drizzle this over the bars along with the melted peanut butter for that extra indulgence.
-
Slice and serve: Chill the bars again for 15–20 minutes to set the toppings. Use the parchment overhang to lift them from the pan, then cut into squares with a sharp knife.
Optional: Serve warm with a scoop of your favorite ice cream on the side.
Exact quantities are listed in the recipe card below.
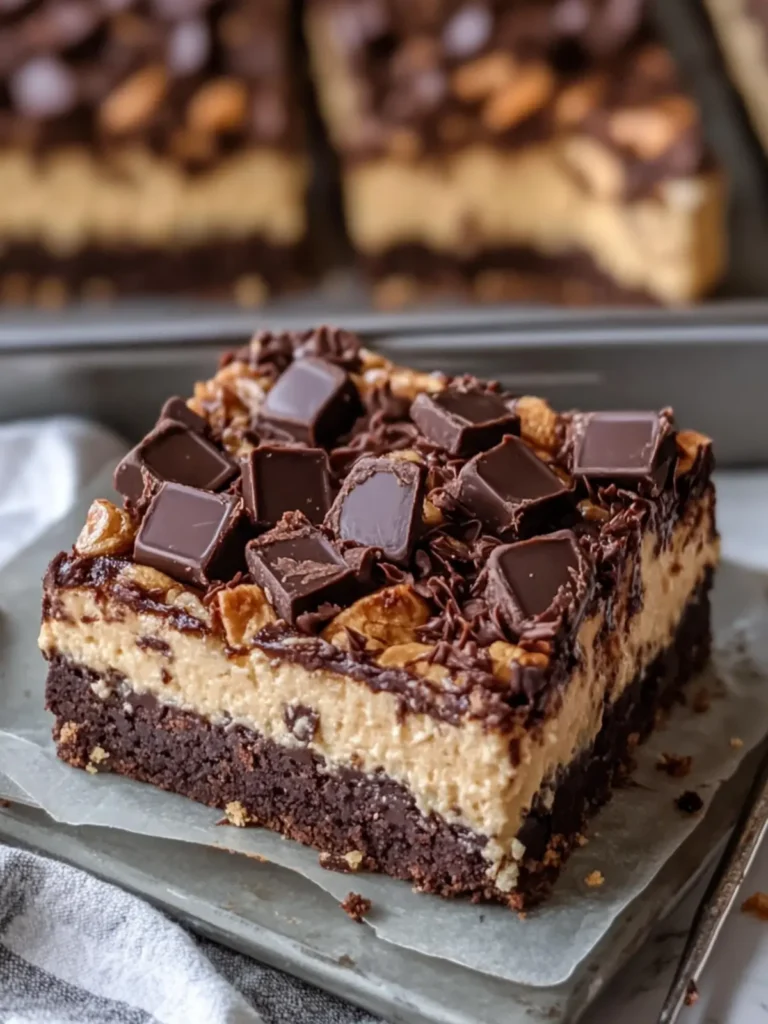
Storage Tips for Peanut Butter Cup Brownie Cheesecake Bars
Room Temperature: Keep any leftover bars at room temperature for up to 2 days in an airtight container to maintain their soft, fudgy texture.
Fridge: Store in the refrigerator for up to 5 days. Place them in an airtight container to prevent drying out while keeping the cheesecake filling creamy and delicious.
Freezer: For longer storage, wrap individual bars tightly in plastic wrap and place them in a freezer-safe bag. They can be frozen for up to 2 months and enjoyed later!
Reheating: When you’re ready to indulge again, thaw in the fridge overnight, then enjoy cold or warm slightly in the microwave for about 10-15 seconds for a freshly-baked experience.
Make Ahead Options
These Peanut Butter Cup Brownie Cheesecake Bars are perfect for meal prep enthusiasts! You can prepare the brownie base and cheesecake filling up to 24 hours in advance, storing them separately in airtight containers in the refrigerator to maintain freshness. Once you’re ready to bake, spread the cheesecake layer over the brownie base and proceed with baking as instructed. After cooling, the bars can be refrigerated for up to 3 days before serving, which allows the flavors to meld beautifully. Just remember to add the toppings shortly before serving to keep them looking fresh and delicious. Enjoy the convenience of having a decadent dessert ready to impress with minimal effort!
Expert Tips for Peanut Butter Cup Brownie Cheesecake Bars
-
Use Room Temperature Ingredients: Ensure your cream cheese and eggs are at room temperature for a smoother filling that blends seamlessly with the peanut butter.
-
Don’t Overmix: When combining ingredients for the brownie batter, mix just until combined to maintain a fudgy texture. Overmixing can lead to dense brownies.
-
Check for Doneness: Bake until the edges are set with a slight jiggle in the center. Overbaking can lead to a dry cheesecake layer, so keep a close eye on them!
-
Cool Properly: Allow the bars to cool completely at room temperature before chilling. This step is essential to achieving the perfect dense yet creamy consistency in your Peanut Butter Cup Brownie Cheesecake Bars.
-
Chill Before Cutting: Let the bars chill in the refrigerator for at least 3 hours to ensure they are firm enough to slice neatly. Enjoy the delightful treat!
Peanut Butter Cup Variations
Customize your Peanut Butter Cup Brownie Cheesecake Bars for a delightful twist that tantalizes your taste buds!
-
Gluten-Free: Substitute all-purpose flour with a 1:1 gluten-free blend for a gluten-friendly option that still delights.
-
Nut-Free: Swap out peanut butter for sunflower seed butter to ensure everyone can enjoy this treat without worry.
-
Dairy-Free: Use coconut or almond cream cheese and dairy-free chocolate for a luscious vegan version that doesn’t compromise on flavor.
-
Spicy Kick: Add a pinch of cayenne pepper to the brownie mix for a surprising, delightful heat that complements the sweetness.
-
Flavor Boost: Incorporate a teaspoon of espresso powder into the brownie batter to enhance the chocolate flavor and add depth to your dessert.
-
Fruit Addition: Mix in 1/2 cup of chopped strawberries or raspberries into the cheesecake layer for a fresh and fruity contrast.
-
Brownie Bottom Upgrade: Use a cookie dough base instead of brownies for a unique, chewy twist that makes the bars even more decadent.
-
Swirl of Goodness: Swirl in some caramel sauce before baking for an extra layer of indulgence that will have everyone begging for more.
Feel free to mix and match these ideas to create your perfect Peanut Butter Cup Brownie Cheesecake Bars that will surely impress every palate!
What to Serve with Peanut Butter Cup Brownie Cheesecake Bars?
Elevate your dessert experience by pairing these delightful bars with complementary flavors and textures that will tantalize your taste buds.
-
Fresh Berries: The bright acidity of strawberries or raspberries cuts through the rich brownie, adding a refreshing bite. Their vibrant colors also make your dessert table pop!
-
Vanilla Ice Cream: A scoop of creamy vanilla ice cream beside these bars creates a delightful contrast, balancing the rich chocolate and peanut butter flavors. It’s the ultimate indulgence every sweet tooth dreams of!
-
Chocolate Sauce: Drizzling warm chocolate sauce on top enhances the decadence, creating a luscious finish that chocolate lovers will adore. This extra touch transforms each bite into pure bliss.
-
Whipped Cream: Light and airy whipped cream offers a perfect creamy contrast to the dense bars, making each bite feel luxurious. Plus, you can sprinkle cocoa powder or crushed nuts on top for added flair!
-
Coffee: A cup of freshly brewed coffee serves as a fantastic companion, complementing the chocolaty flavor while its warmth enhances the overall dessert experience. Consider flavored options like hazelnut for a fun twist!
-
Chopped Nuts: Sprinkle some chopped walnuts or peanuts over the bars for an added crunch. Their earthy flavor complements the peanut butter and chocolate, taking these bars to another level of delight.
-
Mint Leaves: Garnish with fresh mint leaves for a pop of color and a refreshing herbal note that cuts through the sweetness. It brings a sophisticated touch to your dessert presentation!
Choose any of these pairings for a truly memorable dessert experience that’ll wow your guests!
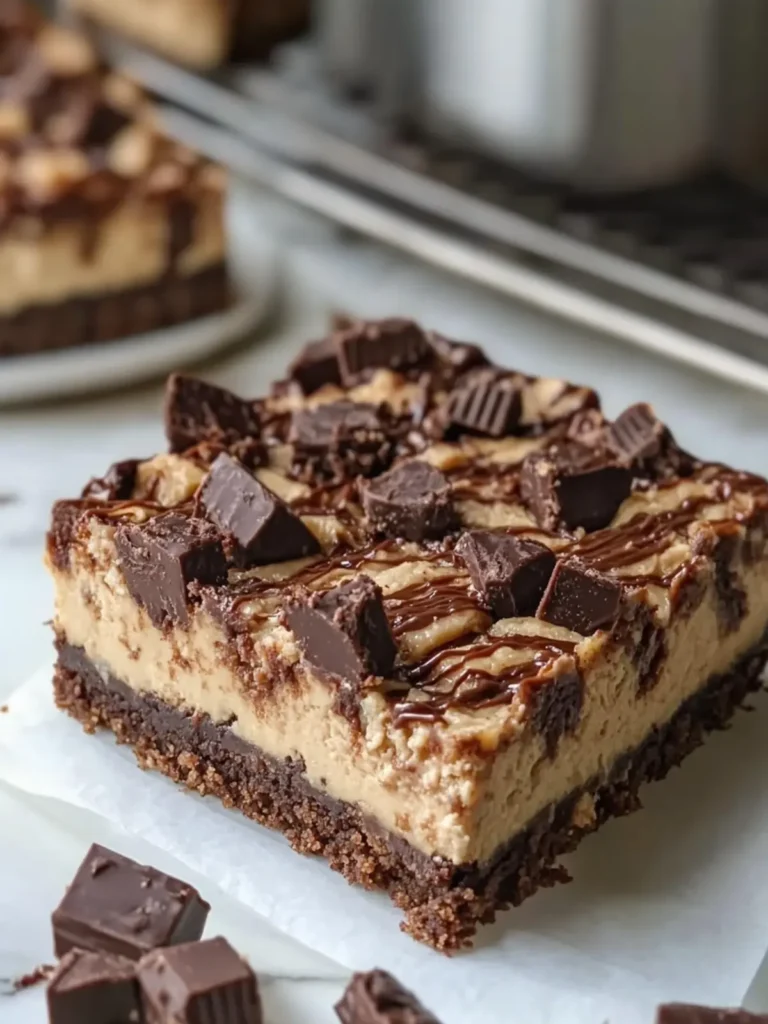
Peanut Butter Cup Brownie Cheesecake Bars Recipe FAQs
How do I choose ripe ingredients for the cheesecake filling?
Absolutely! When selecting your cream cheese, opt for a block of full-fat cream cheese rather than the spreadable tub variety; it will provide the best texture and flavor. Ensure it’s softened to room temperature to avoid lumps in your filling. As for the eggs, fresh ones yield the best results, so check the expiration date on the carton.
What is the best way to store leftover Peanut Butter Cup Brownie Cheesecake Bars?
You can store any leftover bars at room temperature for up to 2 days in an airtight container. For longer freshness, place them in the refrigerator, where they will stay good for up to 5 days. Just remember to use a container that seals tightly to prevent them from drying out!
Can I freeze Peanut Butter Cup Brownie Cheesecake Bars?
Absolutely! To freeze, wrap each individual bar tightly in plastic wrap and place them in a freezer-safe bag or container. They can be stored in the freezer for up to 2 months. When you’re ready to enjoy, simply thaw them overnight in the refrigerator. If you prefer to eat them warm, pop them in the microwave for about 10–15 seconds after thawing.
What should I do if my cheesecake layer isn’t setting during baking?
If you find that your cheesecake layer isn’t firming up as expected, it could mean that the bars were underbaked. The perfect bake should have set edges with a center that jiggles slightly when shaken. If this happens, return them to the oven and bake for an additional 5 to 10 minutes, but keep a close eye on them to avoid overbaking.
Are there any dietary considerations I should keep in mind?
Very! These bars contain common allergens such as dairy and peanuts. If you are serving guests with allergies, consider substituting with dairy-free cream cheese and nut butter alternatives. Also, for a gluten-free treat, you can easily swap the all-purpose flour with a gluten-free blend without compromising flavor.
How can I enhance the flavor of my Peanut Butter Cup Brownie Cheesecake Bars?
For a little extra richness, you can add a pinch of espresso powder to the brownie batter, which enhances the chocolate flavor beautifully. Alternatively, try mixing in some mini chocolate chips to the brownie base for that chocolatey surprise in every bite!
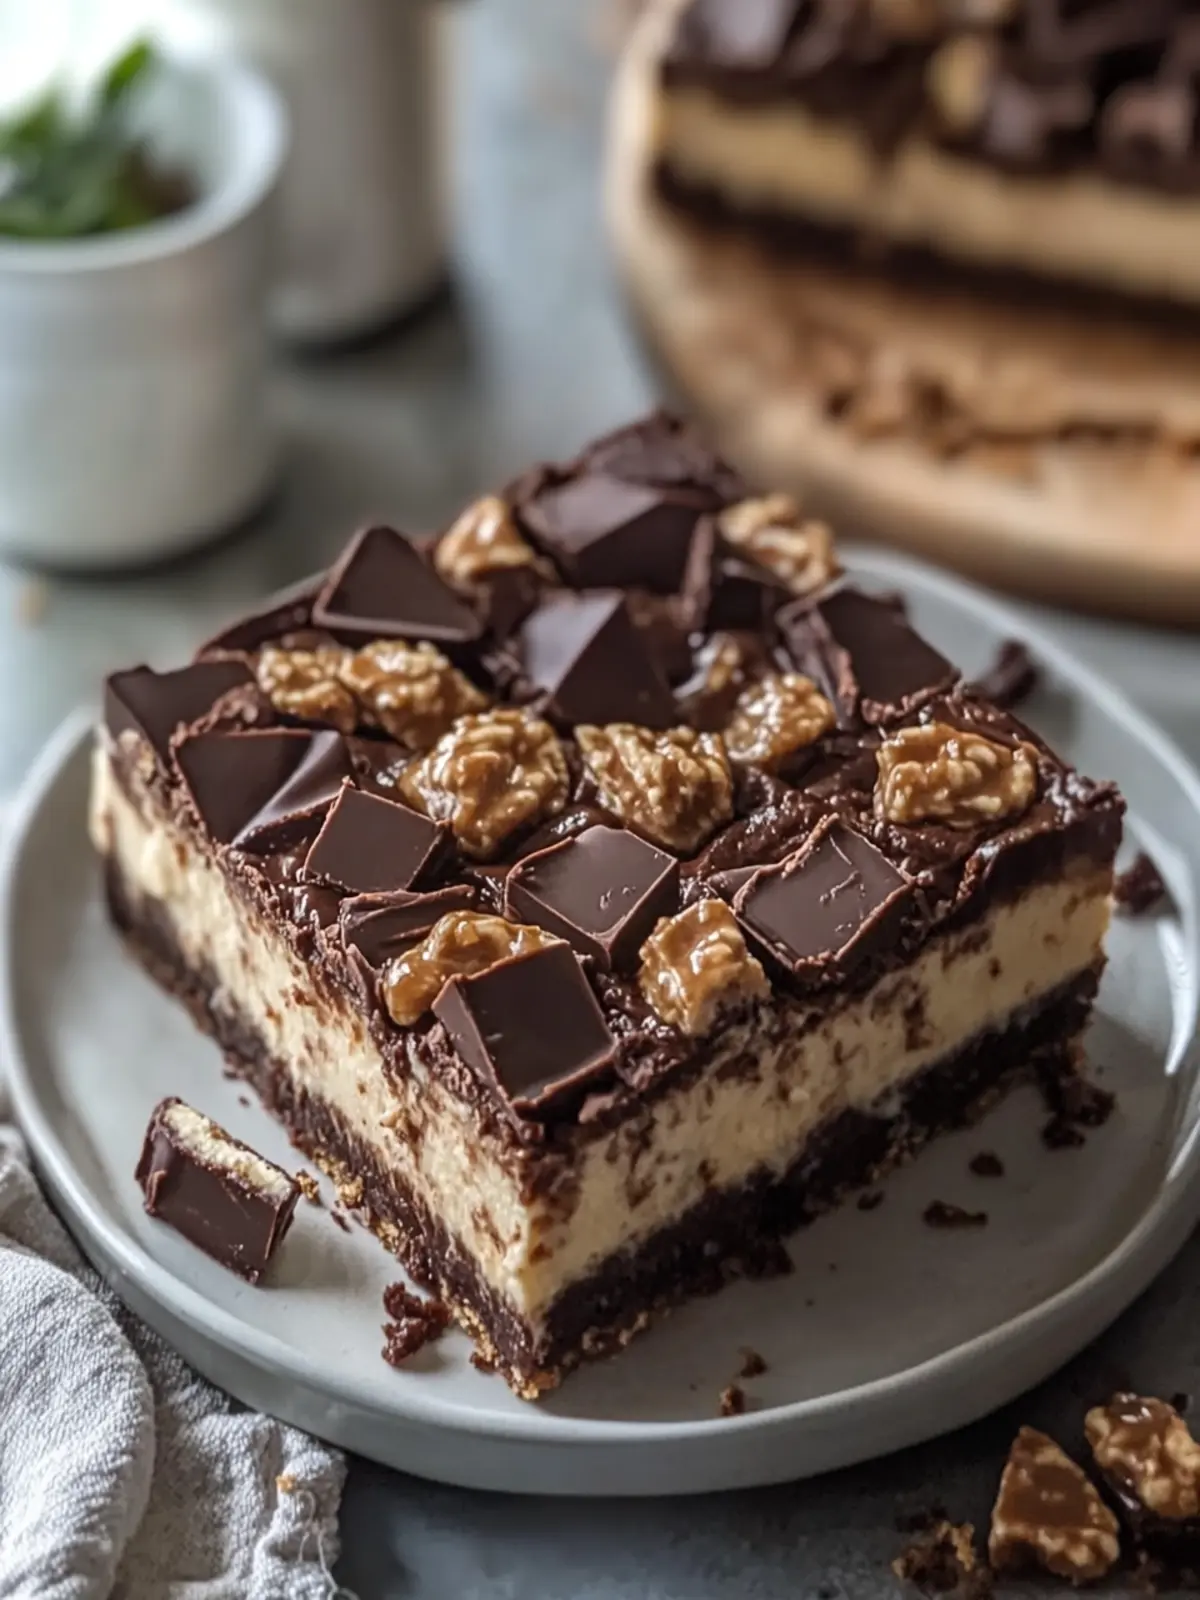
Peanut Butter Cup Brownie Cheesecake Bars That Wow Your Tastebuds
Ingredients
Equipment
Method
- Preheat your oven to 350°F (175°C) and line an 8 × 8-inch baking pan with parchment paper.
- In a mixing bowl, whisk together the melted butter, granulated sugar, eggs, and vanilla extract until smooth and creamy.
- Add in the cocoa powder, all-purpose flour, salt, and baking powder. Stir gently until just combined.
- Spread the brownie batter evenly into the prepared baking pan.
- In a separate bowl, beat the cream cheese, peanut butter, and sugar until smooth. Add the egg and vanilla, mixing until blended.
- Pour the peanut butter cheesecake mixture over the brownie batter.
- Bake for 35–42 minutes until edges are set and center has a slight jiggle.
- Let the bars cool at room temperature for about 1 hour, then refrigerate for at least 3 hours.
- After chilling, sprinkle chocolate peanut butter cups on top, melt chocolate chips with heavy cream and drizzle over bars.
- Chill again for 15–20 minutes before slicing and serving.