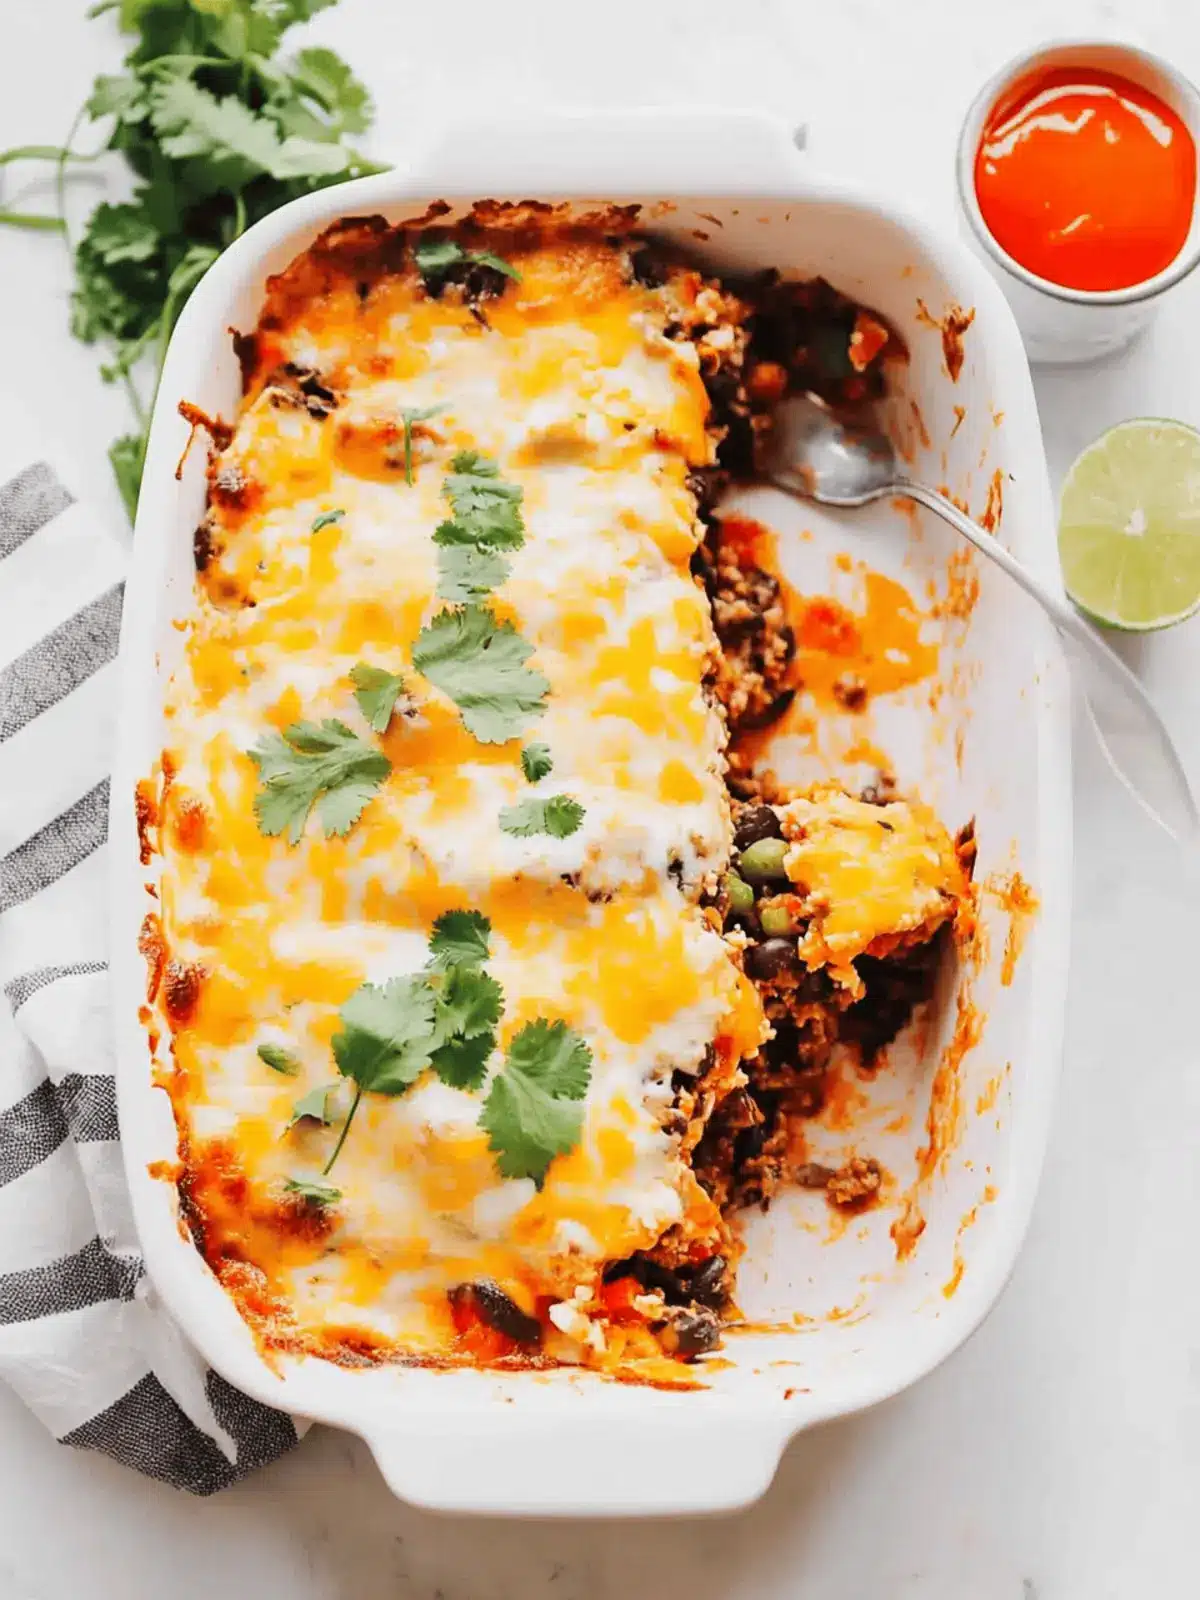
As the sun dips below the horizon and the aroma of spices begins to waft through my kitchen, I can’t help but feel the excitement that comes with preparing something special for my family. Enter the Walking Taco Casserole—a comforting dish layered with spiced ground beef, crunchy corn chips, and creamy sour cream. There’s a sense of joy in this dish that takes me back to summer evenings spent at food festivals, where each bite was a tasty adventure. The best part? It’s incredibly easy to make, meaning you can whip it up even on the busiest of weeknights.
With its customizable toppings, this casserole allows everyone to dive into their own flavor journey, making it a hit at gatherings and family dinners alike. So, whether you’re looking to spice up your dinner routine or simply craving a satisfying meal, this Walking Taco Casserole is sure to become a family favorite. Let’s dive into the recipe that brings the fun of a taco stand right to your dinner table!
Why is Walking Taco Casserole a crowd pleaser?
Comforting and full of flavor, this casserole is the ultimate fusion of convenience and satisfaction. Customizable toppings let everyone personalize their dish, making it ideal for family dinners or casual gatherings. Quick to prepare, this recipe keeps cooking simple, letting you focus on enjoying the meal together. Hearty layers of spiced meat, crunchy chips, and melty cheese create a rich texture that will have everyone going back for seconds. Plus, it’s a fun twist on traditional tacos—dinner just got a lot more exciting!
Walking Taco Casserole Ingredients
This simple yet delightful recipe comes together with ease!
For the Base
- 2 tbsp oil – Essential for sautéing the onion and garlic; any cooking oil like olive or canola works great.
- 2 cups finely-chopped onion – Adds a touch of sweetness and depth; you can substitute with shallots for a milder flavor.
- ½ tsp kosher salt – Enhances the flavors of all other ingredients; feel free to adjust according to your dietary needs.
- 1 tbsp minced garlic – Provides aromatic flavor; fresh garlic is always preferable for richer taste.
- 1 lb lean ground beef or ground chicken – This is the main protein source that gives richness; can substitute with plant-based options like tofu or beans for a vegetarian delight.
- 3 tbsp homemade taco seasoning or 1 packet taco seasoning – Perfect for a flavor boost; making your own allows you to control the spice level.
- 1 (15-oz) can refried beans – Adds creaminess and protein; black beans can be used for a different texture as well.
For Toppings and Layers
- 1 cup sour cream – Contributes a creamy and tangy touch; Greek yogurt is a lighter alternative that works well too.
- 1 bag (9.25 oz) corn chips (Doritos, plain tortilla chips, or Fritos) – Provides a crunchy layer; choose your favorite flavor for added fun!
- 2 cups shredded Mexican blend or cheddar cheese – Enhances the gooey texture on top; dairy-free cheese can be an allergen-friendly option.
Optional Toppings
- Shredded lettuce – Adds a fresh crunch that complements the casserole perfectly.
- Diced tomatoes – Imparts a burst of freshness; don’t skip this for vibrant color!
- Jalapeños – For those who love a spicy kick, these can tantalize your taste buds.
- Sliced black olives – Bring a salty and savory flavor to each bite.
- Additional sour cream or salsa – Perfect for garnishing and enhancing the flavor profile of your Walking Taco Casserole.
With these ingredients in hand, you’re ready to create a hearty dish that turns mealtime into a joyful event!
How to Make Walking Taco Casserole
-
Preheat your oven to 350°F (175°C) and grease a 9×13-inch baking dish to prepare it for your delicious layers.
-
Sauté the onions! In a skillet over medium-high heat, heat the oil and cook the chopped onions with kosher salt until they’re golden brown—about 7-10 minutes. Add the minced garlic and sauté for 1 additional minute until fragrant.
-
Brown the meat by adding the ground beef (or chicken) and taco seasoning to the onion mixture. Stir and cook until the meat is fully browned and cooked through, which should take around 10 minutes.
-
Spread refried beans evenly across the bottom of the greased baking dish, forming a creamy base for your casserole.
-
Layer half of the corn chips over the beans, followed by the cooked meat mixture. Dollop sour cream evenly across this layer and finish it off with the shredded cheese on top.
-
Bake in the preheated oven for about 20 minutes, or until the cheese has melted and the casserole is bubbly.
-
Cool slightly before garnishing! Add your favorite taco toppings to make it extra delicious, and serve with the remaining corn chips for some crunch.
Optional: Garnish with fresh cilantro for an extra burst of flavor.
Exact quantities are listed in the recipe card below.
What to Serve with Walking Taco Casserole?
As you gather around the table to enjoy the delightful layers of your casserole, consider these perfect companions to complete your meal experience.
-
Fresh Guacamole: Creamy and rich, guacamole adds a luscious touch and balances the casserole’s spices beautifully.
-
Zesty Lime Rice: Fluffy rice with a squeeze of lime brightens up the meal and serves as a wonderful base for your taco flavors.
-
Crispy Corn Salad: This refreshing salad, packed with sweet corn, bell peppers, and herbs, complements the casserole’s warmth with its cool crunch.
-
Salsa Verde: A tangy and herby salsa verde drizzled on top elevates the flavor profile, giving it a homey yet zesty twist.
-
Creamy Coleslaw: The crunchy cabbage and creamy dressing provide a nice contrast, enhancing the overall textures of your dinner spread.
-
Chilled Fruit Salad: A sweet and vibrant mix of fruits can cleanse the palate after the savory casserole, creating balance in flavors.
Pairing any of these sides with your walking taco casserole will not only complement its delicious layers but also create a memorable meal for your loved ones!
How to Store and Freeze Walking Taco Casserole
- Fridge: Store any leftovers in an airtight container for up to 3 days. Reheat in the microwave or oven until heated through for a quick meal.
- Freezer: To freeze before baking, assemble the casserole in a freezer-safe dish and wrap securely to prevent freezer burn. It will last up to 3 months.
- Thawing: When ready to bake, thaw overnight in the fridge before popping it into the oven. Bake according to the original instructions for the perfect bubbly texture.
- Reheating: For frozen leftovers, reheat in the oven at 350°F (175°C) until warmed throughout, which usually takes about 25-30 minutes. Enjoy the flavors of your Walking Taco Casserole!
Expert Tips for Walking Taco Casserole
-
Quality Meat: Use lean ground beef or chicken for a savory flavor. Ensure it’s fully browned for the best texture and taste.
-
Layer Wisely: Spread refried beans evenly and don’t skip the sour cream; it adds creaminess that balances the spices in the ground meat.
-
Chip Choice: Opt for your favorite corn chips; nacho-flavored chips can add an extra kick of flavor—but be cautious with varied seasonings if serving kids!
-
Moisture Check: If the casserole seems dry during baking, cover with foil to trap moisture or add extra cheese for a gooey finish.
-
Topping Freedom: Encourage everyone to customize their portions with toppings like jalapeños and olives, making the Walking Taco Casserole a fun, interactive meal.
-
Make-Ahead: This casserole can be prepared in advance and frozen. Just assemble, freeze, then thaw overnight before baking for an easy weeknight dinner!
Make Ahead Options
These Walking Taco Casserole preparations are perfect for busy home cooks looking to save time during the week! You can assemble the casserole and refrigerate it for up to 24 hours before baking. Simply follow the recipe instructions up to step 6, cover the dish tightly with plastic wrap or foil to maintain moisture and prevent browning. When you’re ready to serve, remove the cover and bake it directly from the fridge, adding an extra 5-10 minutes to the cooking time to ensure everything heats through thoroughly. This way, you can enjoy a deliciously comforting meal with minimal effort on hectic nights!
Walking Taco Casserole Variations
Feel free to get creative with this delightful dish by tailoring it to your taste buds!
-
Turkey Swap: Replace beef with ground turkey for a leaner option that maintains flavor.
-
Vegetarian Delight: Use sautéed bell peppers, zucchini, or mushrooms in place of meat for a hearty veggie twist. It’s just as filling!
-
Cheese Change: Experiment with pepper jack cheese for an exciting spicy kick that will add an extra dimension of flavor.
-
Bean Bonanza: Substitute refried beans with black beans or pinto beans to mix up the texture while still packing in protein.
-
Flavorful Chips: Switch to spicy nacho chips for added zest or even use sweet potato chips for a unique twist.
-
Zesty Toppings: Add chopped avocado, pico de gallo, or fresh cilantro on top for a bright and fresh finish.
-
Dairy-Free Option: Swap sour cream with dairy-free yogurt and use a plant-based cheese to make it allergen-friendly.
-
Heat Lovers: Mix diced jalapeños or a few dashes of hot sauce into the meat mixture for an added kick that will excite your taste buds!
Every variation adds a new layer of joy to your Walking Taco Casserole, and each bite promises to be deliciously unique!
Walking Taco Casserole Recipe FAQs
Are there specific types of chips I should use for my Walking Taco Casserole?
Absolutely! You can use any corn chips you love, whether it’s classic Doritos, plain tortilla chips, or Fritos. Each type adds a unique flavor and crunch to the casserole. If you’re feeling adventurous, nacho-flavored chips can give an additional kick!
How long can I store the Walking Taco Casserole in the fridge?
You can keep any leftovers in an airtight container for up to 3 days. Just reheat in the microwave or oven until heated through, and you’ll have a quick meal ready to go!
Can I freeze the Walking Taco Casserole? If so, how?
Yes, you can freeze it! To do so, assemble the casserole in a freezer-safe dish and wrap it securely to avoid freezer burn. It can last up to 3 months. When you’re ready to enjoy it, thaw overnight in the fridge before baking according to the original recipe instructions for a delightful, bubbly end result.
What if my casserole looks dry while baking?
If you find the top of your casserole appears too dry during baking, cover it with foil for part of the baking time to trap moisture. You could also sprinkle some extra cheese on top prior to placing it in the oven, which will help retain that gooey texture we all love!
Are there any dietary considerations for the Walking Taco Casserole?
Yes! This recipe is versatile enough to cater to different dietary needs. For those with lactose intolerance, you can substitute sour cream with Greek yogurt or a dairy-free alternative. If you’re vegetarian, use plant-based meat substitutes or simply add more beans and veggies to keep it satisfying and hearty for everyone!

Delicious Walking Taco Casserole for Fun Family Dinners
Ingredients
Equipment
Method
- Preheat your oven to 350°F (175°C) and grease a 9x13-inch baking dish.
- In a skillet over medium-high heat, heat the oil and cook the chopped onions with kosher salt until golden brown, about 7-10 minutes. Add minced garlic and sauté for 1 additional minute.
- Add ground beef (or chicken) and taco seasoning to the onion mixture. Stir and cook until browned, about 10 minutes.
- Spread refried beans evenly across the bottom of the greased baking dish.
- Layer half of the corn chips over the beans, followed by the meat mixture. Dollop sour cream over this layer and finish with shredded cheese.
- Bake in the preheated oven for about 20 minutes, until cheese is melted and casserole is bubbly.
- Cool slightly before garnishing. Add toppings and serve with remaining corn chips.

