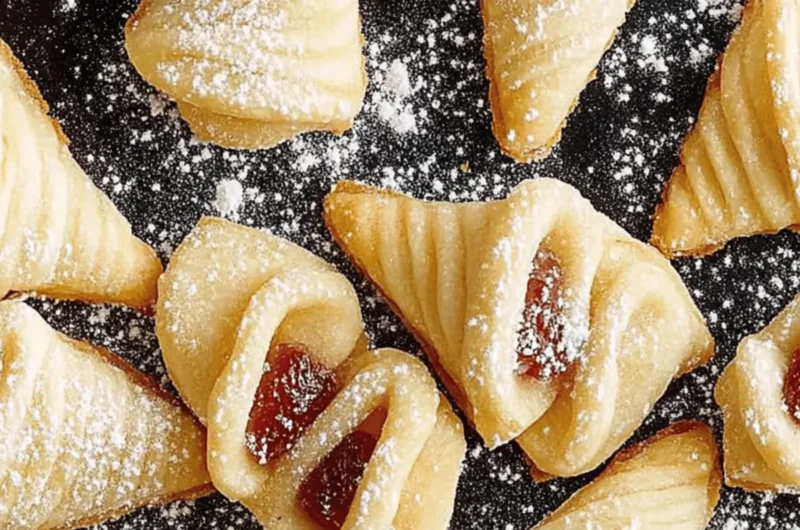
As the festive season approaches, I find myself drawn to the kitchen, craving the familiar scent of sweet treats that once filled my grandmother’s home. This year, I’m excited to share one of my all-time favorites: Italian Horn Cookies. Picture this: delicate, flaky pastries cradling a luscious cherry filling, their golden-brown edges inviting you to take a bite. The moment you sink your teeth in, the buttery goodness melds perfectly with the slightly tangy sweetness of the cherries, creating a harmonious symphony of flavors.
This traditional recipe is a delightful canvas for creativity, allowing you to experiment with various fruit fillings or even add a touch of nuts for crunch. Whether you’re planning a family gathering or simply want to elevate your afternoon tea, these cookies are guaranteed to impress. So, roll up your sleeves and prepare to indulge in the joy of baking these irresistible Italian Horn Cookies, a delightful addition to your culinary repertoire!
Why are Italian Horn Cookies a must-try?
Indulge in a classic treat that showcases the rich, buttery flavor of traditional Italian baking.
Light and Flaky textures make each bite a delightful experience.
Customizable with various fruit fillings, these cookies adapt to your tastes beautifully.
Perfect for Sharing, they add a touch of elegance to any gathering or festive celebration.
Quick to Prepare, this recipe lets you make impressive desserts without the fuss.
With their irresistible charm, Italian Horn Cookies will captivate friends and family alike!
Italian Horn Cookies Ingredients
Get ready to create these exquisite pastries with simple yet delightful ingredients!
For the Dough
- Butter – Provides richness and flakiness; use cold, cubed butter for the best texture.
- All-Purpose Flour – Forms the structure of the cookies; make sure it’s sifted to keep the dough light and airy.
- Vanilla Ice Cream – Adds sweetness and moisture; swap for non-dairy alternatives for a lactose-free option if needed.
For the Filling
- Cherry Cake and Pastry Filling – Offers a fruity burst in each bite; feel free to use your favorite fruit preserve for a personal touch!
For Sprinkling and Dusting
- Sugar – For sprinkling on top before baking, enhancing sweetness and texture; add this for a delightful crunch.
- Confectioners’ Sugar – Optional dusting for serving, providing a touch of sweetness and visual appeal that elevates your presentation.
How to Make Italian Horn Cookies
-
Cut cold butter into the sifted flour using a pastry cutter or your fingertips until coarse crumbs form in a large bowl. This butter-flour mixture is the first step to achieving that flaky texture we love.
-
Mix in the softened vanilla ice cream until well combined, ensuring there are no lumps. This creamy addition not only adds sweetness but also contributes moisture to the dough.
-
Divide the dough into four equal portions, cover with plastic wrap, and refrigerate for 2 hours. Chilling the dough helps maintain its integrity for rolling out perfectly.
-
Preheat your oven to 350°F (175°C). This warm-up is essential for even baking, ensuring those delightful cookies become light brown and perfectly flaky.
-
Roll out each chilled dough portion on a floured surface until about 1/8-inch thick. Aim for a nice even thickness to keep a uniform texture as they bake.
-
Cut the rolled dough into 2-inch squares and place about ½ teaspoon of cherry filling in the center of each square. The filling is the star, so don’t skimp on it!
-
Fold over opposite corners of each square to seal the filling inside, pinching the edges to ensure they stay closed during baking. Sprinkle the tops with sugar for a delightful crunch.
-
Bake on ungreased baking sheets for 10-12 minutes until the bottoms are a light golden brown. Keep an eye on them towards the end of baking for that perfect color!
-
Cool on wire racks once done and dust with confectioners’ sugar before serving, if desired, for an elegant finish that adds sweetness and visual appeal.
Optional: Serve with a hot cup of coffee or tea for a delightful pairing.
Exact quantities are listed in the recipe card below.
Italian Horn Cookies Variations
Feel free to get creative with these Italian horn cookies and discover delightful twists that excite your taste buds!
-
Fruit Filling Substitutes: Swap cherry filling for apricot, raspberry, or even peach for a fresh burst of flavor. Each fruit brings its unique sweetness, transforming your cookies into new sensations.
-
Nutty Additions: Stir in finely chopped nuts like almonds or hazelnuts into your filling. This adds a pleasant crunch and elevates the flavor profile, making each cookie even more indulgent.
-
Chocolate Twist: Incorporate chocolate chips into your dough for a richer treat. The chocolate beautifully complements the fruit filling, offering a decadent option that chocolate lovers will adore.
-
Flavored Ice Cream: Use flavored ice creams like pistachio or coffee instead of vanilla for a distinct twist. Each flavor will add a unique character to the cookies, making them a fun surprise with every bite.
-
Spiced Variation: Add a pinch of cinnamon or nutmeg to the dough for a warm, spicy nuance. These spices enhance the buttery richness and provide a cozy flavor perfect for the holidays.
-
Dairy-Free Delight: Substitute the butter with coconut oil and the ice cream with a non-dairy alternative. This guarantees a deliciously flaky texture while catering to a lactose-free diet.
-
Zesty Infusion: Mix in some lemon or orange zest into the filling for a bright, citrusy kick. This unexpected burst of flavor will freshen the taste and create a lively contrast with the sweetness.
-
Miniature Cookies: Shape the cookies into smaller versions for bite-sized treats. They’re perfect for sharing and allow everyone to indulge without feeling guilty!
Storage Tips for Italian Horn Cookies
-
Room Temperature: Store Italian Horn Cookies in an airtight container at room temperature for up to 1 week to maintain their delightful texture and flavor.
-
Refrigerator: If you need to store them longer, place the cookies in the fridge for up to 2 weeks. Just be sure to let them come to room temperature before serving for the best taste.
-
Freezer: Freeze the cookies in a single layer on a baking sheet, then transfer to an airtight container or freezer bag for up to 3 months. Thaw at room temperature before enjoying.
-
Dough Make-Ahead: You can also prepare the dough ahead of time! Keep it wrapped in plastic in the refrigerator for 1-2 days before rolling and baking for fresh Italian Horn Cookies whenever you desire.
What to Serve with Italian Horn Cookies?
These delightful pastries are a charming addition to any dessert table and pair beautifully with a variety of treats and drinks.
- Fresh Berries: Adds a burst of natural sweetness and bright acidity that complements the cherry filling perfectly.
- Homemade Whipped Cream: A dollop of light whipped cream enhances the richness of the cookies, making every bite even more luxurious.
Indulging in Italian Horn Cookies with a side of fresh berries will elevate your dessert experience. The contrast of flavors creates a beautiful harmony on the palate, ensuring there’s always something delightful cascading through each morsel.
- Classic Italian Espresso: The strong, rich flavor of espresso is the perfect counterpart to the sweet and flaky cookies, creating a delightful finish to your meal.
- Decadent Chocolate Sauce: Drizzling chocolate sauce over these cookies adds a new layer of flavor, combining fruity and rich elements for a truly indulgent treat.
For a festive gathering, pairing these cookies with a cup of classic Italian espresso will transport your taste buds to a charming café in Italy. Imagine savoring these cookies while enjoying the ambiance of lively conversations and laughter—it’s a moment worth cherishing!
- Pinot Grigio: This light-bodied wine has crisp acidity and gentle fruit notes that will complement the cookies’ sweetness without overwhelming them.
- Vanilla Ice Cream: A scoop of creamy vanilla ice cream provides a cool contrast to the warm, flaky pastries, turning dessert into a delightful sundae experience.
An enchanting dessert experience can be effortlessly created by serving Italian Horn Cookies alongside a scoop of vanilla ice cream. The contrast between the temperatures adds a delightful twist, leaving everyone reaching for one more bite!
Expert Tips for Italian Horn Cookies
-
Chill the Dough: Always ensure the dough is well-chilled before rolling. This step is crucial for maintaining a flaky texture and preventing it from sticking.
-
Don’t Overfill: Avoid the common mistake of overfilling the cookies. A little filling goes a long way; aim for just ½ teaspoon to prevent bursts during baking.
-
Sift Your Flour: For the best results in your Italian Horn Cookies, sifting the flour keeps the dough light and airy, leading to that perfect flaky texture.
-
Even Thickness: When rolling out the dough, aim for an even thickness of 1/8-inch. This uniformity ensures even baking and a consistently delightful bite.
-
Use Quality Fillings: Opt for high-quality cherry filling or fruit preserves. The flavor of your filling is what will really shine through in these lovely cookies!
Make Ahead Options
These Italian Horn Cookies are perfect for meal prep enthusiasts looking to save time! You can prepare the dough up to 3 days in advance; simply follow the initial steps, then wrap the formed dough portions tightly in plastic wrap and refrigerate. This chilling process not only keeps the dough fresh but also enhances its flavor and texture. When you’re ready to bake, roll out the dough, fill with your cherry filling, and seal as directed. Bake straight from the fridge for the same delicious results! Ensure they cool completely before storing in an airtight container to maintain their delightful flakiness. Enjoy these elegant treats with minimal effort during your busy days!
Italian Horn Cookies Recipe FAQs
What type of butter should I use for Italian Horn Cookies?
I recommend using cold, unsalted butter for the best results. Cold butter helps achieve the light and flaky texture that makes these cookies so delightful. Make sure to cut it into the flour to form coarse crumbs for that beautiful pastry outcome.
How should I store Italian Horn Cookies?
To maintain their delicious texture, store your Italian Horn Cookies in an airtight container at room temperature for up to 1 week. If you wish to keep them longer, you can refrigerate them for up to 2 weeks, just let them come to room temperature before serving for the best flavor.
Can I freeze Italian Horn Cookies?
Absolutely! To freeze, place the cookies in a single layer on a baking sheet and freeze until solid. Then transfer them to an airtight container or freezer bag, where they can be stored for up to 3 months. When you’re ready to enjoy them, simply thaw at room temperature for that freshly baked taste.
What should I do if my dough is too sticky?
If your dough feels sticky while rolling it out, you can sprinkle a little more flour on your work surface and on the dough itself to make it easier to handle. Chilling the dough again for 15-30 minutes can also help firm it up and prevent stickiness.
Can I use other fillings besides cherry?
Absolutely! The beauty of Italian Horn Cookies lies in their versatility. Feel free to substitute the cherry filling with other fruit preserves, like apricot, raspberry, or even a nutty filling for a different twist. Just ensure that whatever filling you choose is not too watery, as moisture can make the cookies soggy.
Are Italian Horn Cookies suitable for people with allergies?
These cookies contain common allergens such as gluten and dairy. If you want to make them suitable for those with dietary restrictions, consider swapping the all-purpose flour for a gluten-free blend and using a dairy-free ice cream. Always double-check ingredient labels to ensure they’re safe for your loved ones!
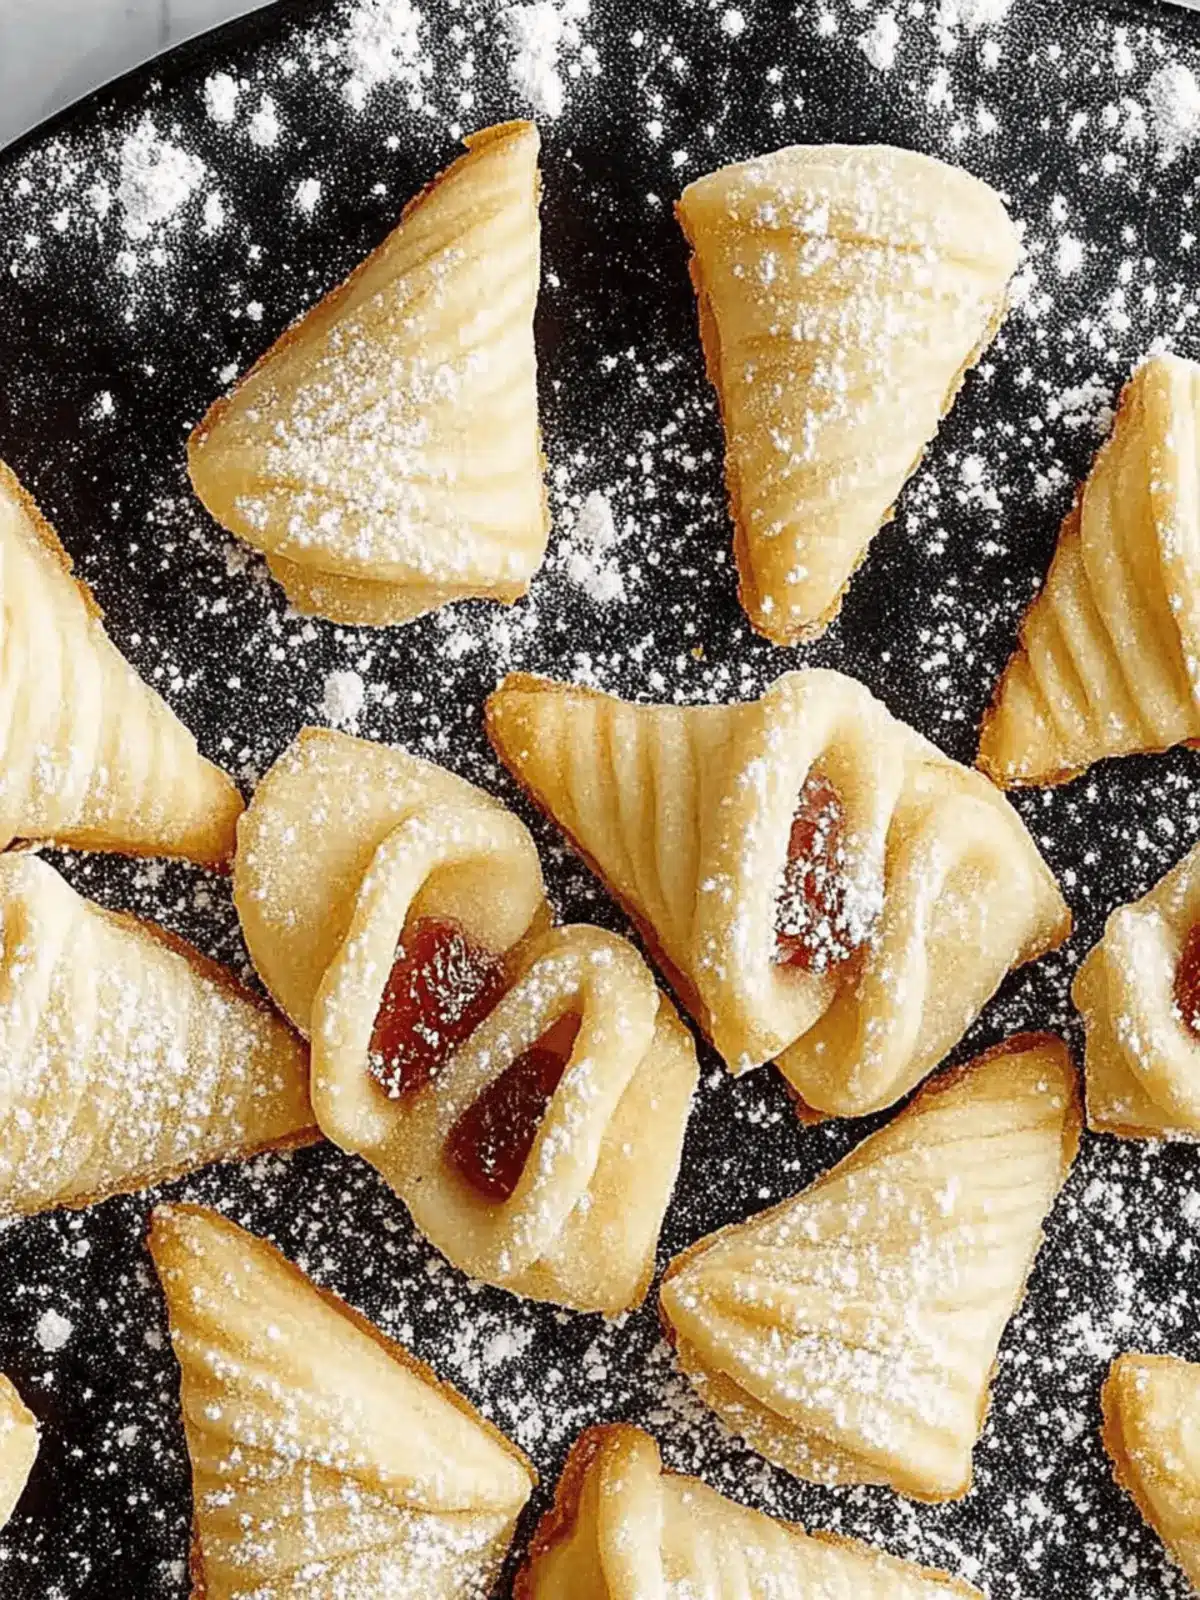
Delicious Italian Horn Cookies with Sweet Cherry Filling
Ingredients
Equipment
Method
- Cut cold butter into the sifted flour using a pastry cutter until coarse crumbs form.
- Mix in the softened vanilla ice cream until well combined.
- Divide the dough into four portions, cover with plastic wrap, and refrigerate for 2 hours.
- Preheat your oven to 350°F (175°C).
- Roll out each chilled dough portion on a floured surface until about 1/8-inch thick.
- Cut the rolled dough into 2-inch squares and place about ½ teaspoon of cherry filling in the center.
- Fold over opposite corners of each square to seal the filling, pinching the edges closed.
- Sprinkle the tops with sugar for added crunch.
- Bake on ungreased baking sheets for 10-12 minutes until the bottoms are light golden brown.
- Cool on wire racks and dust with confectioners' sugar before serving.

