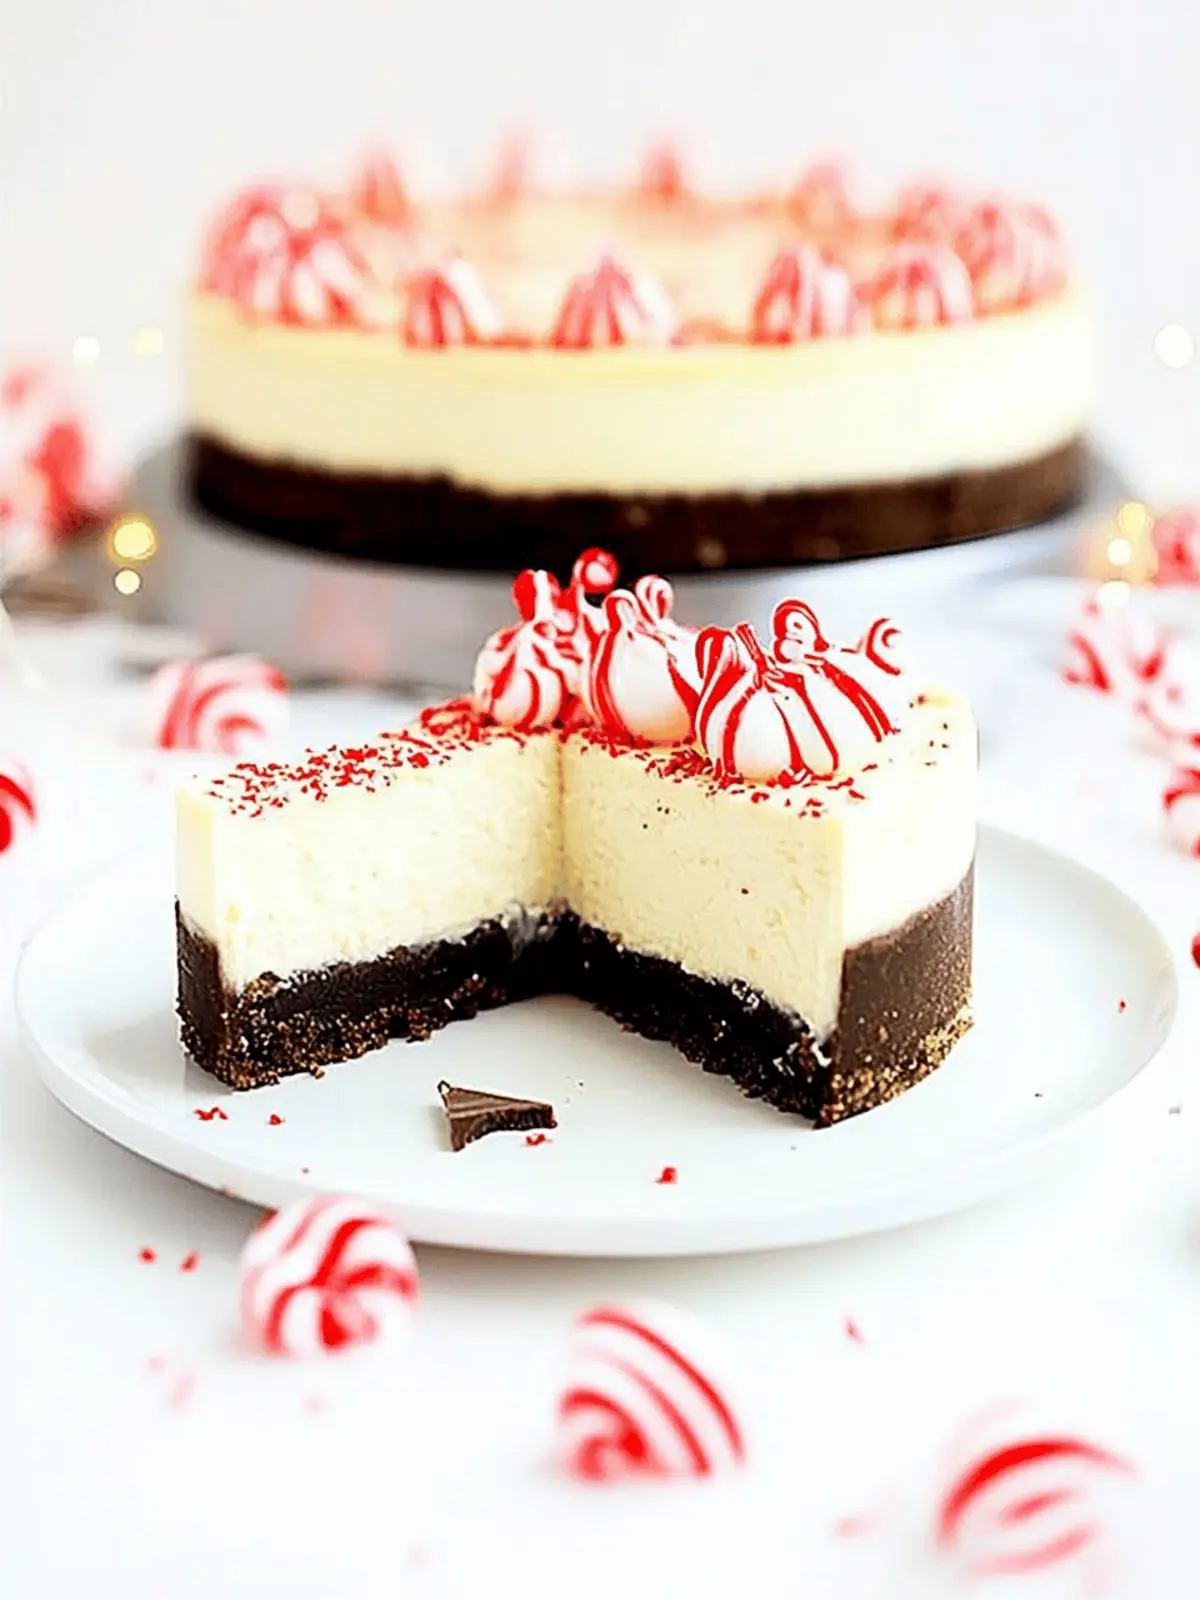
There’s something truly enchanting about the holidays—especially when the air is filled with the refreshing scent of peppermint mixed with the rich sweetness of white chocolate. I first embraced this flavor combination while hosting a cozy gathering with friends, and the moment I set this Instant Pot White Chocolate Peppermint Cheesecake on the table, it was love at first bite! This dessert doesn’t just delight your palate; it also brings an elegant touch to any occasion, all without requiring hours of slaving away in the kitchen.
What I love most about this recipe is how effortless it is, thanks to the Instant Pot. You get that creamy, melt-in-your-mouth cheesecake texture while saving time, allowing you to focus on what truly matters—your loved ones. Perfect for any holiday celebration or simply when you need a sweet escape from your week, this delightful cheesecake has quickly become a crowd favorite in my home. Let’s dive into the recipe and transform your dessert game!
Why is Instant Pot White Chocolate Peppermint Cheesecake so irresistible?
Decadent flavors come alive with rich white chocolate and refreshing peppermint, creating an unforgettable dessert experience.
Time-saving preparation means you can whip up this showstopper in a fraction of the time compared to traditional baking methods, perfect for busy individuals.
Creamy texture ensures each bite melts in your mouth, making it a delight for cheesecake lovers.
Versatile dessert that’s ideal for holidays, gatherings, or an indulgent treat anytime!
Crowd-pleasing appeal will impress family and friends, leaving them asking for seconds.
Instant Pot White Chocolate Peppermint Cheesecake Ingredients
For the Crust
• Chocolate Sandwich Cookies – scrape out the filling to achieve a perfectly crumbly crust.
• Sugar – a little sweetness to balance the chocolatey crunch.
• Butter – melted to help bind the crust for a delightful base.
For the Cheesecake Filling
• Cream Cheese – using room temperature cream cheese ensures a silky smooth texture.
• Sugar – adds the right amount of sweetness to the creamy filling.
• Vanilla – a splash of pure vanilla elevates the flavor profile.
• White Chocolate Chips – melted down to bring a rich, creamy sweetness to your cheesecake.
• Heavy Cream – contributes to a luscious mouthfeel; ensure it’s at room temperature for easier mixing.
• Peppermint Extract – provides that delightful holiday twist, making this cheesecake simply unforgettable!
• Sour Cream – adds a subtle tang that balances the sweetness beautifully.
• Corn Starch – this helps stabilize the cheesecake, ensuring it sets to perfection.
• Eggs – using room temperature eggs yields a better texture in the final product.
Optional Toppings
• Chocolate Chips (semi-sweet) – for those who want a chocolatey punch; totally optional but highly recommended.
• Heavy Cream (for ganache) – combines with chocolate chips to create a rich, drizzled topping for added decadence.
With these carefully selected ingredients, your Instant Pot White Chocolate Peppermint Cheesecake will be a showstopping dessert that everyone will love!
How to Make Instant Pot White Chocolate Peppermint Cheesecake
-
Prepare Pan: Spray a 7 or 8-inch cheesecake pan with baking spray. For a 2-inch high or 6-inch pan, line the sides with parchment paper, ensuring it stands above the rim by at least 2 1/2 inches.
-
Add Water: Pour 1 1/2 cups of water into the inner liner of your pressure cooker and place the trivet inside.
-
Create Sling: Fold a 28-inch length of aluminum foil along the long end three times to create a sling, which will help lift the cheesecake in and out of the pot effortlessly.
-
Make Crust: In a food processor, discard the filling from the chocolate sandwich cookies. Add sugar and pulse until they turn into fine crumbs, then mix in melted butter until well combined.
-
Chill Crust: Pour the crust mixture into the prepared pan, pressing it evenly across the bottom and sides for a thickness of about ¼ inch. Place the pan in the freezer to chill while preparing the filling.
-
Blend Filling: Clean your food processor, then add cream cheese, sugar, and vanilla. Process until smooth and creamy, creating the base for your delicious cheesecake.
-
Melt Chocolate: In a microwave-safe bowl, combine white chocolate chips and heavy cream. Heat for 25 seconds, stir, repeat until creamy. Let cool to lukewarm, then mix in the sour cream.
-
Combine Mixtures: Pour the cooled white chocolate mixture into the cream cheese mixture, followed by adding peppermint extract and cornstarch. Pulse together until everything is smooth and creamy.
-
Add Eggs: Carefully add the eggs to the cream cheese mixture, pulsing just until combined to avoid overmixing, which can affect texture.
-
Pour Filling: Carefully pour the cheesecake filling into the chilled crust. Cover the pan with a paper towel, then tightly with foil, crimping the edges to seal.
-
Lift into Cooker: Set the pan on the sling and gently lift it into the pressure cooker, folding the sling ends over the pan to prevent water from entering.
-
Cook Cheesecake: Close the lid, set the steam vent to the sealing position, and cook on high pressure for 45 minutes.
-
Release Pressure: Once cooking is complete, let the cooker naturally release pressure until the pin drops. Allow the cheesecake to rest in the pot for an additional 10 minutes.
-
Check Doneness: Ensure the cheesecake jiggles slightly for a perfect finish. If too loose, cover and cook for an additional 5 minutes, allowing a natural release of 15 minutes afterwards.
-
Cool Down: Remove the cheesecake from the pot and allow it to cool at room temperature for one hour. Then, refrigerate for at least 4 hours before serving for the best texture.
-
Optional Ganache: For a delightful chocolate ganache topping, combine chocolate chips and heavy cream in a microwave-safe bowl. Heat for 25 seconds, stir well, and repeat until creamy. Drizzle over the cooled cheesecake and let set in the refrigerator.
Optional: Garnish with crushed peppermint candies for a festive touch!
Exact quantities are listed in the recipe card below.
What to Serve with Instant Pot White Chocolate Peppermint Cheesecake?
Enhance your dessert experience with these delightful accompaniments that create a well-rounded meal or sweet spread.
-
Fresh Berries: The tartness of strawberries or raspberries beautifully balances the rich sweetness of cheesecake, adding a refreshing pop of color.
-
Whipped Cream: Fluffy, cloud-like cream complements the density of the cheesecake, offering a light texture that contrasts wonderfully with each creamy bite.
-
Peppermint Mocha: A warm cup of this festive beverage echoes the peppermint flavor, creating a cozy dessert pairing that’s perfect for holiday gatherings.
-
Chocolate Ganache: Drizzling rich chocolate ganache over the cheesecake elevates the presentation and intensifies the chocolatey goodness—always a crowd-pleaser!
-
Gingerbread Cookies: Their spicy crunch adds a delightful texture while complementing the holiday flavors, making for a charming dessert platter.
-
Mint Chocolate Ice Cream: A scoop of cooling ice cream brings extra sweetness and contrast, making each bite of cheesecake even more indulgent.
-
Cranberry Sauce: A dollop of tangy-sweet cranberry sauce introduces acidity that cuts through the creaminess, making this dessert feel even more festive.
-
Espresso: A shot of strong espresso or a rich cappuccino provides a perfect end to your meal, enhancing the flavors of white chocolate while keeping you cozy.
How to Store and Freeze Instant Pot White Chocolate Peppermint Cheesecake
Fridge: Store leftover cheesecake in an airtight container in the refrigerator for up to 5 days. This ensures the flavors remain vibrant while keeping the cheesecake fresh.
Freezer: If you need to store it for longer, you can freeze the cheesecake for up to 3 months. Wrap it tightly in plastic wrap and aluminum foil to prevent freezer burn.
Thawing: To enjoy the cheesecake after freezing, transfer it to the fridge and let it thaw overnight. This allows the flavors to meld beautifully as it returns to the perfect creamy texture.
Reheating: Should you want to enjoy a warm slice, gently reheat individual portions in the microwave for about 10-15 seconds, making sure to keep the cheesecake moist.
Instant Pot White Chocolate Peppermint Cheesecake Variations
Feel free to get creative and customize this delightful cheesecake to suit your taste buds!
-
Gluten-Free: Substitute chocolate sandwich cookies with gluten-free cookies to create a gluten-friendly crust that’s just as delicious.
-
Vegan: Use dairy-free cream cheese and coconut cream in place of heavy cream and sour cream for a vegan-friendly option without sacrificing taste.
-
Flavor Infusion: Try swapping peppermint extract with a splash of orange or almond extract for a unique flavor profile that surprises and delights.
-
** salted Caramel:** Drizzle salted caramel sauce over the cheesecake before chilling for a rich and contrasting flavor explosion that everyone will love.
-
Chocolate Lovers: Add ½ cup of dark chocolate chips in the filling for an extra layer of chocolatey goodness that takes your cheesecake to the next level.
-
Nuts & Crunch: Fold in chopped pecans or crushed toffee bits into the cheesecake filling for a delightful crunch and depth of flavor.
-
Spicy Twist: Include a pinch of cayenne pepper or crushed red pepper flakes for a surprising kick that contrasts beautifully with the sweetness.
-
Festive Finish: Top with a dusting of crushed candy canes or a sprinkle of cocoa powder for a festive garnish that looks as good as it tastes!
Expert Tips for Instant Pot White Chocolate Peppermint Cheesecake
-
Room Temperature Ingredients: Ensure cream cheese, eggs, and heavy cream are at room temperature. This helps achieve a smooth, creamy filling without lumps.
-
Avoid Overmixing: When adding eggs, pulse just until integrated. Overmixing can lead to a cheesecake that cracks. Keep it gentle for that perfect Instant Pot White Chocolate Peppermint Cheesecake.
-
Proper Cooling: Allow the cheesecake to cool in the pot for the right amount of time. This prevents sudden temperature changes that can cause cracks.
-
Check Water Levels: Always double-check that you’ve included the required water in the inner liner of the pressure cooker to avoid any steaming issues.
-
Use a Sling: Creating a foil sling helps in lifting the cheesecake in and out of the Instant Pot with ease, making your cooking experience much smoother.
Make Ahead Options
These Instant Pot White Chocolate Peppermint Cheesecake components are perfect for meal prep, saving you time and effort on busy days! You can prepare the crust and cheesecake filling up to 24 hours in advance. Simply make the crust as directed, press it into the pan, cover tightly with plastic wrap, and refrigerate. Prepare the filling and store it in an airtight container in the fridge. When you’re ready to cook, pour the filling into the chilled crust, cover the pan, and follow the cooking instructions as usual. This way, you’ll have a luscious cheesecake that’s just as delicious, while keeping your prep stress-free and efficient!
Instant Pot White Chocolate Peppermint Cheesecake Recipe FAQs
What type of chocolate sandwich cookies work best for the crust?
For the crust of your Instant Pot White Chocolate Peppermint Cheesecake, I suggest using classic chocolate sandwich cookies like Oreos. They provide a rich chocolate flavor that pairs beautifully with the white chocolate filling. Make sure to scrape out the filling to avoid an overly sweet crust!
How should I store leftover cheesecake?
After you’ve savored your delicious cheesecake, store any leftovers in an airtight container in the refrigerator. It will stay fresh for up to 5 days. To prevent it from drying out, consider covering it lightly with plastic wrap, too—trust me, you’ll want to keep those flavors vibrant!
Can I freeze the cheesecake for later enjoyment?
Absolutely! You can freeze your cheesecake for up to 3 months. To do this, slice the cheesecake into desired portions and wrap each piece tightly in plastic wrap, followed by aluminum foil. This prevents freezer burn and helps keep it fresh. Just make sure to label them so you know what scrumptious dessert awaits you!
What if my cheesecake looks undercooked after cooking?
If you find that the cheesecake jiggles too much when you check for doneness, don’t panic! Cover it back up and cook it for an additional 5 minutes on high pressure, allowing a natural release for about 15 minutes afterward. It’s all about finding that perfect level of creaminess—so keep an eye on it!
Are there any allergy considerations for this cheesecake recipe?
Yes! This Instant Pot White Chocolate Peppermint Cheesecake contains common allergens such as dairy (cream cheese, heavy cream), eggs, and gluten (from the cookies). If you have guests with dietary restrictions, consider using gluten-free cookies and dairy alternatives to ensure everyone can enjoy this delightful dessert. Always double-check ingredient labels to be safe!
How long should I leave the cheesecake to cool before refrigerating?
After removing the cheesecake from the Instant Pot, let it cool at room temperature for about an hour. This gradual cooling helps maintain the cheesecake’s texture and prevents cracking. Then, transfer it to the fridge for a minimum of 4 hours—this waiting game is well worth it when it comes to that creamy, tangy flavor!

Decadent Instant Pot White Chocolate Peppermint Cheesecake Bliss
Ingredients
Equipment
Method
- Spray a 7 or 8-inch cheesecake pan with baking spray. Line the sides with parchment paper if using a 2-inch high pan.
- Pour 1 1/2 cups of water into the inner liner of your pressure cooker and place the trivet inside.
- Fold a 28-inch length of aluminum foil along the long end three times to create a sling.
- In a food processor, discard the filling from the chocolate sandwich cookies. Add sugar and pulse until they turn into fine crumbs, then mix in melted butter until well combined.
- Pour the crust mixture into the prepared pan, pressing it evenly across the bottom and sides.
- Place the pan in the freezer to chill while preparing the filling.
- Clean your food processor, then add cream cheese, sugar, and vanilla. Process until smooth and creamy.
- In a microwave-safe bowl, combine white chocolate chips and heavy cream, heat for 25 seconds, stir, repeat until creamy. Let cool and then mix in the sour cream.
- Pour the cooled white chocolate mixture into the cream cheese mixture, add peppermint extract and cornstarch. Pulse until smooth.
- Carefully add the eggs, pulsing just until combined to avoid overmixing.
- Carefully pour the cheesecake filling into the chilled crust. Cover with a paper towel and then tightly with foil.
- Set the pan on the sling and lift it into the pressure cooker, folding the sling ends over the pan.
- Close the lid, set the steam vent to sealing position, and cook on high pressure for 45 minutes.
- Once cooking is complete, let the cooker naturally release pressure until the pin drops, then let rest in the pot for an additional 10 minutes.
- Ensure the cheesecake jiggles slightly for perfect doneness. If too loose, cover and cook for an additional 5 minutes.
- Remove the cheesecake from the pot and allow it to cool at room temperature for one hour before refrigerating for at least 4 hours.
- For a chocolate ganache topping, combine chocolate chips and heavy cream in a microwave-safe bowl. Heat for 25 seconds, stir, and repeat until creamy. Drizzle over the cooled cheesecake.

