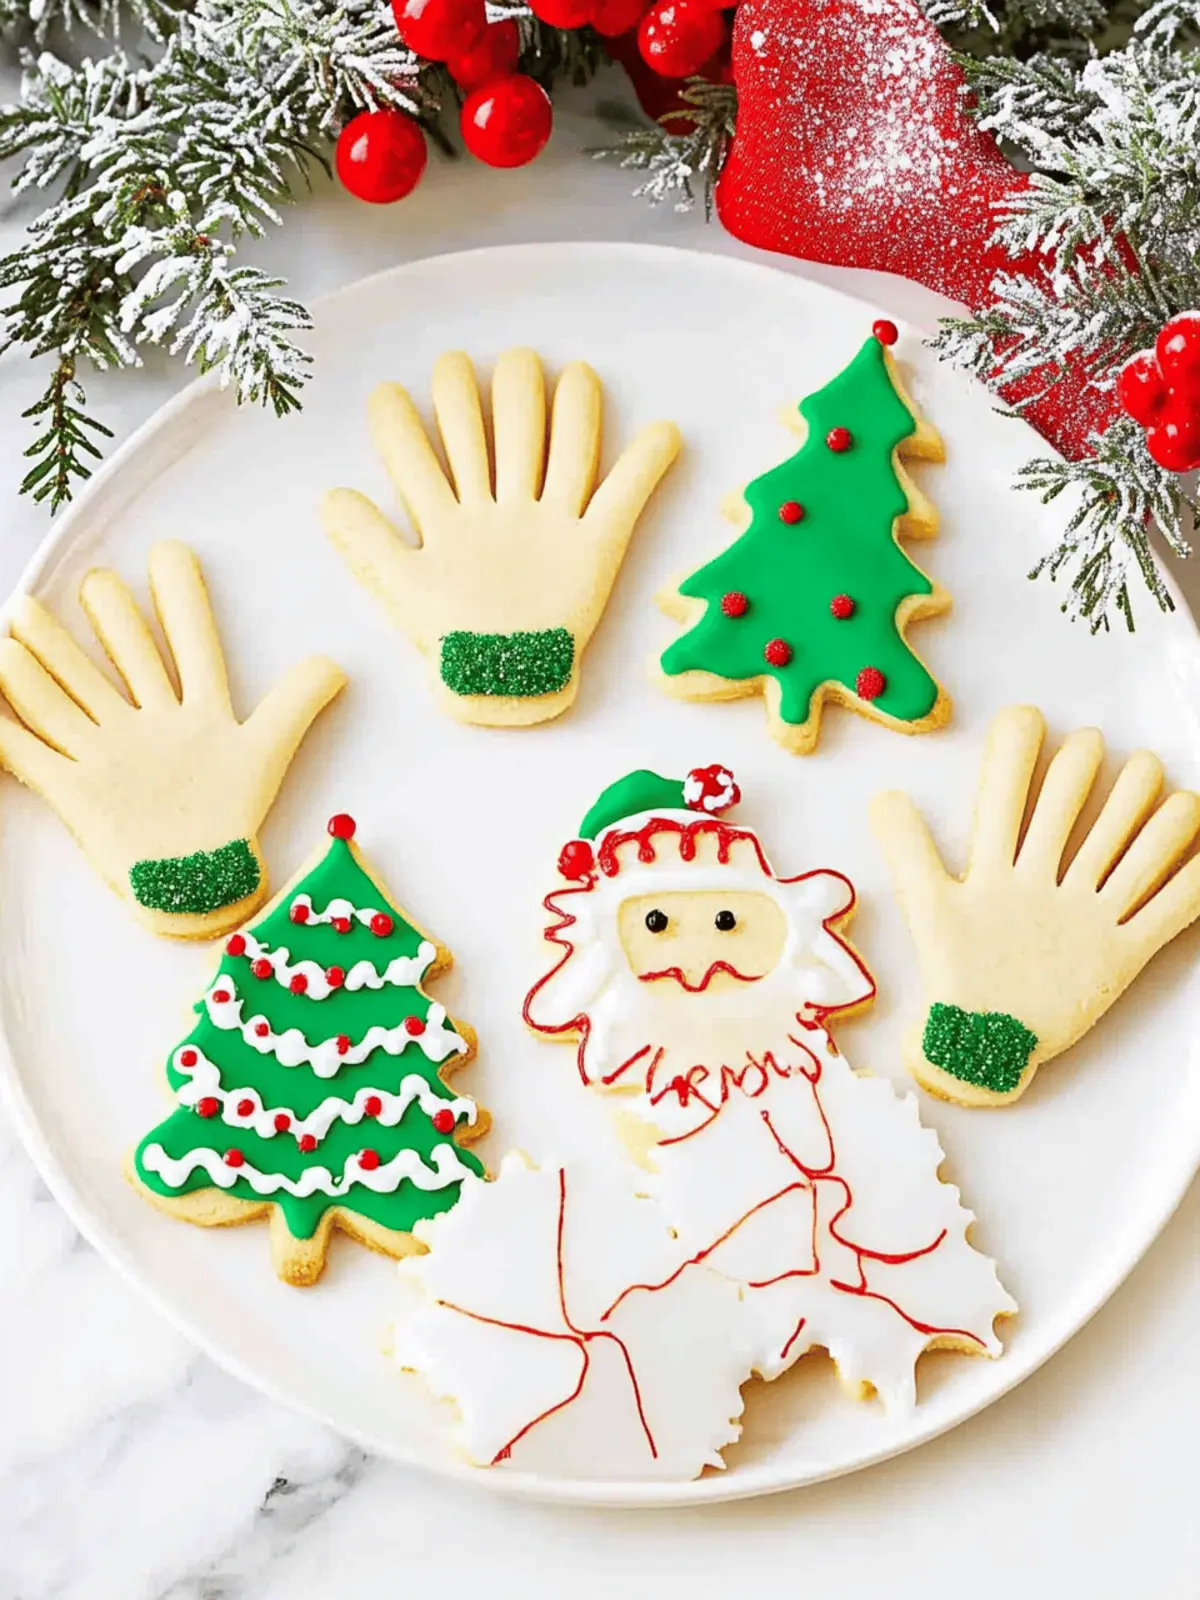
There’s a certain joy in baking that transforms an ordinary afternoon into a cherished family memory, especially during the holidays. Picture this: the laughter of kids echoing through the kitchen as they press their little hands onto soft, buttery dough, creating delightful Handprint Sugar Cookies. This isn’t just any cookie; it’s a canvas for creativity, turning simple ingredients into festive masterpieces. With vibrant icing and playful decorations, these cookies become more than just treats—they’re a celebration of togetherness.
As the aroma of these cookies bakes in the oven, you can’t help but smile, thinking of the little hands that crafted them. This recipe is perfect for kids of all ages and requires no eggs, making it super simple and stress-free. Whether you’re looking for a fun holiday activity or an adorable addition to your party table, these adorable Handprint Sugar Cookies will surely become a beloved tradition. Let’s dive into this sweet adventure and bring some holiday cheer into your home!
Why will you love these Fun Christmas Cookies?
Delightful engagement: Watching kids imprint their hands on dough turns baking into joyful artistry.
No eggs required: These Handprint Sugar Cookies are simple and worry-free, making them perfect for little chefs!
Endless creativity: Use colorful icing and sprinkles to create unique designs for all occasions.
Quick cleanup: Easy-to-follow instructions mean you’ll spend more time enjoying the fun and less time scrubbing!
Memorable tradition: Create lasting family memories every holiday season with this sweet, interactive activity.
Fun Christmas Cookies Ingredients
For the Cookie Base
- Unsalted Butter – Adds richness and moisture. Use salted butter for a salty-sweet contrast.
- Granulated Sugar – Provides sweetness and helps with browning. Brown sugar can add a softer texture.
- All-Purpose Flour – Main structure of the cookies. Gluten-free flour can substitute; expect slight texture changes.
- Kosher Salt – Enhances flavor balance. Table salt can be used; adjust quantity as needed.
For the Decoration
- Icing Tubes (red, white, green) – For easy decorating. Any color frosting works, but tubes are user-friendly for kids.
- Assorted Christmas Sprinkles – Adds festive flair and texture. Use any sprinkles available for decoration.
- Mini M&Ms/Cinnamon Imperials – For additional decoration and flavor. Chocolate chips can be an easier alternative.
- Googly Candy Eyes – Adds a fun touch for festive designs. Optional but enhances the appearance.
With these ingredients, you’re all set to create some delightful and fun Christmas cookies that are perfect for your holiday celebrations!
How to Make Handprint Sugar Cookies
- Prepare Dough: Cream the unsalted butter and granulated sugar in a large mixing bowl until fluffy and light in color. Slowly mix in all-purpose flour and kosher salt to form a smooth dough. Chill in the refrigerator for 20 minutes.
- Roll & Cut: After chilling, roll out the dough on a lightly floured surface until it’s about 3/8” thick. Use a parchment paper handprint template to cut out shapes that resemble little hands.
- Chill Again: Arrange the cutout cookies on a parchment-lined baking sheet, ensuring they have space between them. Chill for another 20 minutes to help them keep their shape while baking.
- Bake: Preheat your oven to 375°F (190°C). Bake the cookies for 15-20 minutes or until the edges are golden brown, and they’re fragrant and inviting.
- Cool: Allow the cookies to cool on the baking sheet for a few minutes before transferring them to a wire rack. Let them cool completely before decorating to keep the icing from melting.
Optional: Add a touch of festive appeal by drizzling extra icing over the top!
Exact quantities are listed in the recipe card below.
Expert Tips for Handprint Sugar Cookies
- Butter’s Temperature: Ensure your butter is softened to room temperature for easier mixing and a smoother dough texture.
- Chill Properly: Chilling the dough is essential to prevent spreading while baking. Don’t skip this step!
- Sharp Edges: Use a sharp knife to precisely define the handprint fingers for a clearer design.
- Icing Application: Avoid smudging the icing by letting cookies cool completely before decorating them.
- Decorative Options: Feel free to experiment with various colors and toppings for your Handprint Sugar Cookies to match themes or personal preferences!
Make Ahead Options
These delightful Handprint Sugar Cookies are perfect for meal prep and can save you time during the busy holiday season. You can prepare the dough up to 48 hours in advance; just wrap it tightly in plastic wrap or store it in an airtight container in the refrigerator. Additionally, after cutting the handprint shapes, chill them on the baking sheet and refrigerate for up to 24 hours before baking. This prevents the dough from spreading and ensures crisp edges. When you’re ready to bake, simply preheat your oven and follow the baking instructions. With these make-ahead tips, you’ll enjoy the joy of cookie decorating without the last-minute rush, keeping your holiday cheerful and stress-free!
Storage Tips for Handprint Sugar Cookies
- Room Temperature: Store cookies in an airtight container for up to 1 week. Ensure they are completely cool before sealing to maintain freshness.
- Fridge: If you want to extend freshness, place cookies in the fridge for up to 2 weeks. Just be sure to use an airtight container!
- Freezer: For longer storage, freeze cookies for up to 3 months. Wrap each cookie individually or layer them with parchment paper in an airtight container.
- Reheating: To enjoy frozen Handprint Sugar Cookies, thaw them in the fridge overnight, then bring to room temperature. If you want them warm, pop them in a preheated oven at 300°F (150°C) for about 5 minutes.
What to Serve with Handprint Sugar Cookies?
Discover delightful pairings that enhance the festive joy of your sweet creations.
- Hot Cocoa: A warm cup of rich hot cocoa adds a cozy touch that complements the sweetness of your cookies.
- Milk: Classic cold milk washes down the buttery flavor perfectly, making it an ideal companion for a nostalgic dessert experience.
- Fruit Salad: A refreshing mix of seasonal fruits balances the sweetness while adding a burst of color to your holiday spread.
- Cheese platter: A variety of cheeses provides a savory contrast to the sweet cookies, creating a well-rounded festive table.
- Christmas Punch: A fruity or spiced holiday punch adds a fun, festive sparkle to gatherings, enticing everyone to dig into those cookies!
- Gingerbread Cookies: Serve alongside for a delightful contrast in flavor and texture, perfect for indulging in a holiday cookie spread.
- Vanilla Ice Cream: A scoop of creamy vanilla ice cream pairs wonderfully, melting and soaking into the cookies for an indulgent treat.
- Spritz Cookies: Create a cute cookie platter with different textures and flavors by adding colorful spritz cookies, making the display even more festive!
- Decorated Sugar Cookies: Enhance the treat selection by adding some vibrant sugar cookies, inviting even more creativity to your holiday dessert table.
Handprint Sugar Cookies Variations
There’s something delightful about putting your own twist on a classic recipe!
- Gluten-Free: Use a gluten-free all-purpose flour blend, and enjoy the same sweet flavors without the gluten. Your loved ones won’t even notice the difference!
- Nutty Delight: Incorporate almond or hazelnut flour for a unique, nutty flavor that adds depth to these cookies. It’s a scrumptious twist that families adore!
- Milk Chocolate Drizzle: Instead of decorative icing, melt milk chocolate and drizzle it over the cooled cookies for a decadent touch. Sweeten the holiday spirit!
- Citrus Zest: Add a teaspoon of lemon or orange zest to the dough for a refreshing twist that brightens up the sweetness. It’s like a burst of sunshine!
- Spiced Up: Mix in a pinch of cinnamon or nutmeg to the dough for warm, holiday spiciness that envelops your taste buds. Perfect for cozy gatherings!
- Flavorful Extracts: Swap out vanilla extract for peppermint or almond extract to create unique flavor profiles that complement seasonal celebrations. It’s practically a festive explosion!
- Chewy Texture: Substitute half of the granulated sugar with brown sugar. This swap creates a slightly chewier texture that’s irresistibly satisfying!
- Festive Shapes: Instead of just handprints, use cookie cutters for stars, trees, or other fun holiday shapes to bring charm and variety to your cookie platter. Who doesn’t love choices?
Handprint Sugar Cookies Recipe FAQs
How do I select the best ingredients for my Handprint Sugar Cookies?
Absolutely! For the best flavor, ensure your unsalted butter is at room temperature for easy mixing. When choosing flour, aim for all-purpose flour for the best texture. If you’re looking for a gluten-free option, try a gluten-free all-purpose blend, but keep in mind that it may alter the cookie’s texture slightly. For the sweetest outcome, opt for granulated sugar; brown sugar is a wonderful alternative if you’re after a softer cookie.
How should I store my Handprint Sugar Cookies?
I recommend storing your cookies in an airtight container at room temperature for up to a week. Ensure they are completely cool before sealing to maintain that delightful freshness. If you plan to keep them longer, storing them in the fridge can extend their life to about 2 weeks, and an airtight container is a must!
Can I freeze my Handprint Sugar Cookies?
Absolutely! Freezing is a great way to keep your cookies for longer. To freeze, wrap each cookie individually in plastic wrap to prevent freezer burn, or layer them with parchment paper in an airtight container. They can be kept in the freezer for up to 3 months. When you’re ready to enjoy them, simply thaw in the fridge overnight and allow them to come to room temperature.
What should I do if my cookie dough is too sticky?
No worries, this can happen! If your dough feels excessively sticky and hard to work with, try adding a bit more flour, about a tablespoon at a time, until it reaches a firmer consistency. Make sure to chill the dough well, as this will also help it firm up and reduce stickiness. Remember to keep your work surface lightly floured as you roll it out to prevent sticking during cutting.
Are there any dietary considerations for my Handprint Sugar Cookies?
Very! Since these cookies are egg-free, they can be enjoyed by those with egg allergies. If you need to cater to larger dietary needs, feel free to use gluten-free flour or other sweeteners like coconut sugar for a lower glycemic index option. Always check for nut allergies if you’re using ingredients like icing or sprinkles that may contain nuts.
How can I prevent my Handprint Sugar Cookies from spreading while baking?
To ensure your cookies maintain their charming handprint shape, it’s crucial to chill your dough before and after cutting out the shapes. This helps solidify the butter, preventing the cookies from spreading too much in the oven. Keep the cutouts on a parchment-lined baking sheet and refrigerate them for at least 20 minutes before popping them into the oven. Happy baking!

Fun Christmas Cookies: Easy Handprint Sugar Cookies for the Holidays
Ingredients
Equipment
Method
- Cream the unsalted butter and granulated sugar in a large mixing bowl until fluffy and light in color. Slowly mix in all-purpose flour and kosher salt to form a smooth dough. Chill in the refrigerator for 20 minutes.
- After chilling, roll out the dough on a lightly floured surface until it's about 3/8” thick. Use a parchment paper handprint template to cut out shapes that resemble little hands.
- Arrange the cutout cookies on a parchment-lined baking sheet, ensuring they have space between them. Chill for another 20 minutes to help them keep their shape while baking.
- Preheat your oven to 375°F (190°C). Bake the cookies for 15-20 minutes or until the edges are golden brown, and they're fragrant and inviting.
- Allow the cookies to cool on the baking sheet for a few minutes before transferring them to a wire rack. Let them cool completely before decorating to keep the icing from melting.
- Optional: Add a touch of festive appeal by drizzling extra icing over the top!


