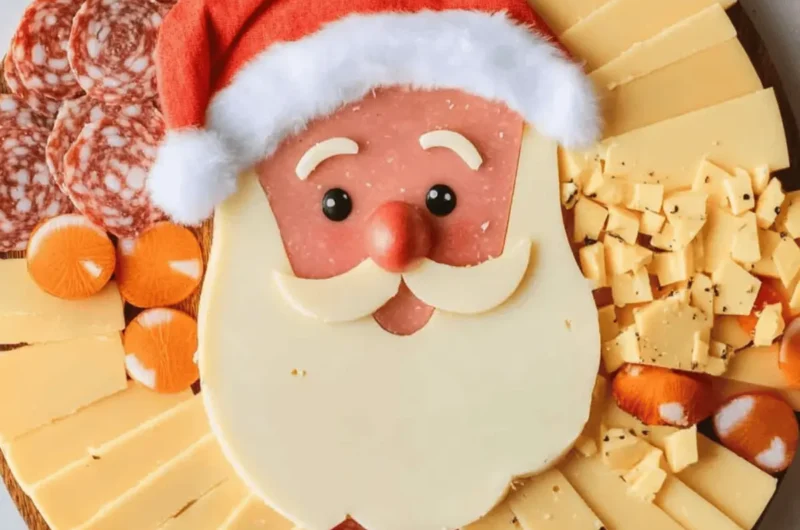
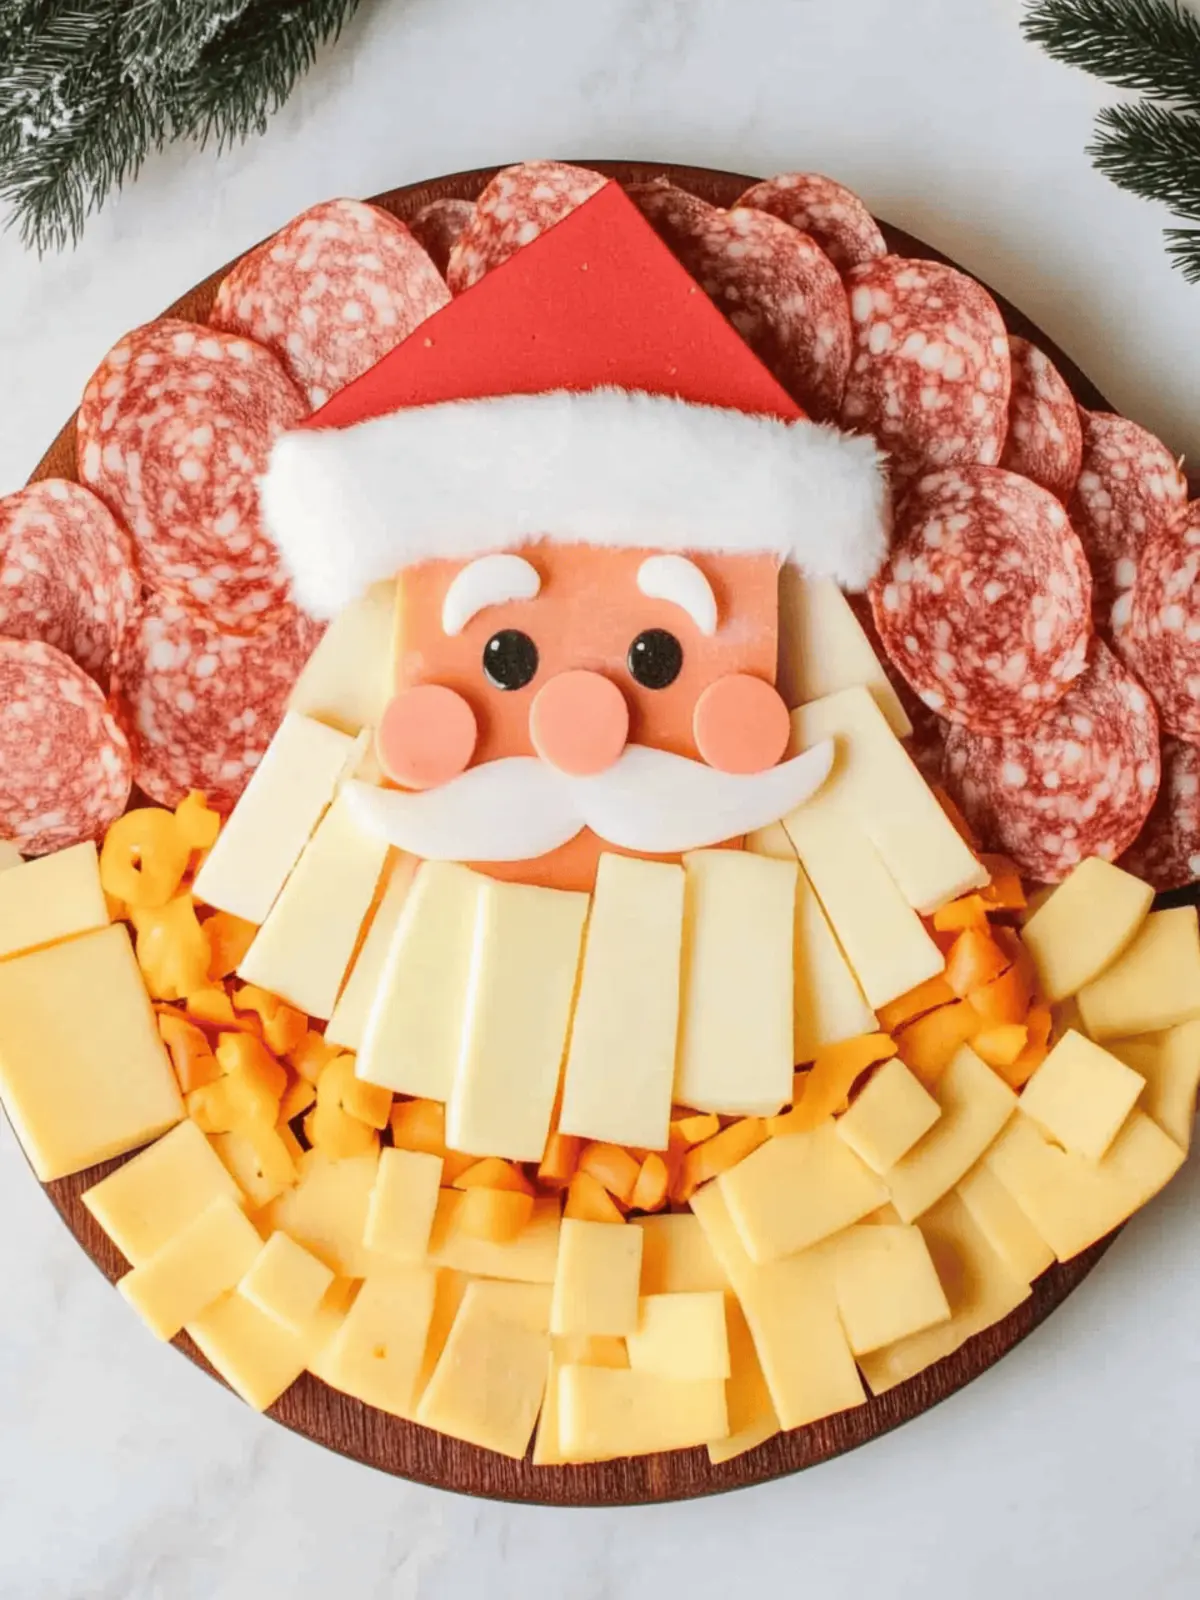
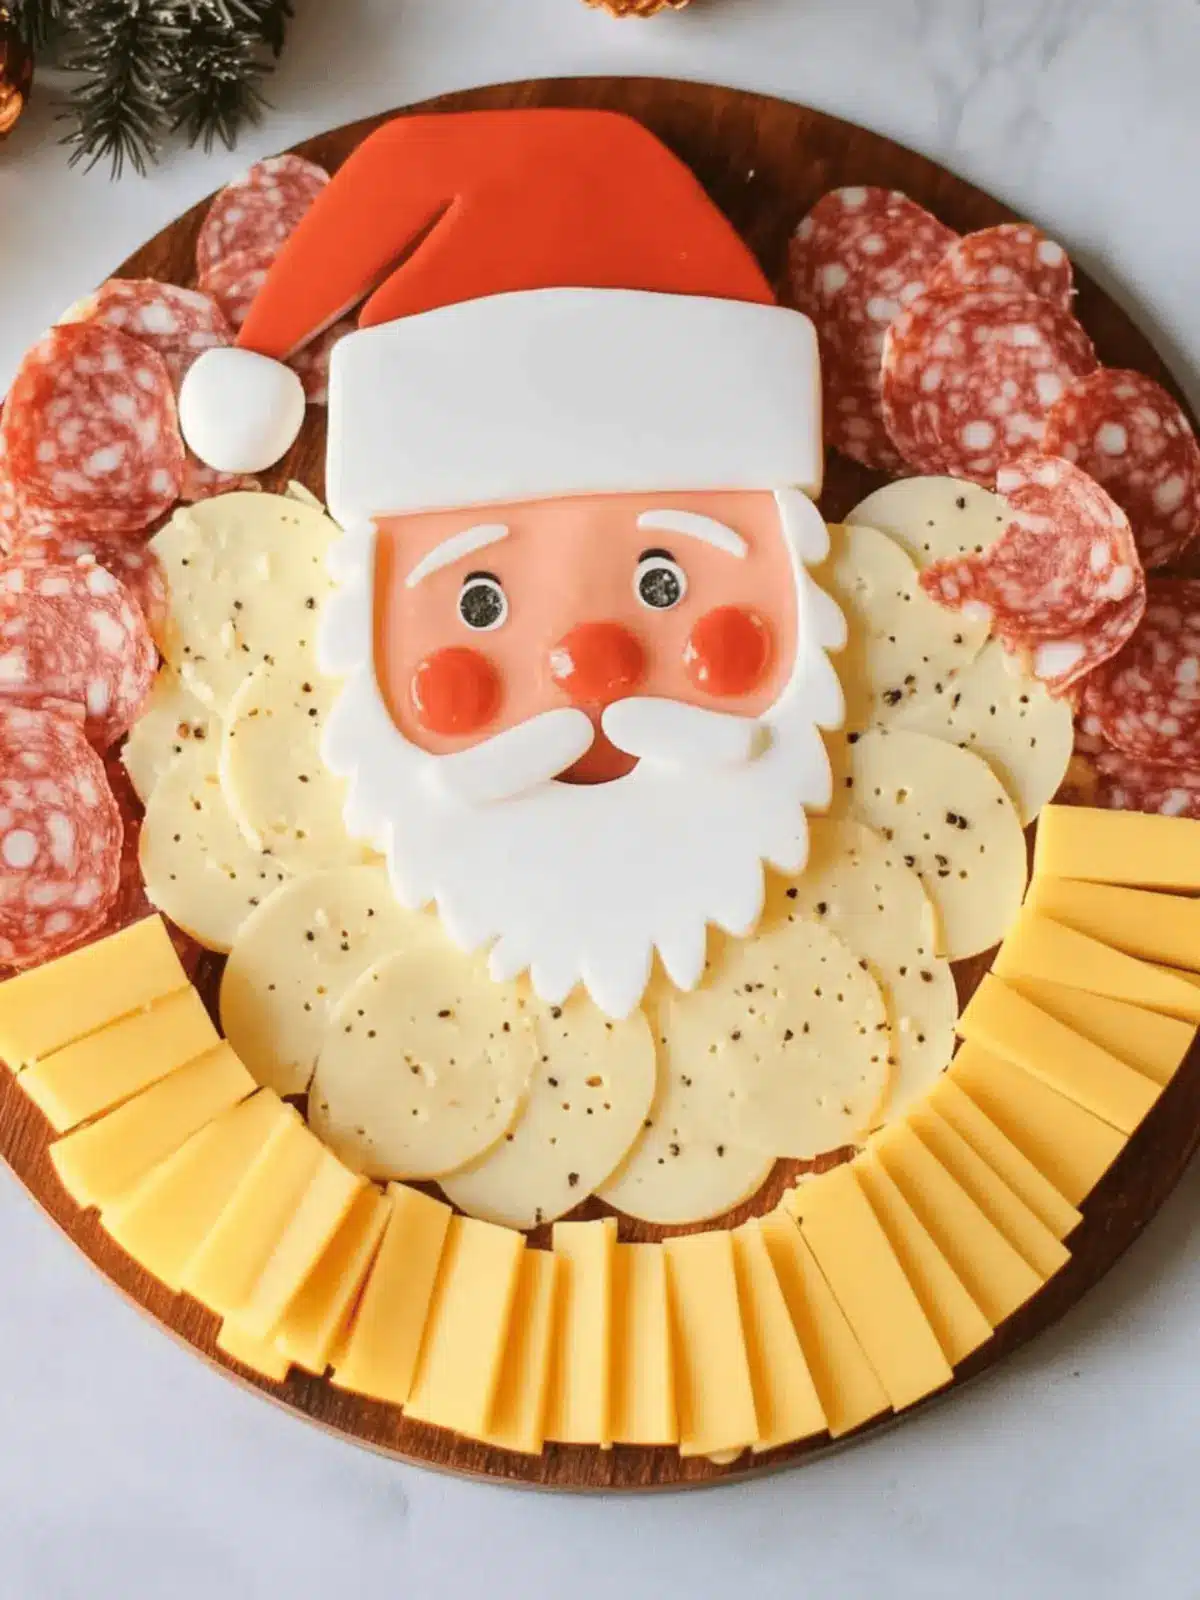
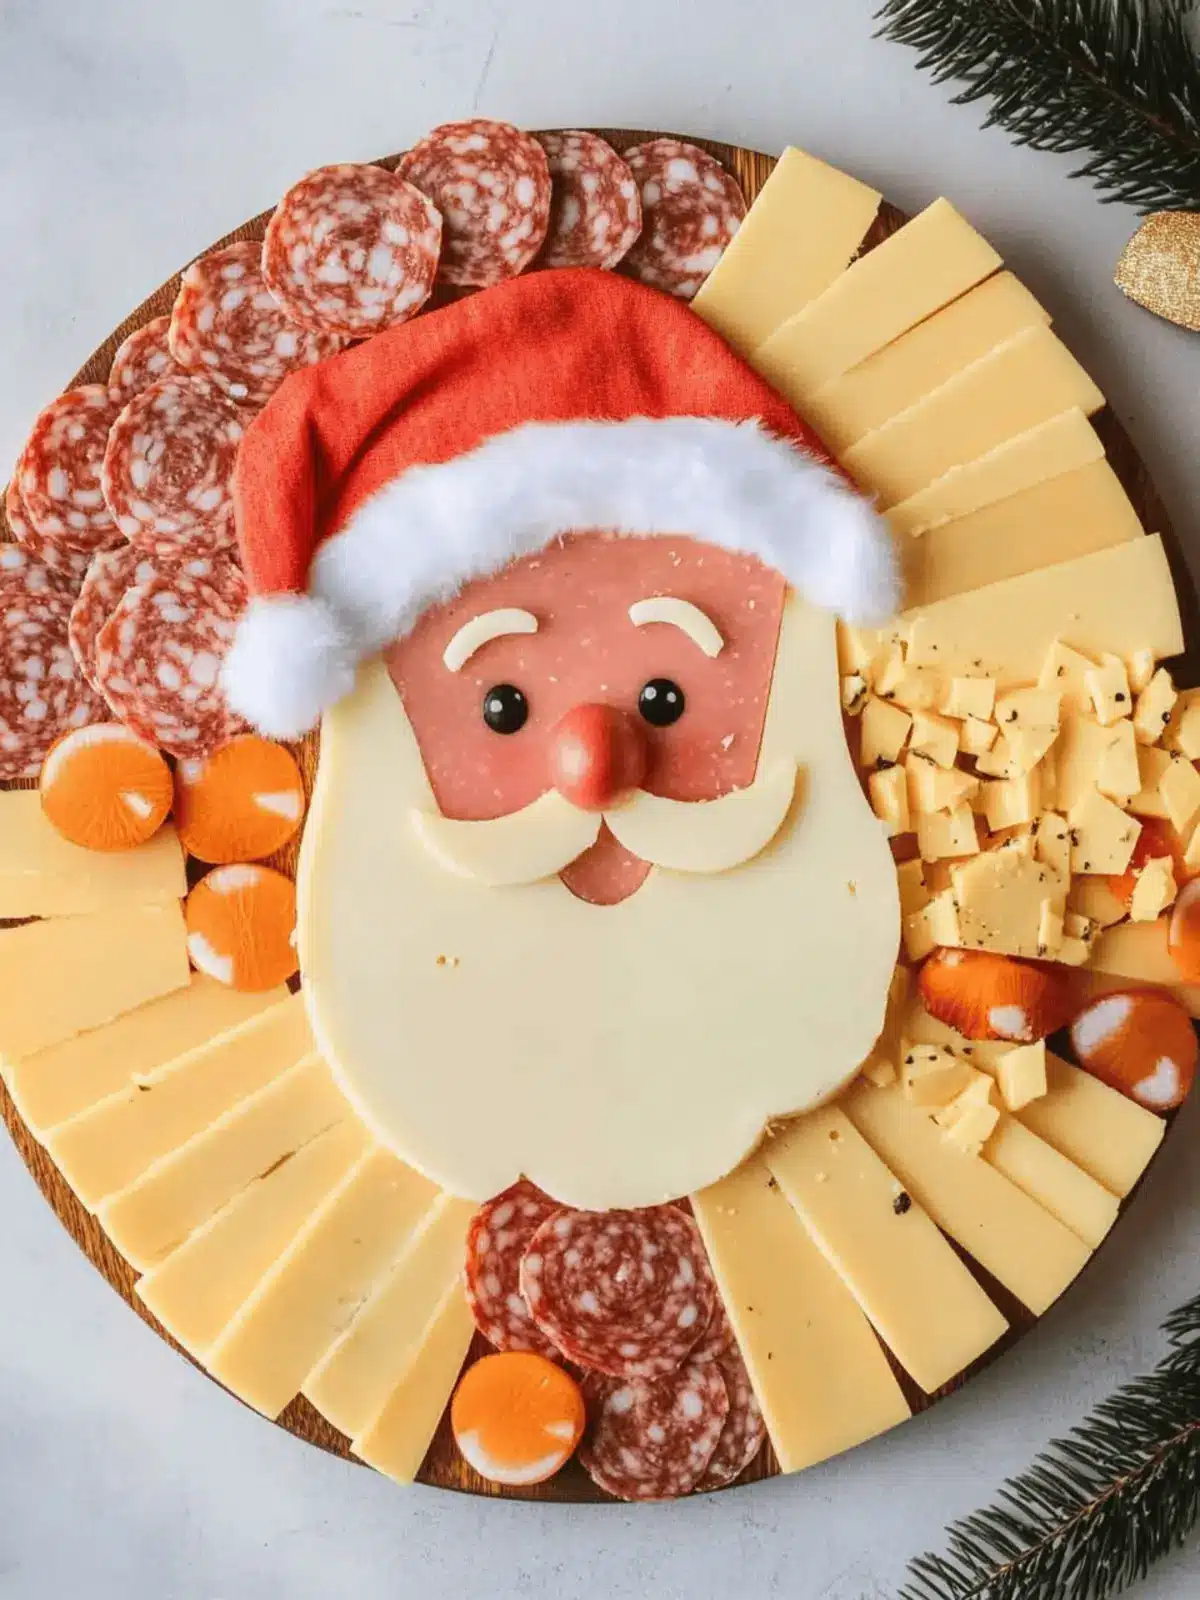
The holiday season fills the air with joy, laughter, and of course, delightful food! As I was getting ready for our annual festive gathering, I knew I wanted to create something special that would be a hit with not just the adults, but especially the kids. That’s when the idea of the Easy Santa Christmas Cheese Board came to life. Imagine a colorful platter that brings the spirit of Santa to your table—it’s visually appealing, fun to assemble, and packed with creamy, savory flavors that everyone will love.
With just 15 minutes of prep time, this whimsical cheese board is perfect for those busy holiday days when you want to impress without the stress. Let your kids dive in and unleash their creativity by building Santa’s jolly face while sneaking in some tasty nutrients along the way.
Let’s jingle all the way to the kitchen and get started on this fun, kid-friendly holiday treat that is sure to steal the show at your next gathering!
Why will you love this Easy Santa Christmas Cheese Board?
Colorful Creation: A feast for the eyes! This cheese board instantly uplifts the holiday spirit with its vibrant colors and playful design.
Kid-Friendly Fun: Perfect for little hands! Kids will enjoy helping out and creating their own version of Santa, making it a delightful family activity.
Quick Assembly: With just 15 minutes needed, it’s a speedy solution for festive gatherings, allowing you to spend more time enjoying the celebrations.
Customizable: Versatile ingredients mean you can swap for different cheeses or toppings according to your family’s preferences.
Crowd-Pleaser: This adorable board is not only visually stunning but also packed with flavors that will please both kids and adults alike.
Celebrate the season with delicious creativity!
Easy Santa Christmas Cheese Board Ingredients
For the Cheeses
- 2 Different Colored Cheeses – Choose vibrant options like mozzarella and cheddar for a striking contrast. Substitution: Any cheese type can be used as long as it contrasts in color.
For the Decorations
- Pepperoni – This savory addition forms Santa’s cheeks and hat. Substitution: Salami or turkey slices can be alternatives.
- Olives – Use these to create Santa’s eyes, bringing a salty touch to the board. Green or black olives can be used based on preference.
- Grape or Cherry Tomato – Perfect for the nose, adding a sweet burst of flavor. Substitution: Any small fruit/vegetable can be used for similar visual effect.
Optional Additions
- Crackers or Bread – Serve alongside for an extra crunch and to complement the flavors.
- Sliced Bell Peppers or Carrots – Add these for a colorful crunch and to increase the healthy factor of your Easy Santa Christmas Cheese Board.
How to Make Easy Santa Christmas Cheese Board
- Select a plate: Choose a round plate that fits the number of guests you’re serving. A larger plate gives ample space for Santa’s features.
- Layer the cheese: Begin by arranging one color of cheese squares across the plate, leaving the edges uncovered for added visual interest.
- Position the pepperoni: Place pepperoni slices strategically to form Santa’s hat and rosy cheeks, giving him a jolly look.
- Add contrasting cheese: Use the second cheese color to make the brim of the hat. Cut some into thin strips to create eyebrows that give Santa character!
- Craft Santa’s eyes: Place olives for the eyes, and slice a cherry or grape tomato in half to create a cheerful nose that pops with color.
- Shape the mustache: Use additional cheese for the eyebrows and mustache, and trim pepperoni for Santa’s smiling mouth to enhance his friendly demeanor.
- Finish the beard: Layer more cheese slices at the bottom of the face to sculpt Santa’s fluffy beard, making sure it looks soft and inviting.
Optional: Garnish with fresh herbs for an extra festive touch.
Exact quantities are listed in the recipe card below.
What to Serve with Easy Santa Christmas Cheese Board?
Elevate your festive meal with delightful pairings that complement the whimsy of Santa’s cheese creation.
- Round Crackers: These add a delightful crunch and are perfect for spreading cheese—ideal for balancing the creamy textures.
- Fresh Veggie Sticks: Serve sliced bell peppers or cucumbers for a refreshing crunch that beautifully contrasts the rich cheese flavors.
- Sweet Fruit Platter: A mix of grapes, strawberries, and apple slices adds a pop of sweetness, making each bite a joyful surprise.
- Sparkling Juice: Offer a fruity sparkling beverage; it enhances the festive feel and balances the savory elements of the cheese board.
- Chocolate-Covered Pretzels: These provide a sweet and salty combination, perfect for those who might want a treat alongside their cheese.
- Miniature Cupcakes: Light and airy cupcakes add a fun dessert option, rounding out the meal and bringing festive cheer with every bite.
Each of these accompaniments will enhance the fun experience of creating and enjoying your Easy Santa Christmas Cheese Board!
Easy Santa Christmas Cheese Board Variations
Feel free to get playful with this recipe by adding your unique twist, making each board a masterpiece!
- Non-Dairy: Swap dairy cheese for nut-based cheeses to make it friendly for lactose-intolerant guests. There are many delicious options available that melt well!
- Flying High: Use flavored cheeses, like herbed goat cheese or smoked gouda, for a delightful flavor boost that will surprise and delight everyone at the table.
- Crunchy Additions: Add sliced bell peppers or baby carrots to introduce a refreshing crunch and enhance the board’s color. This offers a wonderful contrast alongside the creamy cheeses.
- Fruity Fun: Incorporate fresh fruit, such as sliced strawberries or kiwi, for a burst of sweetness that pairs beautifully with the savory elements.
- Festive Shapes: Use holiday-themed cookie cutters to shape the cheese into stars, snowflakes, or trees, making it even more fun for kids and a festive feast for eyes.
- Spicy Kick: Sprinkle some crushed red pepper flakes or add jalapeño slices to the cheese board for those who love a little heat. Balance is key, so avoid overwhelming the other flavors.
- Herbaceous Touch: Fresh herbs like rosemary or thyme can be added for a fragrant garnish that elevates both the presentation and flavor profile.
- Colorful Display: Mix in different types of olives or pickles to enhance flavor complexity and add even more vibrant colors to your Easy Santa Christmas Cheese Board!
Make Ahead Options
Preparing your Easy Santa Christmas Cheese Board ahead of time is a fantastic way to save precious minutes during the holiday rush! You can slice the cheeses and keep them in an airtight container in the refrigerator for up to 3 days. Additionally, prep the pepperoni, olives, and tomatoes by storing them separately to maintain their freshness and prevent any wateriness. Just ensure they are covered tightly to keep flavors vibrant. On the day you plan to serve, simply assemble the cheese board in a few quick steps, layering the ingredients as outlined. By prepping these components in advance, you’ll have a delightful and eye-catching board ready to wow your guests with minimal effort!
Expert Tips for Easy Santa Christmas Cheese Board
- Get Creative: Encourage kids to rearrange the toppings however they like; it adds to the fun and personalization of the Easy Santa Christmas Cheese Board.
- Contrast is Key: Make sure the cheese colors contrast well. This not only enhances the visual appeal but also makes the board more enticing.
- Less is More: Avoid overloading the plate; a tidy presentation keeps the focus on Santa’s adorable features and prevents a messy display.
- Prep Ahead: Consider pre-slicing the ingredients a few hours before your gathering, but assemble the cheese board right before serving for ultimate freshness.
- Use What You Have: Don’t hesitate to swap out ingredients based on personal preferences or dietary needs. This flexibility will help you create a cheese board everyone can enjoy.
Storage Tips for Easy Santa Christmas Cheese Board
- Fridge: Store leftover cheese board components in an airtight container in the fridge for up to 2 days to maintain freshness.
- Cheese: Keep cheese wrapped tightly to prevent drying out; use wax paper for soft cheeses and plastic wrap for harder varieties.
- Reheating: While intended to be served cool, any leftover ingredients can be used in salads or sandwiches, just remember to enjoy them quickly!
- Assembly: If making ahead, prep ingredients but assemble the Easy Santa Christmas Cheese Board right before your gathering for the best visual appeal and taste.
Easy Santa Christmas Cheese Board Recipe FAQs
What types of cheeses should I use for the Easy Santa Christmas Cheese Board?
I recommend using two different colored cheeses for contrast, such as mozzarella and cheddar. This not only adds a vibrant appearance but also provides a delightful mix of creamy textures. Feel free to substitute with any cheese types that differ in color—this flexibility keeps creativity flowing while allowing for personal taste.
How should I store leftovers of the Easy Santa Christmas Cheese Board?
Leftovers should be stored in an airtight container in the refrigerator. They can stay fresh for up to 2 days. Make sure to wrap cheese tightly to prevent it from drying out, and use wax paper for soft cheeses. To keep things clean, keep the ingredients separate if possible, and repurpose them in salads or sandwiches for delicious use!
Can I freeze components of the Easy Santa Christmas Cheese Board?
While it’s best enjoyed fresh, you can freeze certain elements. For instance, cheese can be frozen for up to 3 months, but its texture will change and may become crumbly upon thawing. To freeze, wrap cheese tightly in freezer-safe plastic wrap and place it in a resealable bag. When you’re ready to use it, thaw it in the fridge overnight for the best results.
What should I do if my cheese is not melting well?
If you’re using low-moisture cheeses or pre-shredded cheese, sometimes it doesn’t melt as smoothly. To troubleshoot, try using a cheese with a higher moisture content, or grate your cheese fresh from a block rather than using pre-grated options, which often contain anti-caking agents. If melting is your goal, try mixing in a little bit of cream cheese to achieve a silkier texture for dipping.
Is this recipe safe for kids with dairy allergies?
Definitely! You can easily modify the Easy Santa Christmas Cheese Board for dietary restrictions by using non-dairy cheese alternatives, which have come a long way in terms of taste and texture. Always check labels for allergy advice, as some brands may contain gluten or nuts. By being mindful of substitutions, you can create a festive board that’s enjoyable for everyone, including those with food sensitivities.
Can I prepare the Easy Santa Christmas Cheese Board in advance?
Yes! You can prep all the ingredients a few hours ahead. Slice the cheeses, pepperoni, and veggies, then store them separately in the fridge. Assemble the board right before serving to ensure it looks fresh and inviting. This allows you to enjoy your time with guests without worrying about last-minute preparations!
Easy Santa Christmas Cheese Board
Ingredients
Equipment
Method
- Select a plate: Choose a round plate that fits the number of guests you're serving. A larger plate gives ample space for Santa’s features.
- Layer the cheese: Begin by arranging one color of cheese squares across the plate, leaving the edges uncovered for added visual interest.
- Position the pepperoni: Place pepperoni slices strategically to form Santa’s hat and rosy cheeks, giving him a jolly look.
- Add contrasting cheese: Use the second cheese color to make the brim of the hat. Cut some into thin strips to create eyebrows that give Santa character.
- Craft Santa's eyes: Place olives for the eyes, and slice a cherry or grape tomato in half to create a cheerful nose that pops with color.
- Shape the mustache: Use additional cheese for the eyebrows and mustache, and trim pepperoni for Santa's smiling mouth to enhance his friendly demeanor.
- Finish the beard: Layer more cheese slices at the bottom of the face to sculpt Santa's fluffy beard, making sure it looks soft and inviting.
